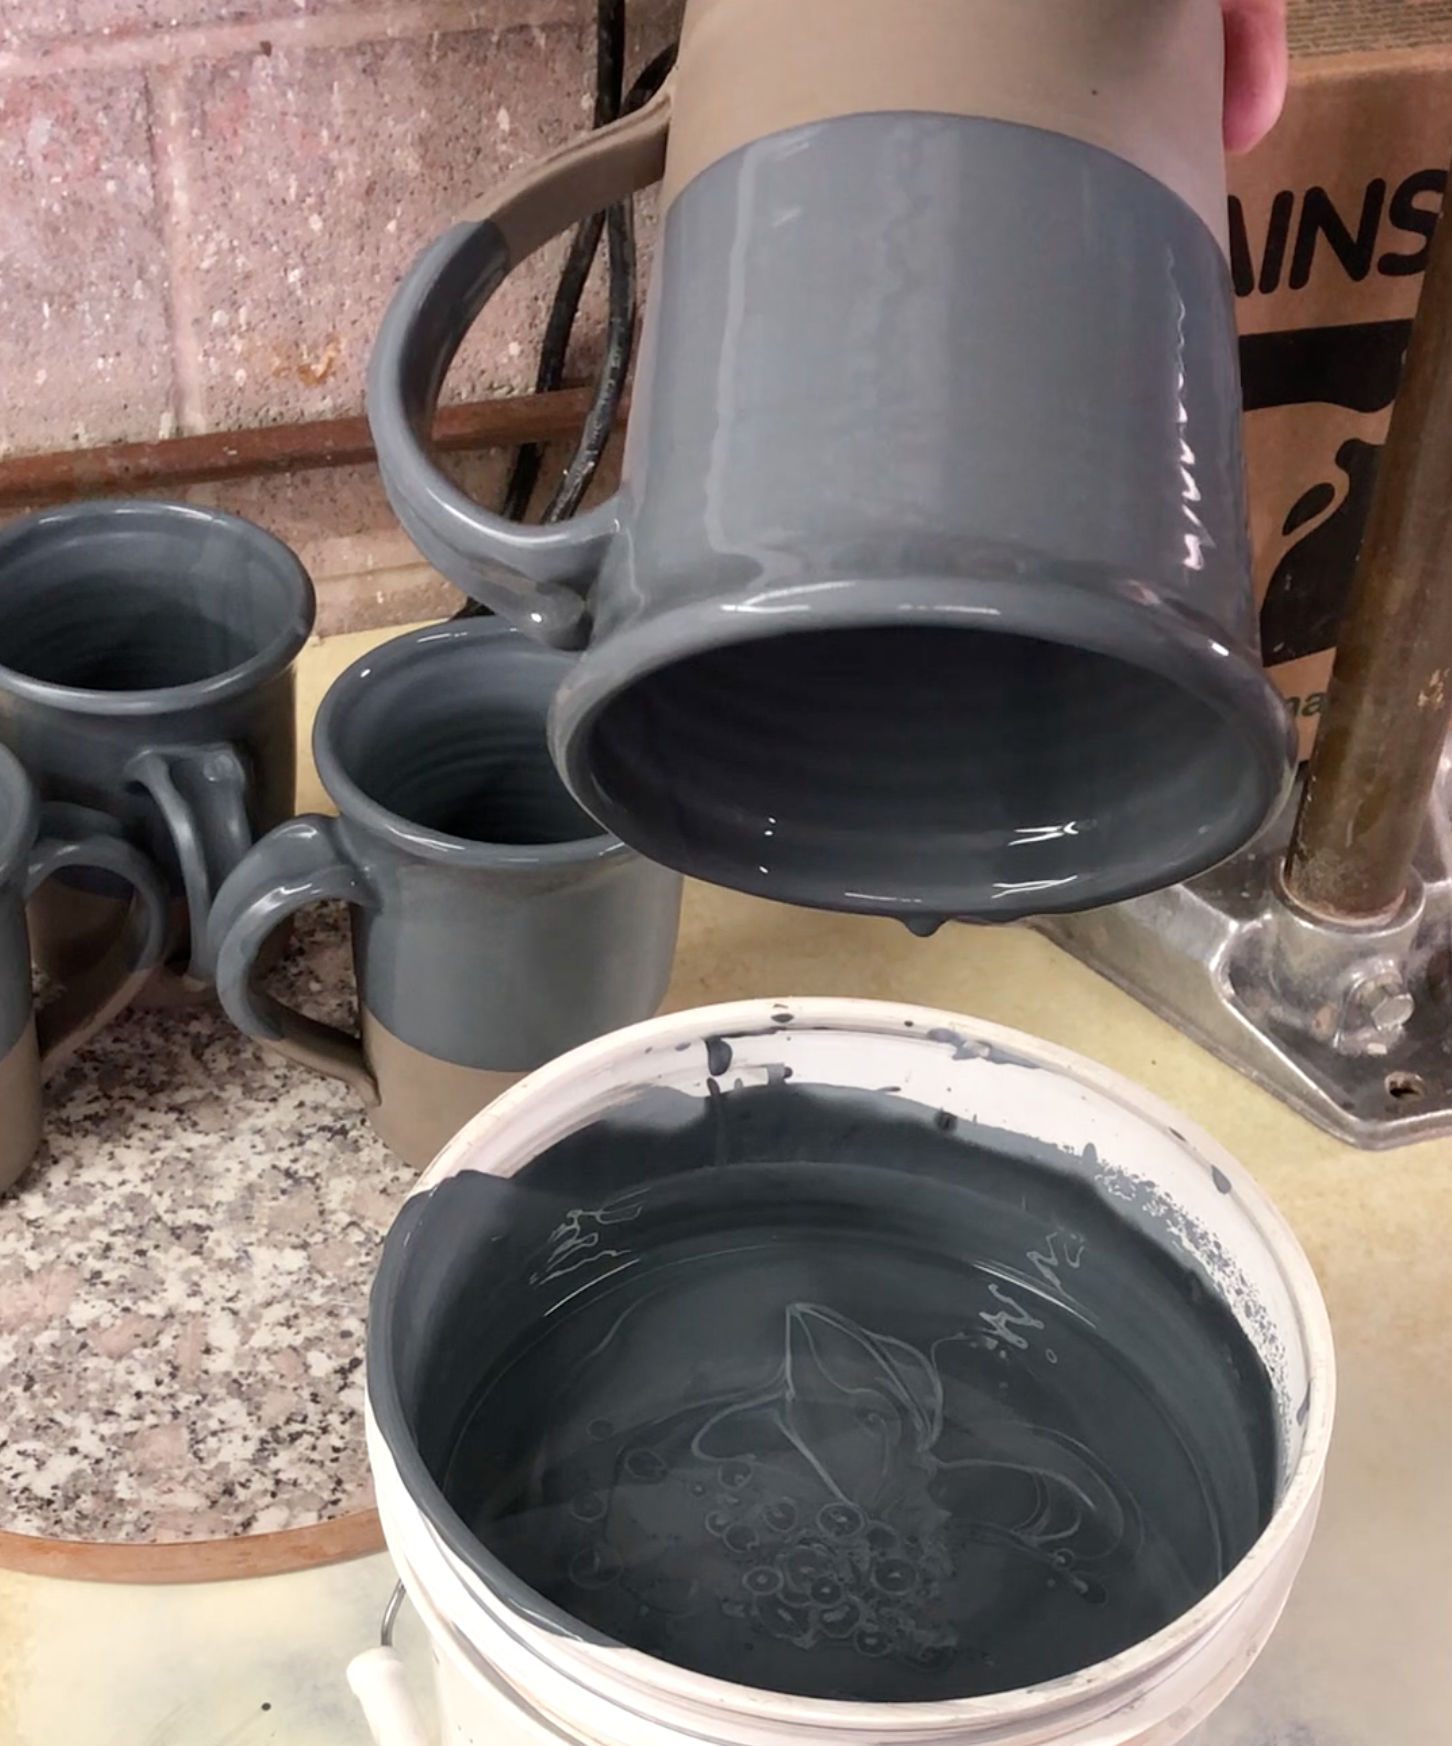
Here is what dipping engobes can do:
Go on even. In one coat. Stay put.
When you learn to make and use engobes correctly, they make magic possible. Here I am turning a dark rustic body into a smooth white one (rear mugs) and a white body into a dark one (front). The engobes have been applied at the leather-hard stage. That is the perfect time, the engobe and body are clay bodies, designed to fit each other; they dry together and fire together creating an inseparable bond.
Handles have been applied, and they have dried to stiff leather hard. Engobe was poured in, poured out, then the mugs were pressed, lip down, into it and extracted. No dwell time was needed. This dipping engobe is DIY thixotropic (not available commercially anywhere). That means I tuned it just before use, to just the right degree of gel (enough for it to drain to the right thickness, then gel just as the last few drops fall from the rim). Honestly, these are a beauty to behold at this stage, the silky, drip-free surface is just so perfect.

Related Pictures
How stop dripping and running:
Add water! Then make it thixotropic.
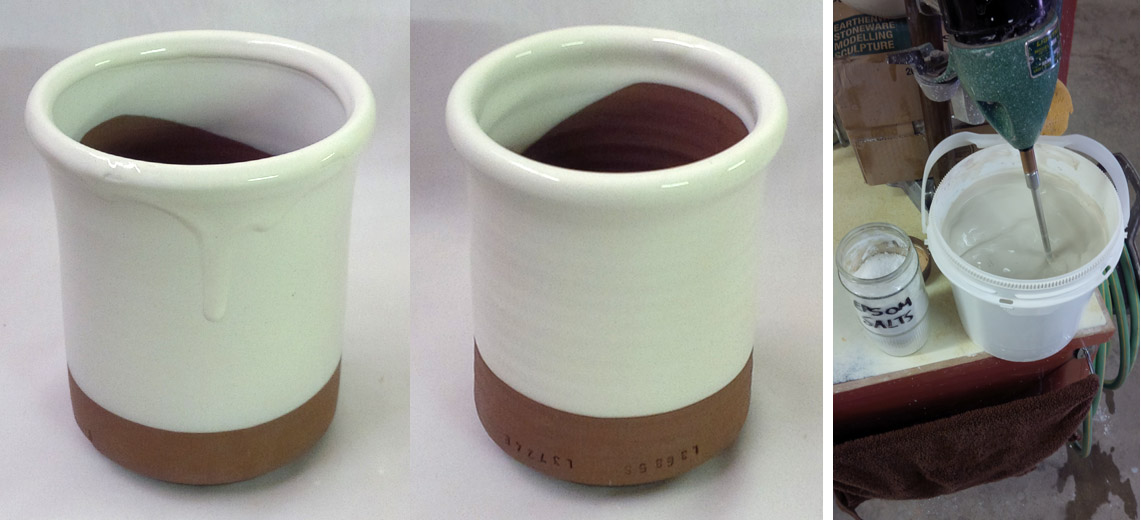
This picture has its own page with more detail, click here to see it.
The white slip on the left, L3685Z2, (applied to a leather hard cup) is dripping downward from the rim (even though it was held upside down for a couple of minutes!). Yet that slurry was very viscous with a 1.48 specific gravity. Why? Because it was not thixotropic. The fix? I watered it down to 1.46 (making it runny) and added pinches of powdered Epsom salts (while mixing vigorously) until it thickened enough to stop motion in about 1-2 seconds on mixer shut-off. But that stop-motion is followed by a bounce-back. That is the thixotropy. It is easy to overdo the Epsom salts (gelling it too much), I add a drop or two of Darvan to rethin it if needed. When the engobe is right, it gels after about 10 seconds of sitting, so I can stir it, dip and extract the mug, shake to drain it and then it gels and holds in place. Keep in mind, this is a pottery project. In industry, they deflocculate engobes to reduce water content and then impose thixotropy, but that is more technical than the average potter would want.
Here’s how I make a base brushing engobe

This picture has its own page with more detail, click here to see it.
This brushing engobe has already passed my EBCT test for use on the intended body. It is thick and gooey (because it contains CMC gum), so it is practically impossible to sieve. My regular propeller mixer is not able to break up the tiny agglomerates of New Zealand kaolin. But 30 seconds of blender mixing makes it as smooth as silk. To make this liter of brushing engobe, I use 800g of powder and 10g of CMC gum in 800g of water. Because of the very high clay content, this does not require Veegum to gel it. The CMC gum greatly improves the brushing properties. It also thins the slurry enough to enable its lower-than-normal water content, making it more suitable for painting onto leather-hard ware, often in as little as one coat.
Why your supplier does not sell dipping engobes:
#1 Getting the thixotropy just right is hard.
This picture has its own page with more detail, click here to see it.
Two things are happening simultaneously: The engobe is gelling and last few drips are falling away. I am rolling the mug just enough to encourage them (but so so much as to disrupt the gelling). Engobes are best applied to leather-hard ware and thus need to be thixotropic. The dipping process for each is to stir, pour-fill the mug, pour it out and push it upside down into the engobe. If I finish before the 10 second gel-time is up I get a perfectly even layer that does not move. Achieving this behaviour requires careful additions of Epsom salts. As the slip approaches the 10-second threshold even a slight bit more salts will turn it into a bucket of jelly (if that happens I add a drop or two of Darvan). This process works across a range of specific gravities (about 1.45-1.6), the higher the SG the trickier it is (but the faster it dries). I work at the low end, it’s easier..
Are dipping engobes useful? Incredibly. But the technical support that would be required to help customers learn the careful tuning of rheology is not something that any commercial glaze supplier would be prepared to do. No problem. DIY is the answer. This engobe is L3954B.
Why your supplier does not sell dipping engobes:
#2: They must be tuned to match body fired shrinkage

This picture has its own page with more detail, click here to see it.
The white engobe on the inside of this mug does not fit (in shrinks more than the body during firing), that is what these cracks are about. The misfit can be demonstrated using EBCT test bars (shown in the foreground). This pair sandwich the engobe and body as a bi-clay strip, they are dried and fired with alternative sides up. A bend demonstrates differences in the fired shrinkage of body and engobe. On drying these stayed relatively flat but after firing at cone 10R, the engobe's higher shrinkage pulled them concave. On this mug, made from the same clay and engobe, the latter has done likewise, shrinking more than the body and creating a crack pattern that even the glaze could not hide. This was a development version of L3954N that contained too much nepheline syenite.
Are dipping engobes useful? Incredibly. DIY is the only current way to use them.
Links
| Recipes |
L3954B - Cone 6 Engobe for Stonewares
A base recipe, a starting point, that you can tune to fit any stoneware. |
 PayPal | No tracking, No ads, No paywall, No transient content! Just organized, concise information constantly updated and improved. Was this helpful? Consider supporting me. |
Got a Question?
Buy me a coffee and we can talk 

https://digitalfire.com, All Rights Reserved
Privacy Policy