A Case Mold and Working Mold for Slip Casting
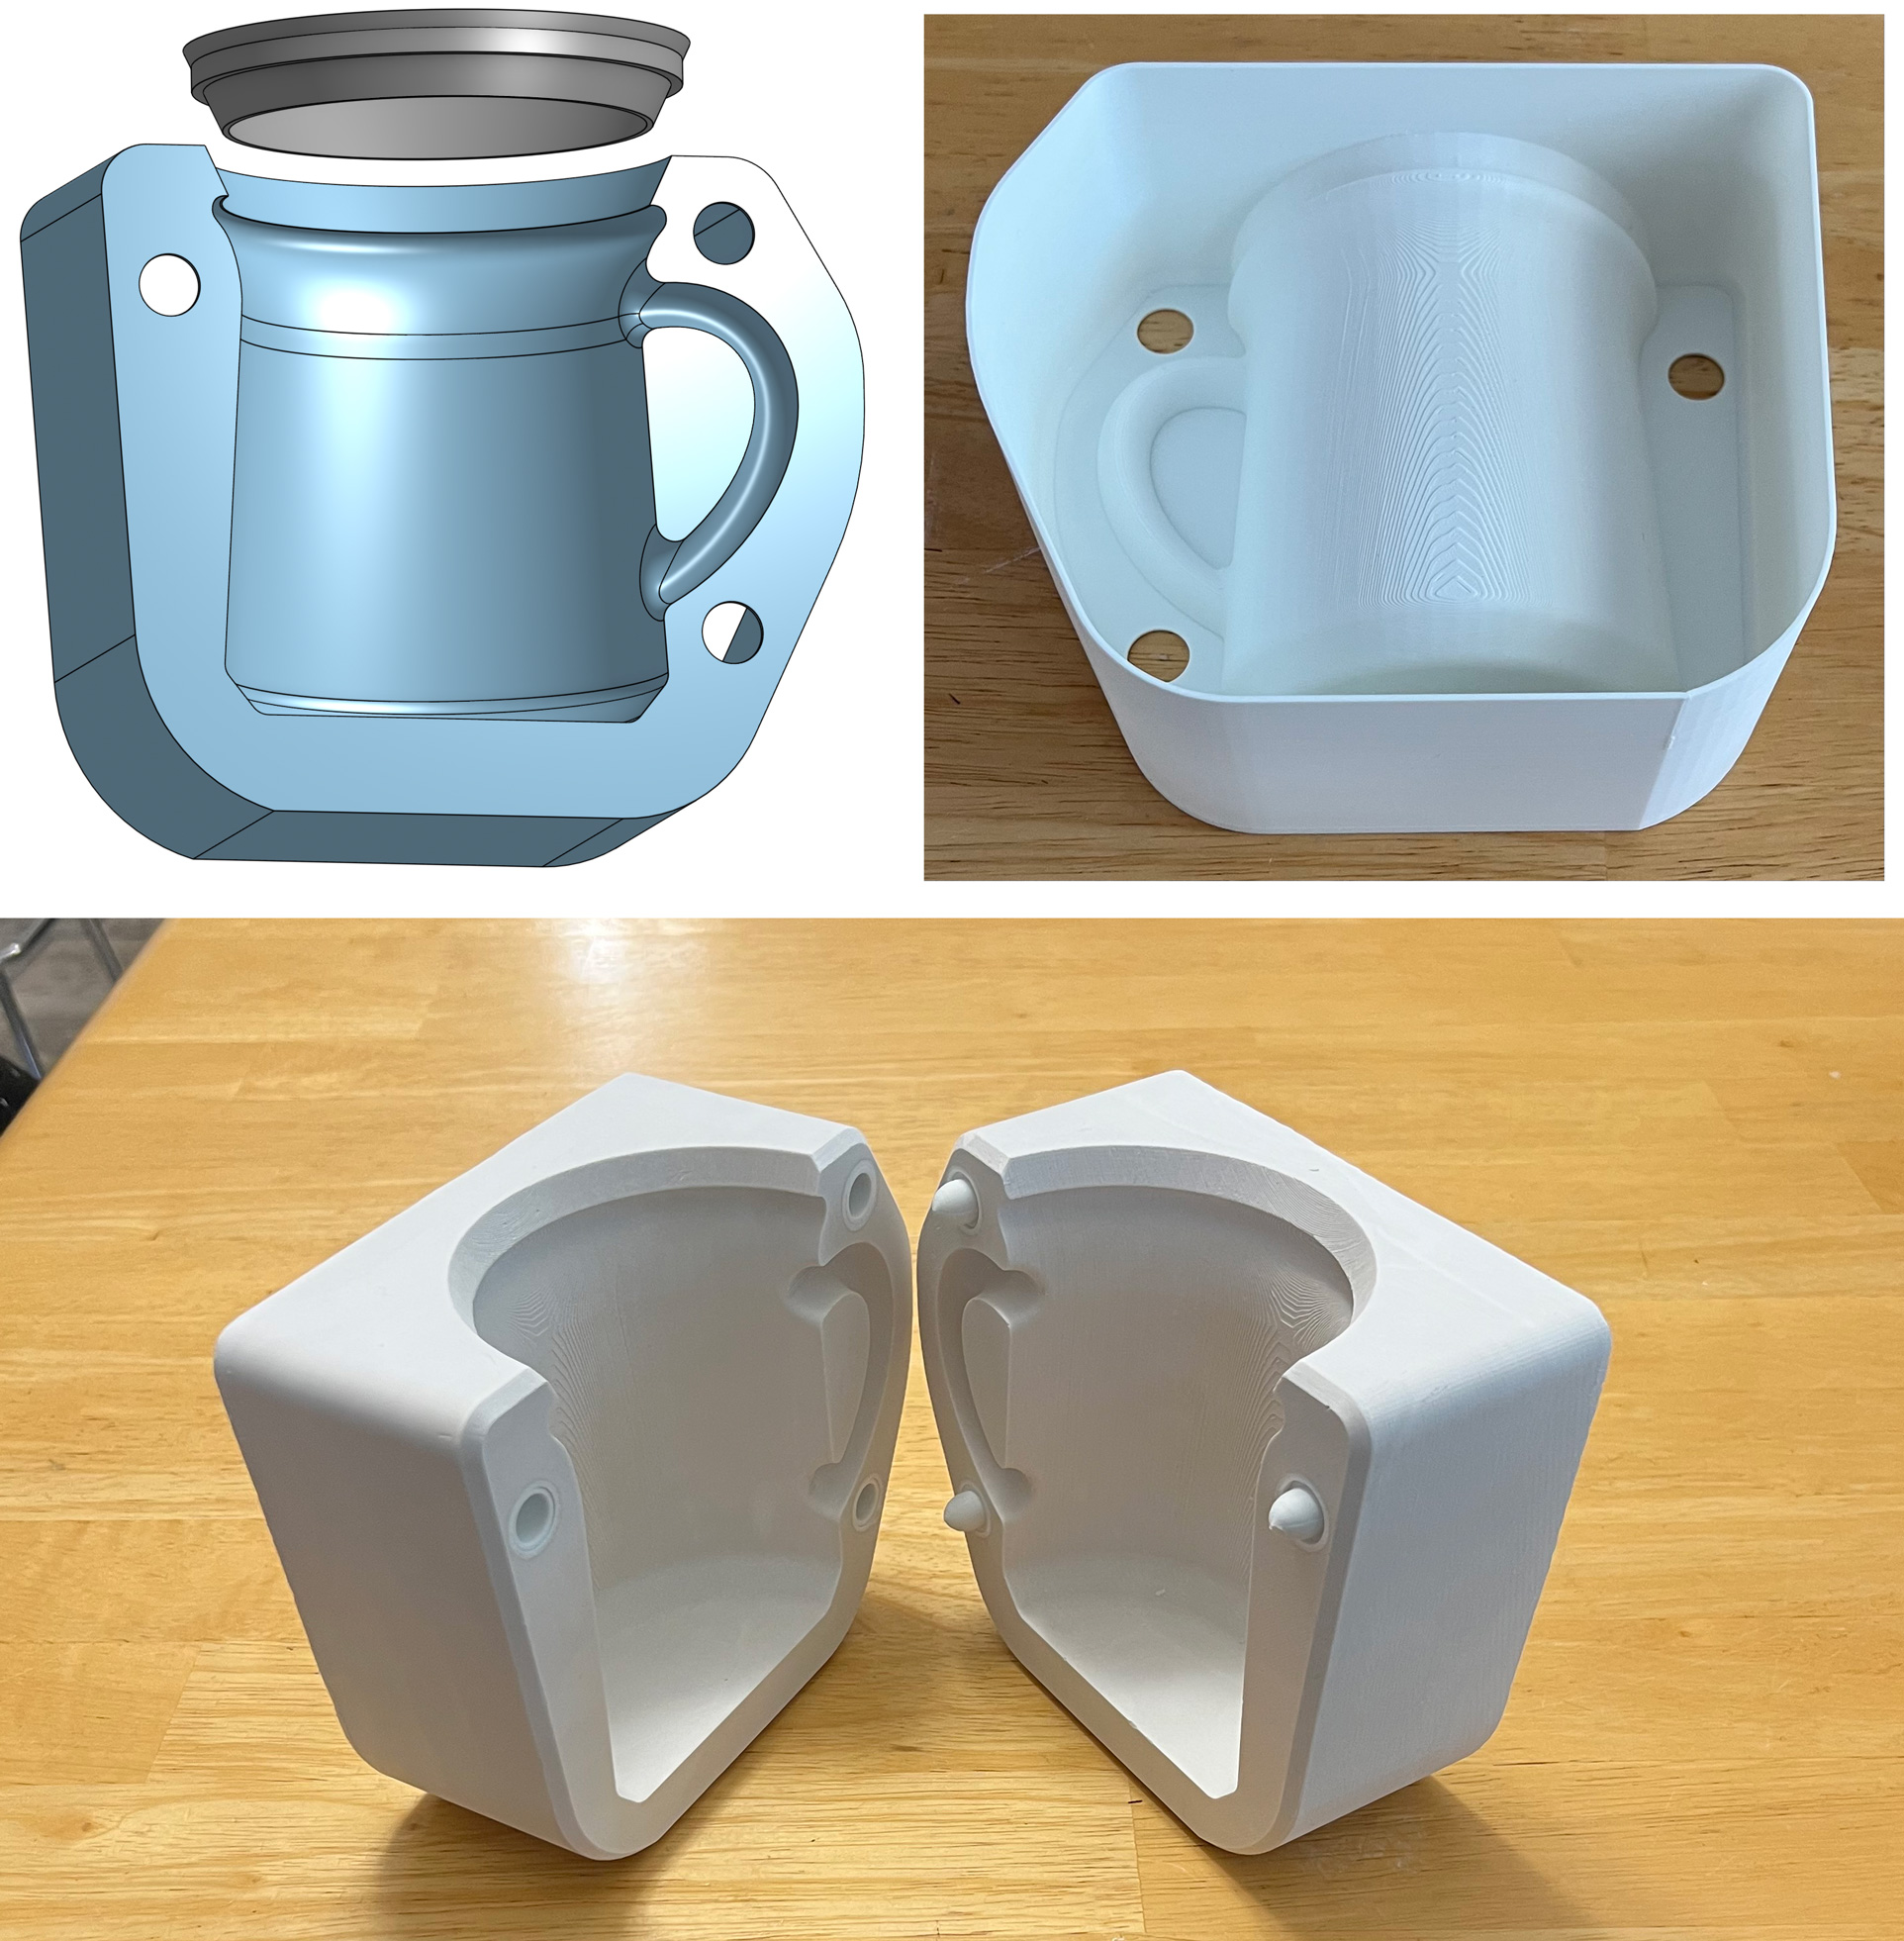
Top left: The back side of the mold, as it appears in the 3D CAD program (pouring spout also visible).
Top right: A 3D print of the design (another mirrored one of this was also done). The CAD software, OnShape, exported the design in 3MF format to the slicer software (in this case, Prusa Slicer). The slicer software produces a g-code file that the printer needs to create this, layer by layer. Although the walls are only 0.8mm thick, and this mold only weighs 100g, it is surprisingly strong. The holes are for our mold natch system (clips inserted from the back side hold embeds in place, they are thus cast into the plaster).
Bottom: A plaster working mold. Each half was made by pouring plaster into the case molds (top right). The case mold was removed using a heat gun.
Although printing artifacts are visible, we either do not regard them as a problem, work to enhance them, or remove them for production case molds.
Related Pictures
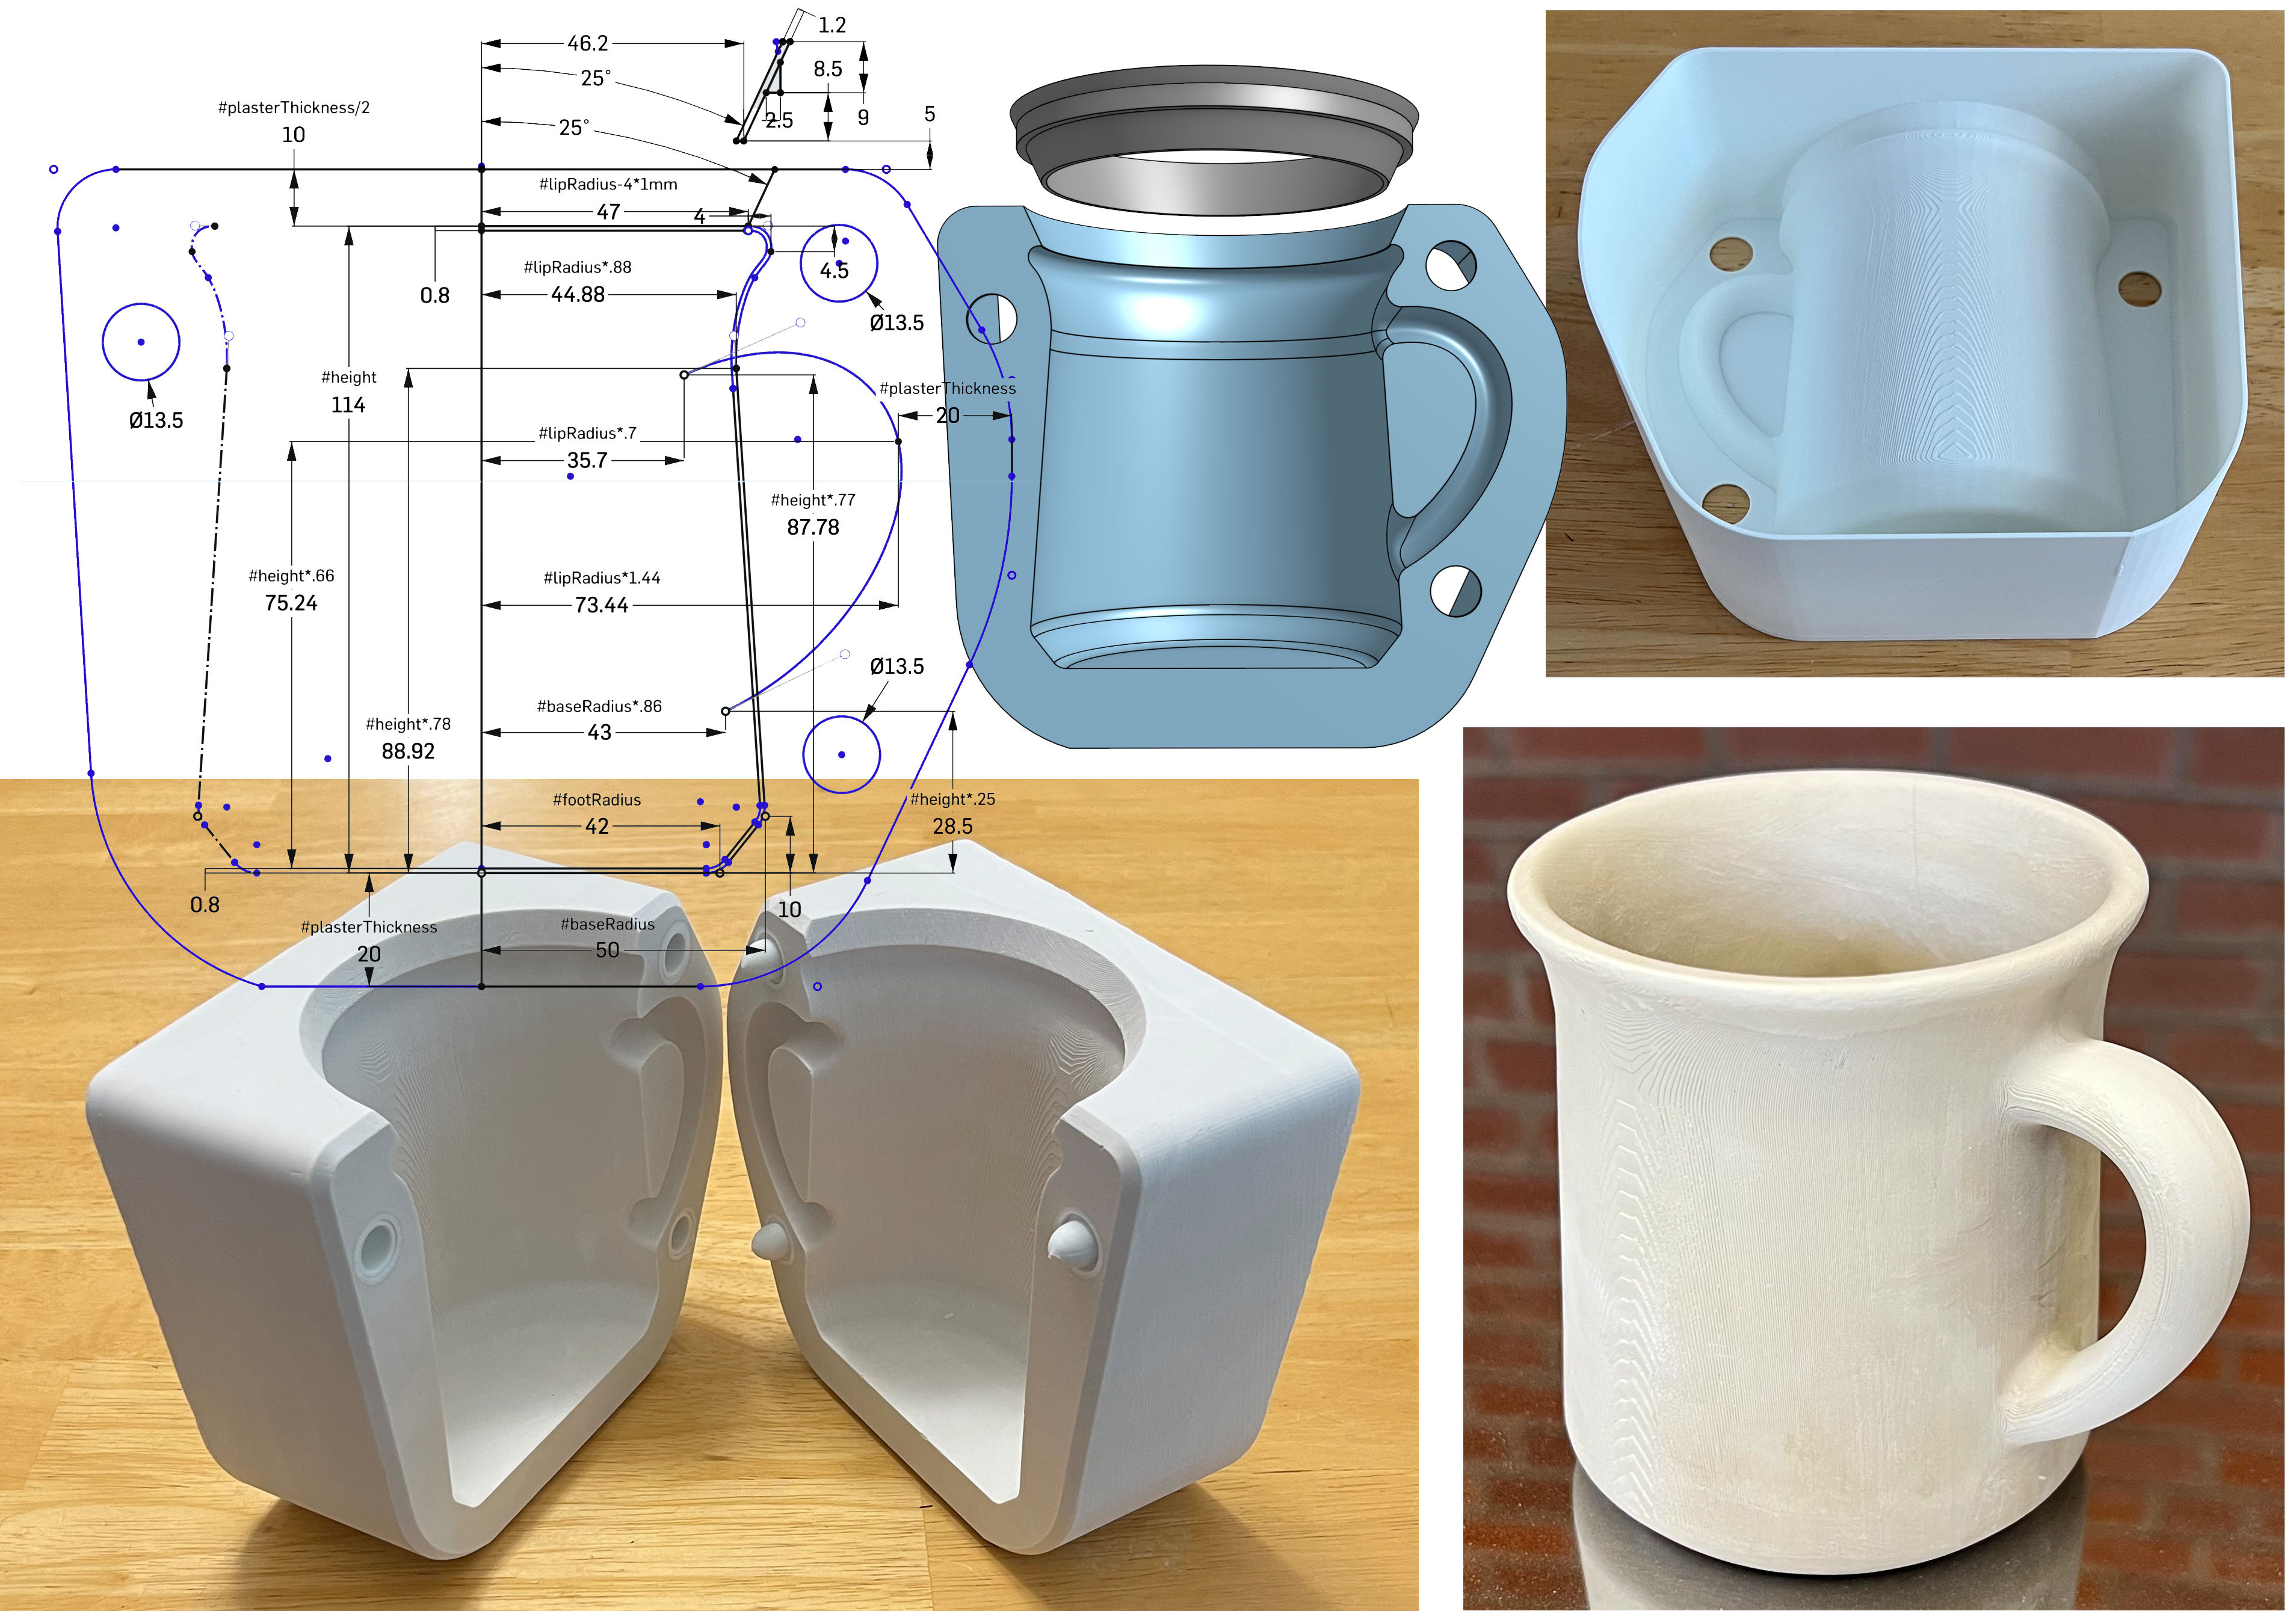
v3 Shelled AI Mug Using OnShape CAD
A great on-ramp to learning slip casting
Available on the Downloads page
This picture has its own page with more detail, click here to see it.
Follow the video, step-by-step, to create this yourself. Don’t expect perfection the first pour, we did this dozens of times to get to this point. You’ll still make a few mistakes before getting it right, that is what DIY is about.
This design differs from the v2 drawing in that the plaster pouring cavity is formed by shelling (hollowing) the back side (top right). And this is designed for removal using a heat gun. This method has several advantages:
-No sketch offset or extrusion was needed to make the outer wall.
-Because the first 3D action is to extrude everything as one solid mass, corners of the outer 3D perimeter can be chamfered (but don’t do it so much that that there is insufficient thickness for the natches).
-The mug's geometry (offset inward by 0.8mm) is revolved, swept and bevelled by cutting into the block. Shelling to the same 0.8mm wall thickness, from the backside of the block, produces the cavity needed (top right).
-The last steps, after shelling, are chamfering the outside inner corner, cutting the holes for the natches and revolving the pouring spout (as a separate body).
-Our v3 natch system continues to work well with this (lower left).
-Printing artifacts are not a problem for prototype molds (visible op right). Production is asking me to enhance these (a freshly cast mug is shown lower right).
-The plaster mold is of stunning quality (the PLA 3D print was softened using a heat gun and carefully removed using needle-nose pliers).
-Slip cast mugs most often have poor-quality and oval lips. This one stays round because of the outward flare and the quality is better because the 3D printed pouring spout also acts as a cutting guide at the pre-removal stage.
-The PLA pouring spout is deep and absorbs no water. Thus, the slip level does not need to be topped up during casting, the slip surface stays flatter (not developing a bowl shape) so pour-out time can be accurately gauged by its slip level.
There are many casting body recipes that would work with this. DIY CAD skills will enable you to follow me into another exciting world: Low-cost 3D printing of the clay itself! Coming soon.
 PayPal | No tracking, No ads, No paywall, No transient content! Just organized, concise information constantly updated and improved. Was this helpful? Consider supporting me. |
Got a Question?
Buy me a coffee and we can talk 

https://digitalfire.com, All Rights Reserved
Privacy Policy