| Monthly Tech-Tip | No tracking! No ads! No paywall! |
Simplified v2 AI-Inspired Mug Using OnShape
As good or better than previous Fusion 360 efforts
We redid this mold to apply new CAD methods using a new tool, OnShape. Consider the advantages over our v1 method.
-It has a hybrid standard plaster spare (although short) coupled with a 3D printed spout that fits down into the spare. The spout doubles as a cutting guide to enable a higher-quality lip.
-These prototype 3D printed case mold halves use far less PLA filament to print, they only weigh 105g (at 1.2mm wall thickness).
-The OnShape timeline is flexible, I can roll back and forth, disable individual steps and go down alternative paths from any point.
-No side rails are needed, this mold removes from the plaster using a heat gun.
-This employs our new v3 natch system.
-The matching edges are chamfered for easier splitting of the halves (when the leather hard piece is ready to remove).
-The mating surfaces are flatter; no sanding is needed, the halves fit together really well (assuming plaster is poured with these molds sitting on a planar surface).
-The printing artifacts present no problems (opaque glazes hide them completely but many potters will want to take measure to enhance them using semi-transparents or glazes that variegate with thickness).
Related Pictures
AI-Assisted Mug and Handle Design
A shape with multiple benefits for slip casting
 Midjourney prompt: Create a coffee mug with a shape having inherent strength to keep it from warping to oval during firing
This picture has its own page with more detail, click here to see it.
This shape is one of many suggestions I got from MidJourney.com when I described what I needed. Consider the advantages of this for slip-casting:
-The piece has thick walls, that will help prevent warping during firing (enabling using a clay body that is highly vitreous).
-The shape, wide at the bottom to narrower at the top - and then a flared rim will also resist warping.
-The flat sides will be practical for applying ceramic transfers (this decoration can be done exactly that way). Of course, the transfer will have to be cut in a semi-circle to lay properly.
-The heavy handle should make it possible to cast the mug with the handle attached.
-The smaller foot ring sets it up off the table and should enable stacking.
This surface character will be possible using an opacified light-colored glossy oatmeal glaze - the pigment in an iron-bearing body should bleed through wherever the glaze is thinner (e.g. on contour edges like the rim).
v3 Shelled AI Mug Using OnShape CAD
A great on-ramp to learning slip casting
Available on the Downloads page
This picture has its own page with more detail, click here to see it.
Follow the video, step-by-step, to create this yourself. Don’t expect perfection the first pour, we did this dozens of times to get to this point. You’ll still make a few mistakes before getting it right, that is what DIY is about.
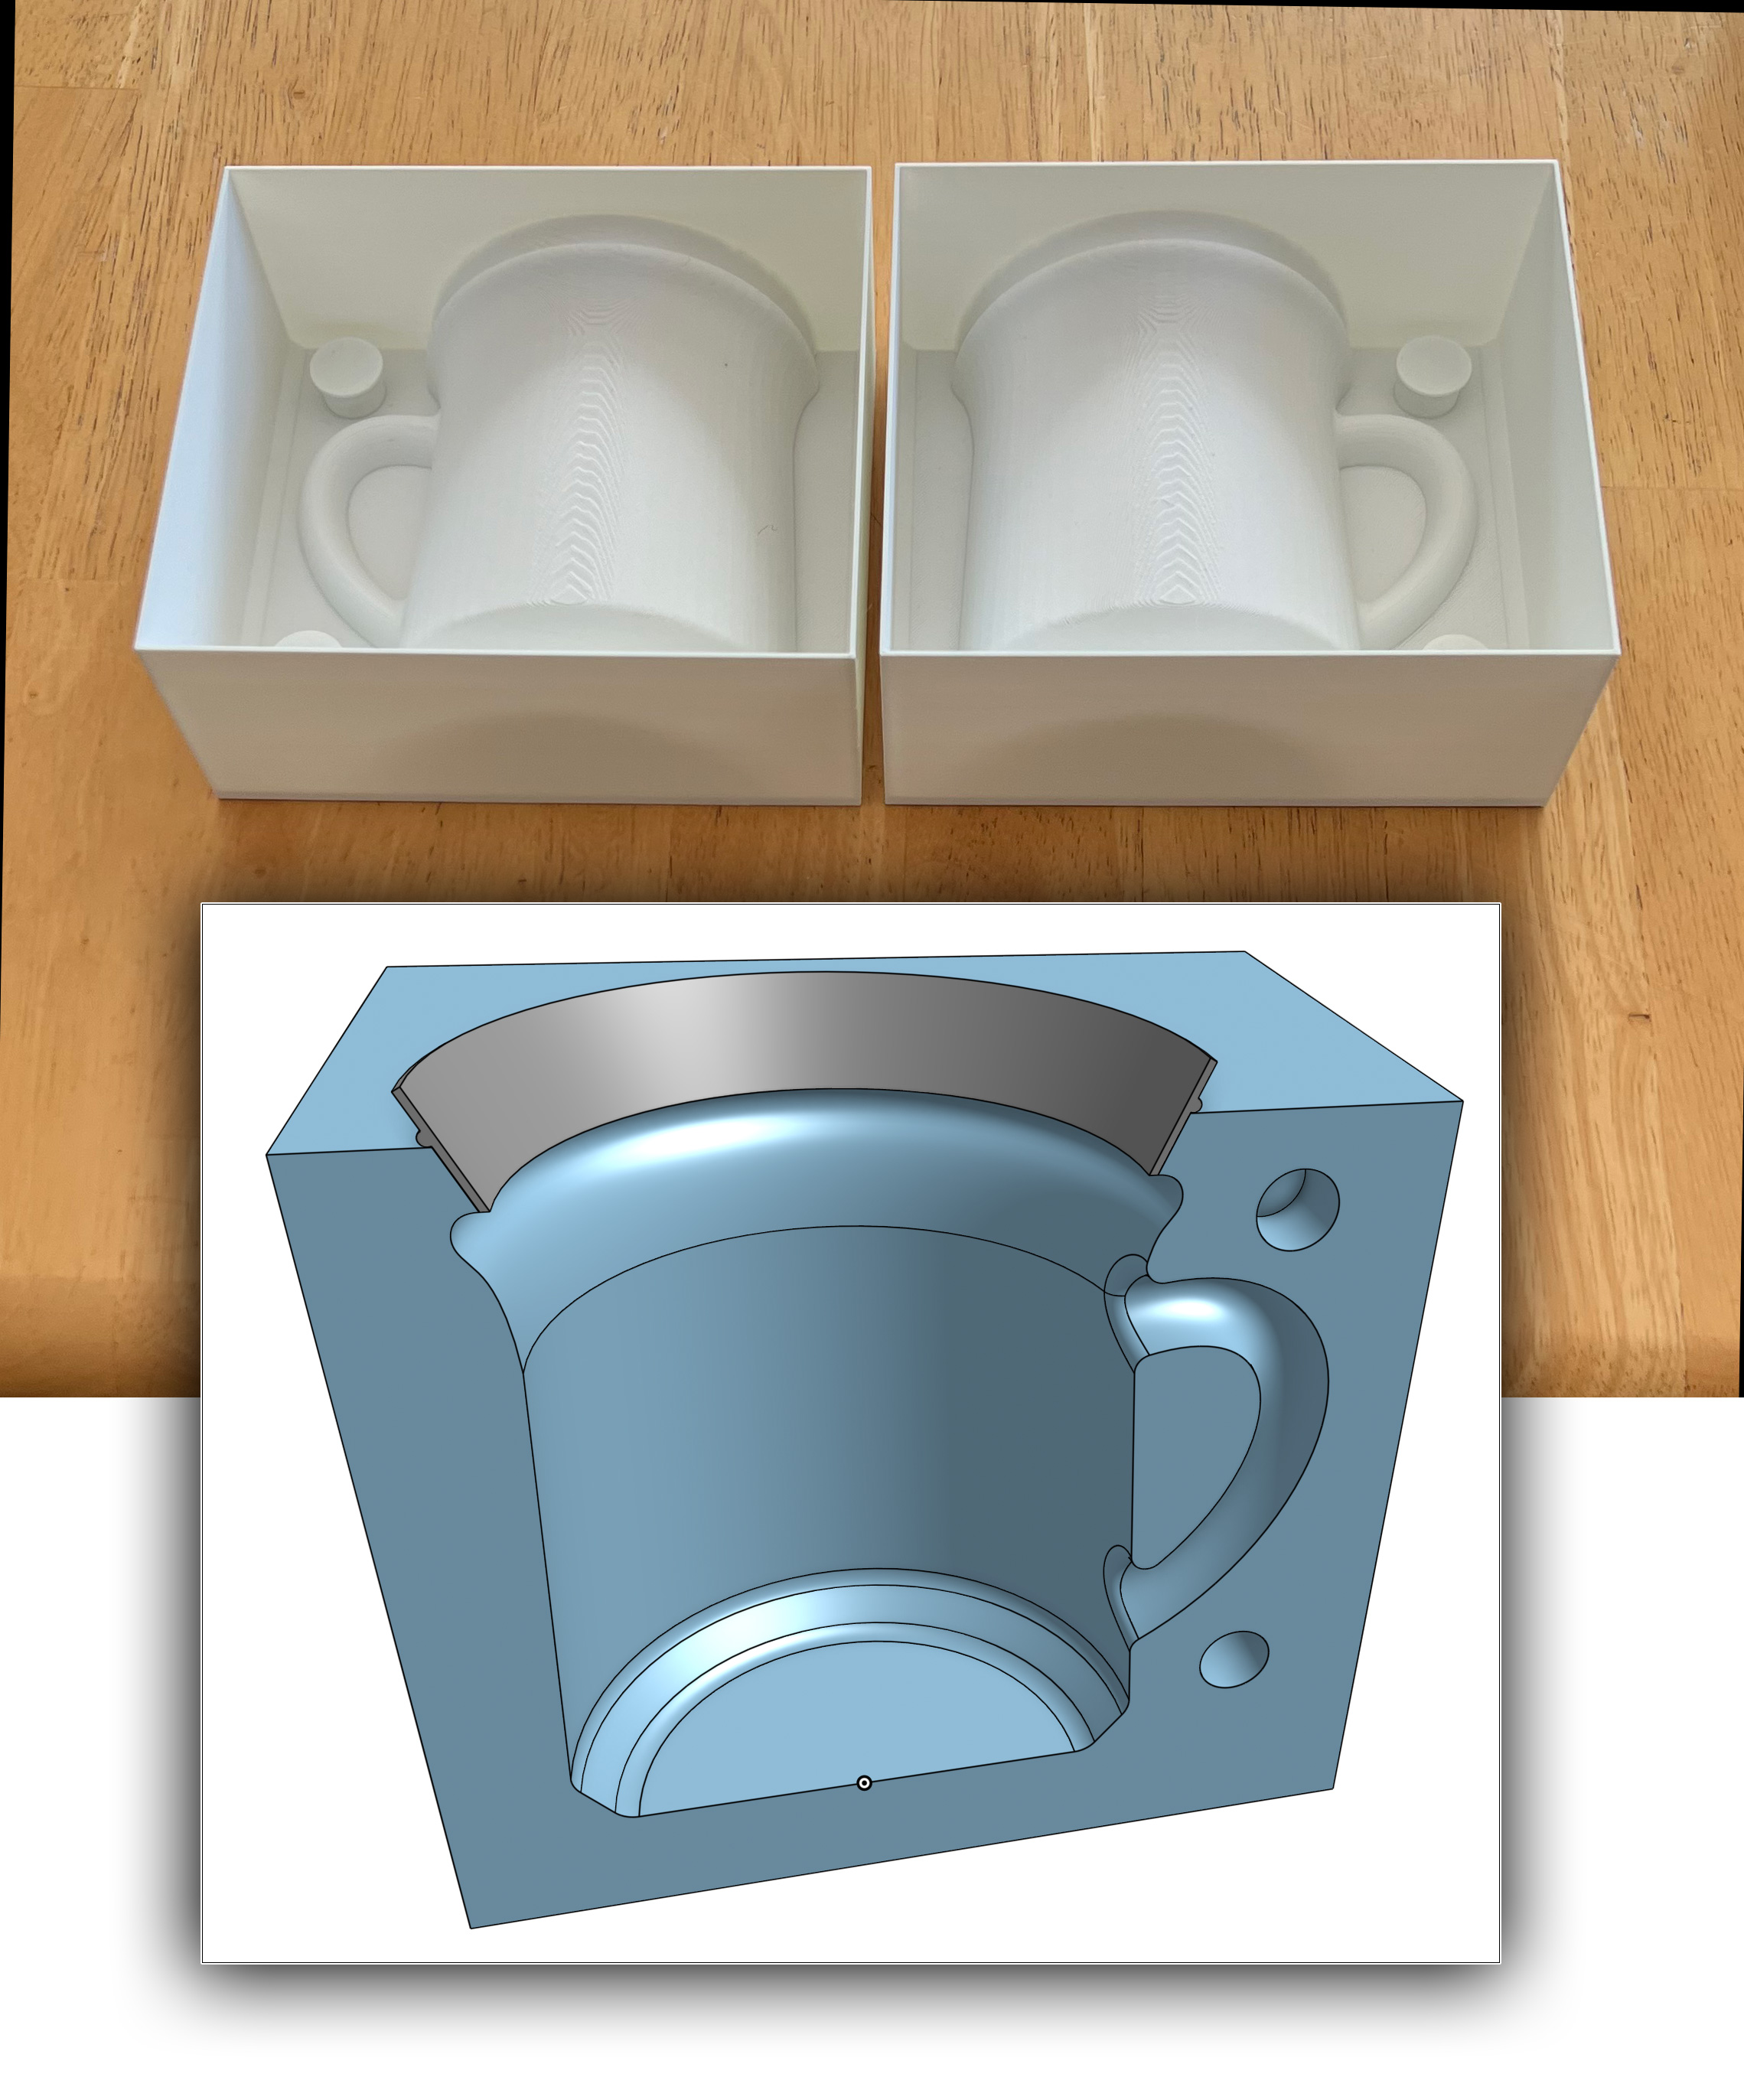
This design differs from the v2 drawing in that the plaster pouring cavity is formed by shelling (hollowing) the back side (top right). And this is designed for removal using a heat gun. This method has several advantages:
-No sketch offset or extrusion was needed to make the outer wall.
-Because the first 3D action is to extrude everything as one solid mass, corners of the outer 3D perimeter can be chamfered (but don’t do it so much that that there is insufficient thickness for the natches).
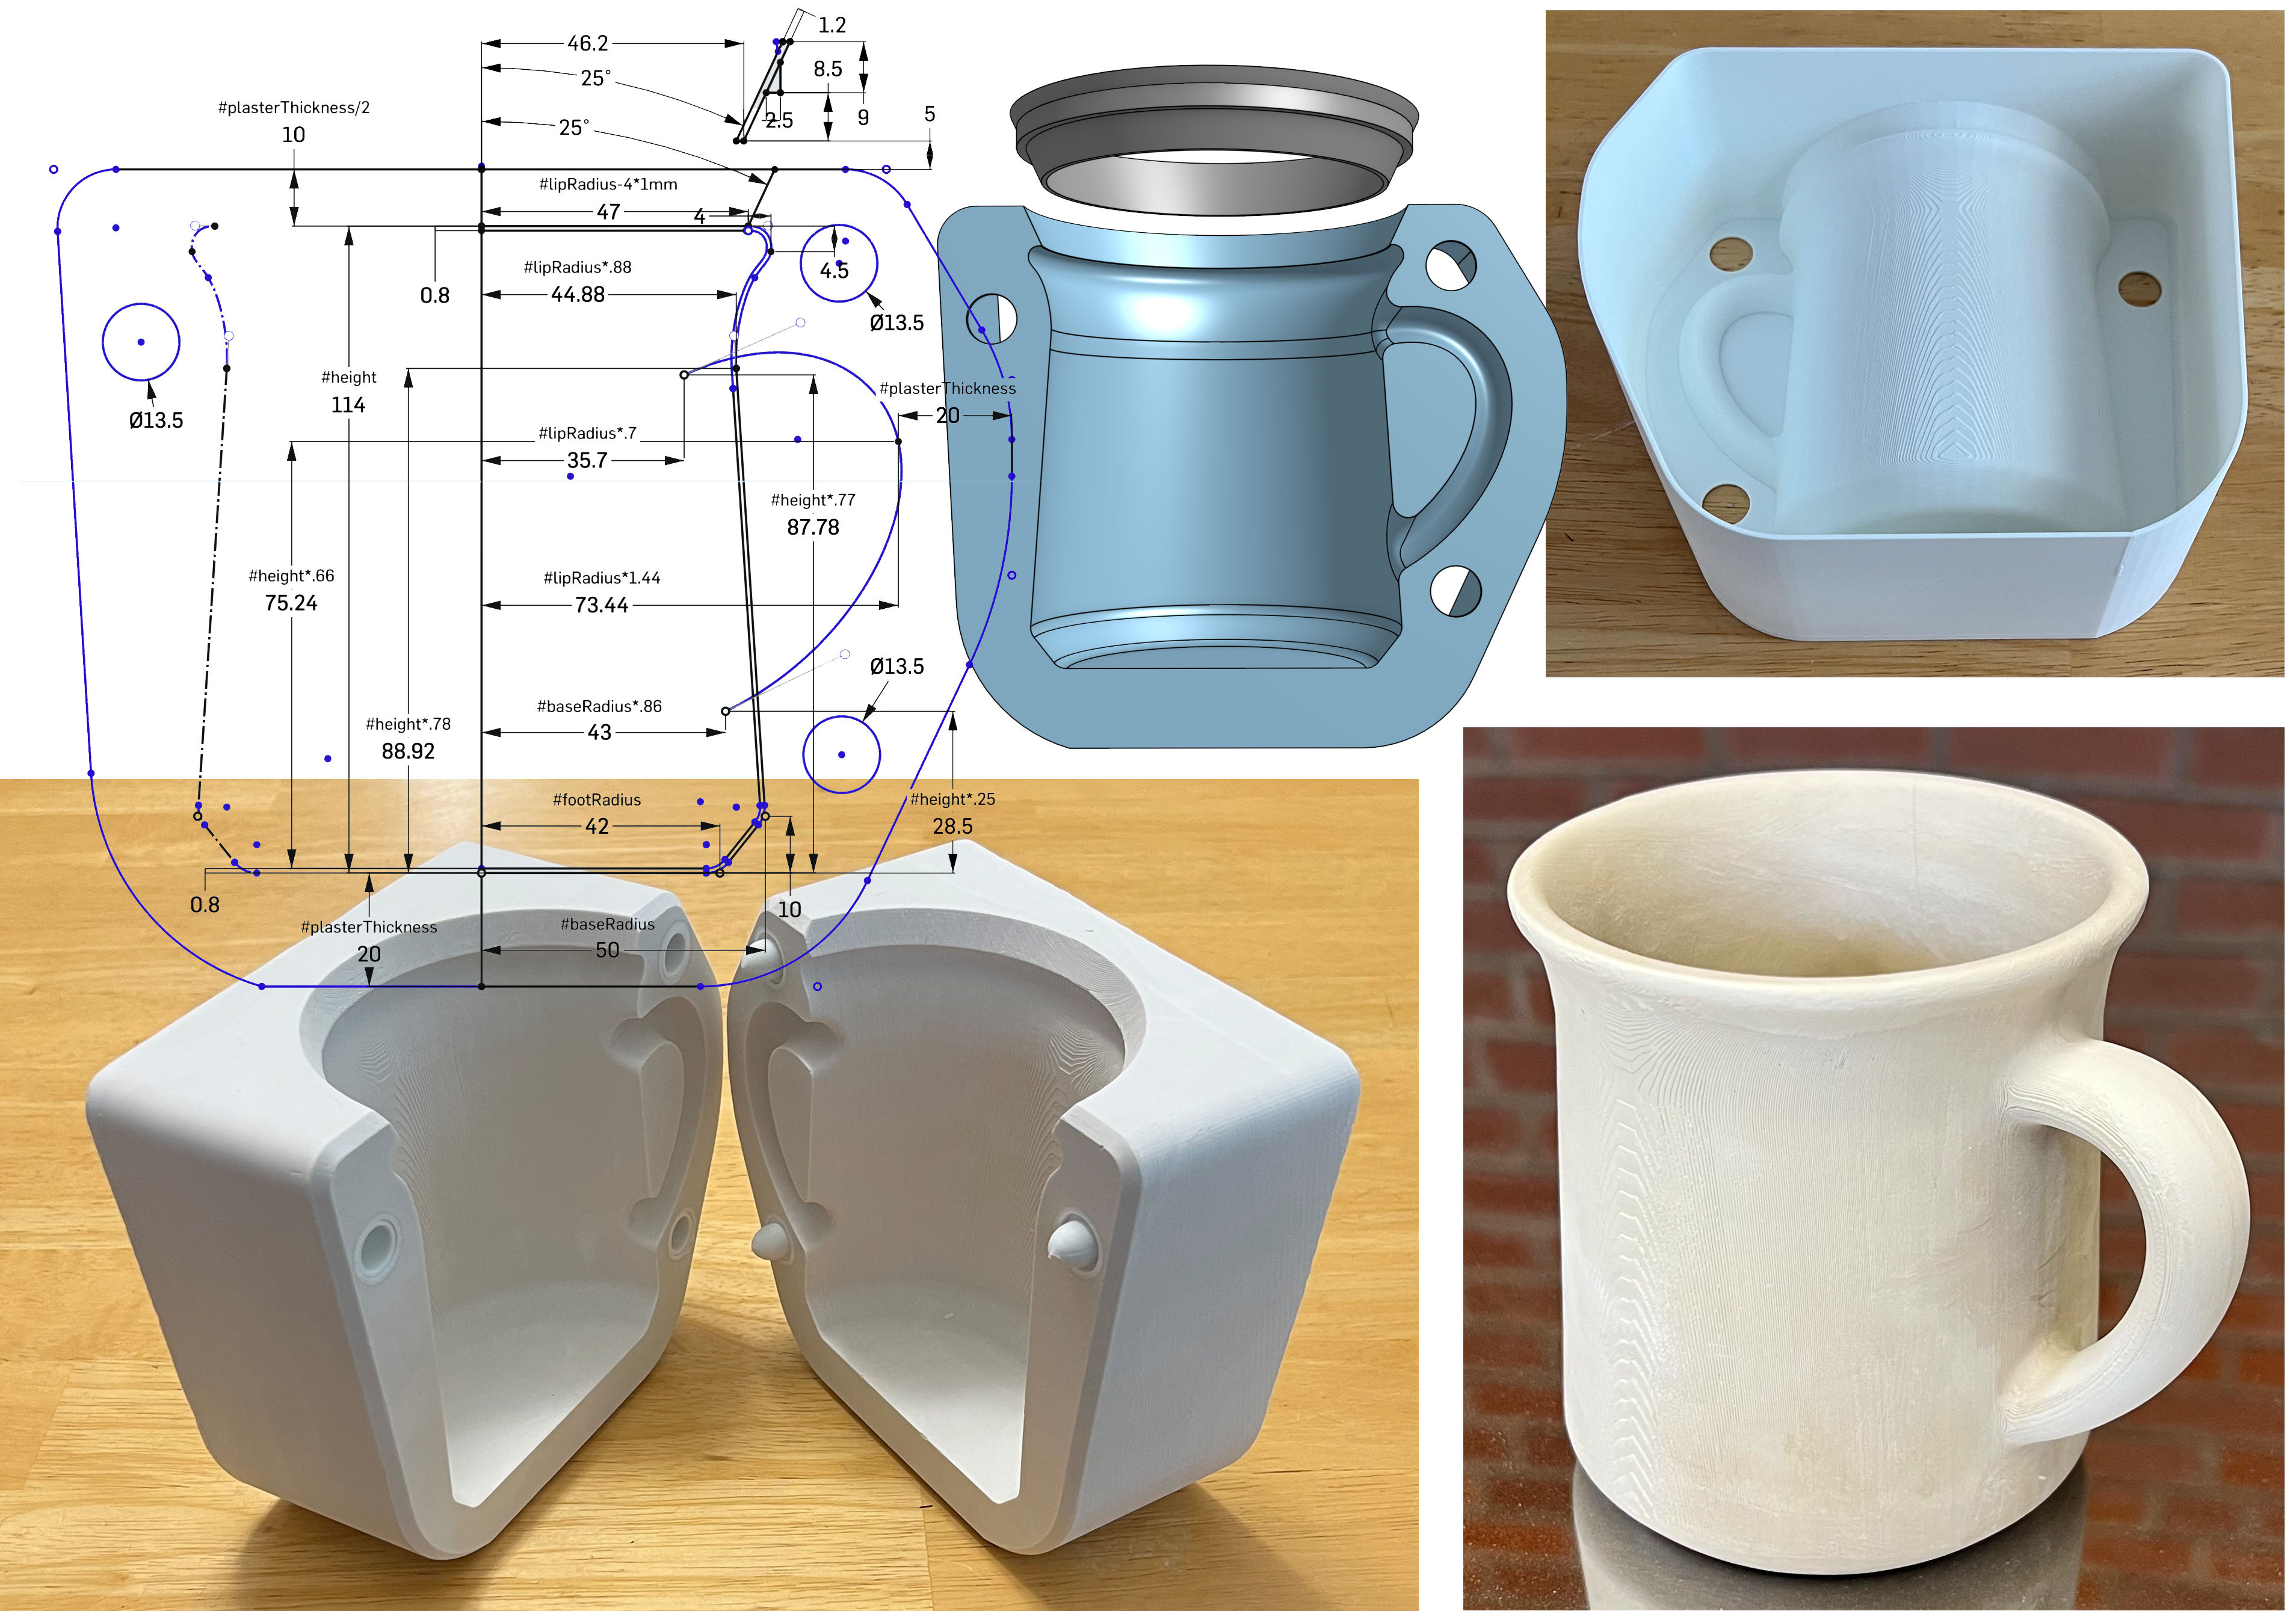
-The mug's geometry (offset inward by 0.8mm) is revolved, swept and bevelled by cutting into the block. Shelling to the same 0.8mm wall thickness, from the backside of the block, produces the cavity needed (top right).
-The last steps, after shelling, are chamfering the outside inner corner, cutting the holes for the natches and revolving the pouring spout (as a separate body).
-Our v3 natch system continues to work well with this (lower left).
-Printing artifacts are not a problem for prototype molds (visible op right). Production is asking me to enhance these (a freshly cast mug is shown lower right).
-The plaster mold is of stunning quality (the PLA 3D print was softened using a heat gun and carefully removed using needle-nose pliers).
-Slip cast mugs most often have poor-quality and oval lips. This one stays round because of the outward flare and the quality is better because the 3D printed pouring spout also acts as a cutting guide at the pre-removal stage.
-The PLA pouring spout is deep and absorbs no water. Thus, the slip level does not need to be topped up during casting, the slip surface stays flatter (not developing a bowl shape) so pour-out time can be accurately gauged by its slip level.
There are many casting body recipes that would work with this. DIY CAD skills will enable you to follow me into another exciting world: Low-cost 3D printing of the clay itself! Coming soon.
Videos
Links
| Projects |
Coffee Mug Slip Casting Mold via 3D Printing
A potter can now use AI, 3D CAD, 3D printing and custom clay bodies to slip-cast beautiful quality stoneware pottery mugs. It is efficient and practical. |
Got a Question?
Buy me a coffee and we can talk 

https://digitalfire.com, All Rights Reserved
Privacy Policy