| Monthly Tech-Tip | No tracking! No ads! | |
Warping during a large print - one solution is multiple pieces
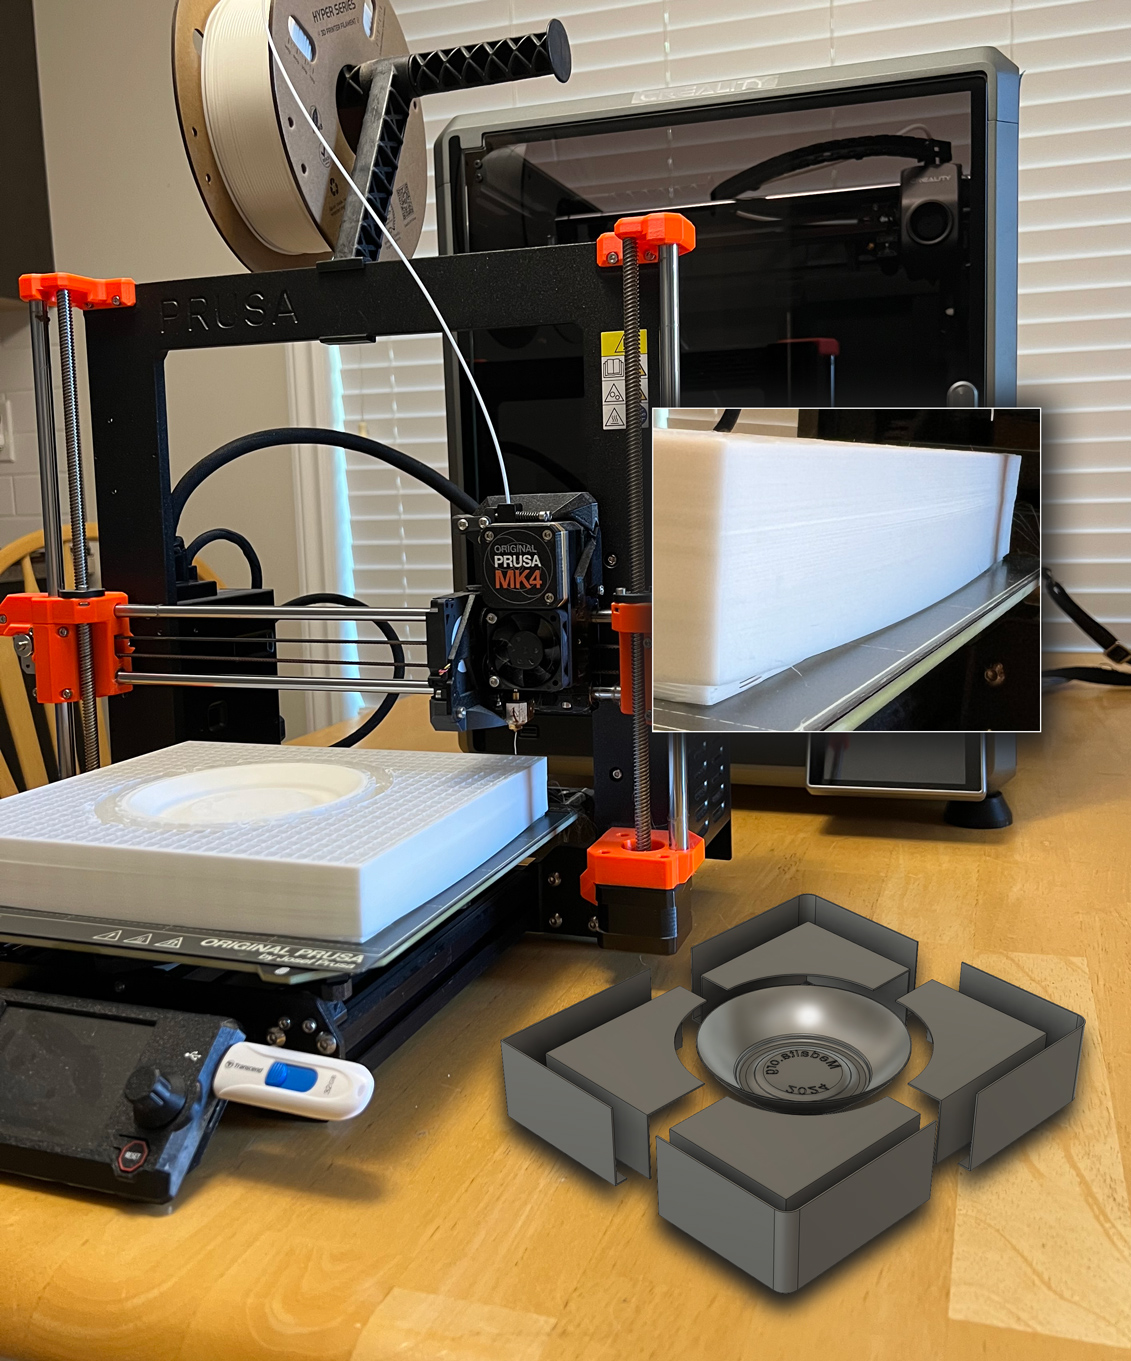
I am attempting to 3D print a shell for making a rubber block mold (the base of a Medalta ball pitcher). This is almost at the limit of what will fit on the print-bed. It would take 30 hours. But at about 10 hours it did this: All four outer corners warped upwards. I have a larger printer but it will do the same thing! What is the solution? Cut it up into smaller pieces and print each of them at the best orientation (bottom right), this saves significant printing time and achieves better quality. For this piece, the inside surface on the center section is most important, printing it upright with printed support took about 4 hours. All the other pieces print in about 1 hour each. Tape (either masking or MicroPore) can be used effectively to hold everything together for super-gluing or epoxy. Much of the tape can be left in place during the pour. The rubber form has thin 1cm walls, but these are supported by side-rails when plaster is poured.
Related Pictures
Infill and support issues with 3D PLA prints

This picture has its own page with more detail, click here to see it.
Top: The left one has a rectilinear fill, the right a square grid fill. Notice the fill on the left has buckled part way up - this piece is too tall for that type. While the grid fill on the right is far more stable, it is not as easily removed (although it can stay in place here).
Middle: The piece on the right printed in half the time because the only fill needed is at the bottom. The fill is rectilinear and easily removed - it affects the smoothness of the surfaces but they are not a finished ones so it does not matter. However that method is risky, notice the failed print on the lower right - upward pull of the flat section pulled it away. This happened twice more so I chalked up the one success to luck.
Bottom: Took about 16 hours. Like others, the grid of printed support out past the edge - that part has to be cut away with a sharp blade knife to enable mating with the other pieces.
Warping of PLA under heat of plaster set

This picture has its own page with more detail, click here to see it.
When cutting a larger object into multiple pieces it is important to have an assembly plan.
In this case I have glued at the pieces together (and filled and sanded the joins) and plan to fill the two on the left with plaster to make them rigid.
I should have 3D printed inserts to cap these ends instead. The printer can produce a very precise fit and they can be super-glued in.
Videos
Links
| Typecodes |
3D printing problems
3D design and printing for mold making in ceramics bring exciting new capabilities. Awareness of the issues and knowing how to mitigate each is a must. 3D is resetting all fabrication industries and engineers are solving every problem, you can too. |
| URLs |
https://www.3m.com/3M/en_US/p/d/b10057822/
3M MicroPore tape works well for joining multiple 3D printed mold pieces |
| Projects |
Medalta Ball Pitcher Slip Casting Mold via 3D Printing
A project to make a reproduction of a Medalta Potteries piece that was done during the 1940s. This is the smallest of the three sizes they made. |
Got a Question?
Buy me a coffee and we can talk

https://digitalfire.com, All Rights Reserved
Privacy Policy

