| Monthly Tech-Tip | No tracking! No ads! | |
3D Printing an entire one-off case mold in one piece
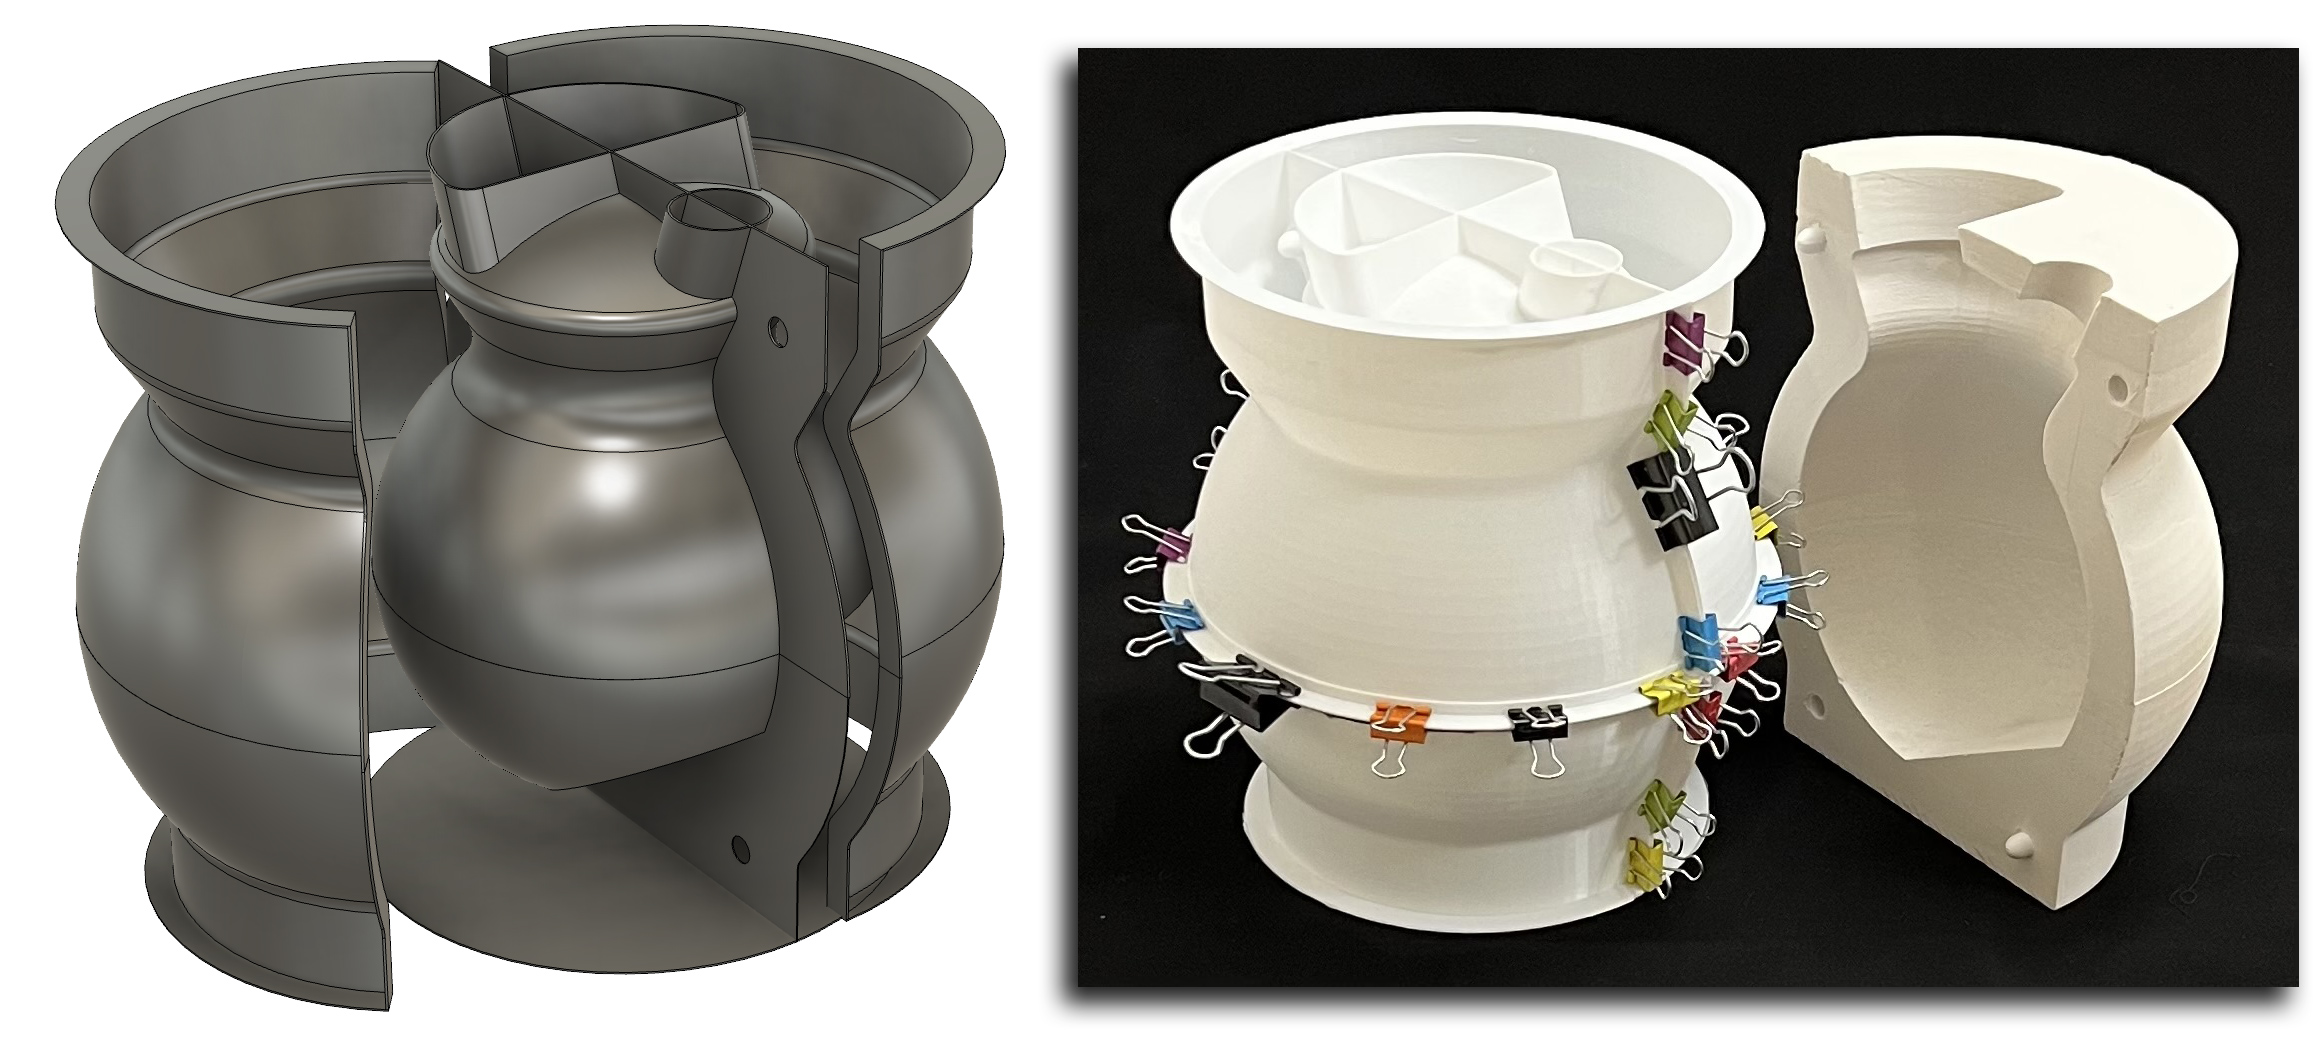
This 3D printed shell encloses an entire two-piece mold for v 5.0 Medalta Potteries ball pitcher - all that is needed is to fill it with plaster and peel off the PLA casing after it sets. We are still in the development stages so the fact that this will only produce one mold is fine. The membrane across the center is where the two mold halves mate (it also holds the inner model in place). The membrane has holes where natch-pairs can be mated for embedding into the plaster mold. The spare (shown lower right) will be rotated 90 degrees, it has a slot that fits snuggly over the membrane to hold it in place. The handle is being done separately. This was printed on a consumer 3D printer with standard PLA filament.
Related Pictures
Flanges enable an all-in-one 3D printed block mold for slip casting

This picture has its own page with more detail, click here to see it.
The center piece of this 3D printed assembly defines the outside shape of the ceramic vessel (plus two spares at the top). This entire assembly is an all-in-one case mold for a two-piece plaster working mold. This was printed as six light-weight units on standard Prusa MK3 and MK4 printers, walls are 0.8mm thickness. The upper and lower inside model halves were glued together (with the aid of an inside hoop to line them up). Outer flanges were glued on to enable clamping the outer shell vertically and horizontally.
The membranes defining mold mating points are printed onto the inside model, they extend out far enough to clamp between the flanges of the outer shell sections (suspending the model in the center). The membranes have holes to enable inserting natch-pairs. The thin base is glued on to hold the lower outer shells in place (in flexes enough to enable extracting the plaster form without mold breakage). The whole assembly is held together by clamps so it can be used multiple times.
Extreme handle fitting: A Medalta v.5 ball pitcher

This picture has its own page with more detail, click here to see it.
This handle mold is for v.5 of our 3D mold-making (and discovery) project for the ball pitcher. The process to make the 3D drawing is quite simple: Cut it out of the model (top left), draw and extrude side walls (top right) and slice off and remove the pointy parts (a step-by-step video coming soon). Bottom left: A ready-to-use mold. Notice how it fits perfectly onto the side of the pitcher form (bottom right). Because of the good fit, attaching these is just a matter of using some casting slip as the glue. Casting this handle separately affords multiple benefits: It simplifies making the mold of the pitcher itself, of extracting pieces after casting and it produces a more professional-looking product (without holes inside where the handles join). And, handles can be stockpiled in a damp box, ready to use when needed.
Videos
Links
| Projects |
Medalta Ball Pitcher Slip Casting Mold via 3D Printing
A project to make a reproduction of a Medalta Potteries piece that was done during the 1940s. This is the smallest of the three sizes they made. |
Got a Question?
Buy me a coffee and we can talk

https://digitalfire.com, All Rights Reserved
Privacy Policy
