Once-Fire
The practice of once-firing ceramics (no bisque) to produce fully glazed products. Considerable technical expertise and good testing are required to make it work. This is not a shortcut to skipping bisque firing.
Key phrases linking here: green glazing, green glazed, single-fire, once-fire - Learn more
Details
The practice of applying glazes to dried, rather than bisque-fired ware, and firing in one operation. Tradition is an important driver; some cultures have never used any other method. In industry (e.g. tile, sanitaryware, porcelain insulators), the advantage of the practice is saving energy and money. Understandably, many potters have or are considering single fire. But the difficulty of once firing is not to be underestimated, nor should it be considered a shortcut for skipping the bisque. Once-fire is a body-glaze-application-firing system.
Factors giving the greatest chance of success
- Use ware having good dry strength, uniform wall thickness and adequate permeability. Avoid thin spots, abrupt changes in section and sharp inside corners.
- For bone-dry glazing, use the lowest practical amount of water that will produce the needed viscosity and thixotropy to get the right thickness.
- Establish a suitable specific gravity and rheology for each individual glaze.
- Use enough raw clay, bentonite or binder to produce a glaze layer that remains attached during drying, handling and firing. Too little can cause powdering or flaking; too much raw clay can produce excessive drying shrinkage, cracking and subsequent crawling.
- Where additional clay is needed to supply Al2O3, replace part of it with calcined clay if drying shrinkage needs to be minimized.
- Apply the minimum thickness needed.
- Gel the slurry to a thixotropic state, if needed, to prevent running.
- Spraying is especially effective because the coating can be built in thin increments with little penetration of water into the ware.
- Quick dipping or pouring can also work where the shape is strong enough and can be supported without concentrating pressure in one area.
- Experiment with the amount of pre-warming of bone-dry to shorten dry but avoid flash-drying that might cause uneven deposition or leave a poor bond.
- Minimize gums and other additives that unnecessarily slow water removal, but do not assume that all binders are undesirable. A small amount may be essential for adherence and handling strength.
- Glaze the inside and outside in quick succession where uneven wetting could place the wall under stress. Avoid repeatedly wetting one area or applying several water-rich layers by dipping.
- Dry glazed ware uniformly and completely before loading it into the kiln. A surface that appears dry can conceal moisture in thick walls, bases or attachments.
- Glazing at the leather-hard stage using glazes of high clay content enables slower drying (leather-hard clay does not slake, but it can still soften, swell or warp. An advantage is that the body and a clay-bearing glaze can continue drying and shrinking together. A disadvantage is the drying time needed to equalize moisture.
- Make sure re-drying is complete before firing.
A major challenge is to maintain the glaze slurry properties within an often narrow range of parameters (within which shrinkage can be tolerated, adherence is good, drying is efficient, and bonding is good). Each glaze must be tested thoroughly to discover this range and the methods needed to successfully apply and fire it. Often glaze recipes need to be adjusted (involving finding ways to increase the clay percentage while maintaining the chemistry). Common problems with the glaze itself include muddying of the body below, cracking and flaking during drying, crawling and blistering during firing, inadequate thickness and surface defects. Handling of the more fragile unfired ware (for application, cleaning, drying and setting) presents challenges. If ware is glazed at leather hard stage, extra drying times require extra floor space or special driers.
One caution: A high specific gravity does not automatically mean low water exposure during dipping. A strongly gelled slurry can deposit an excessively thick layer, carrying more total water onto the pot despite its high solids content. Deposit weight and application time should therefore be measured along with specific gravity.
Firing
A single firing is not simply an ordinary glaze firing containing unfired pots. Once firing brings the body-decomposition (bisque) and glaze-melting processes together in the same firing. Water vapour and gases from organics, clay minerals, carbonates, sulfates and other body or glaze materials must escape before the glaze seals the surface. If gas evolution continues after the glaze has begun melting, bubbles can be trapped or can break through too late for the surface to heal, producing microbubbles, pinholes, pits or blisters. Both the timing of gas evolution and the ability of the glaze melt to heal need to be considered.
Testing
A practical testing program should examine the merits of glazing leather-hard or bone dry, determine limits of wall thickness and construction methods, discover a glaze specific gravity and flow behaviour that work best, a suitable application method, limits of glaze thickness and layering, best preglaze preheat and drying time, best firing schedule and kiln atmosphere and factors that produce fired pinholing, blistering, crawling, or ware warping.
Handmade Tile
Manufacturers of industrial single-fired tile tightly control body preparation, pressing pressure, moisture content, glaze recipe (especially clay content) and application, drying and firing. But handmade tile makers are much less equipped to deal with the challenges for single firing. For bone dry tiles having a broad, thin, flat shape; water absorbed during glazing can itself curve them. But handmade shapes almost always have uneven wall thickness. Modern methods of 3D printing complex shaped tiles directly or using 3D tech to make intricate molds for casting them can produce even wall thicknesses. But clays suitable for casting are normally non-plastic and thus have much less ability to tolerate being rewetted without slaking or sagging; couple that with the fact that pieces are usually cast thin walled and glaze resetting issues are amplified. 3D printing clays are plastic, thus potentially better, and walls can be printed thicker. But shapes are often such that walls converge to create sections of double or triple thickness, a no-no for bone dry glazing.
For initial testing:
- Use a body having good dry strength, moderate plasticity and sufficient permeability.
- Make tiles thicker than would be necessary for bisque-first production.
- Roll and compress both surfaces consistently.
- Dry them slowly between rigid, absorbent boards until flat and evenly leather hard.
- Apply glaze at a consistent leather-hard stage rather than to completely bone-dry tile.
- Spray a high-solids glaze in several light coats.
- Keep the glaze layer thinner near edges.
- Return the tiles to flat drying boards immediately after glazing.
- Dry slowly at first so moisture can equalize through the thickness.
- Finish drying thoroughly before firing.
- Fire slowly and with good ventilation through the body-decomposition range.
- Use flat setters or shelves and test the maximum tile size the body can support without slumping.
Related Information
Can bone-dry ware be glazed too thickly?
Yes! When the specific gravity is 1.7.
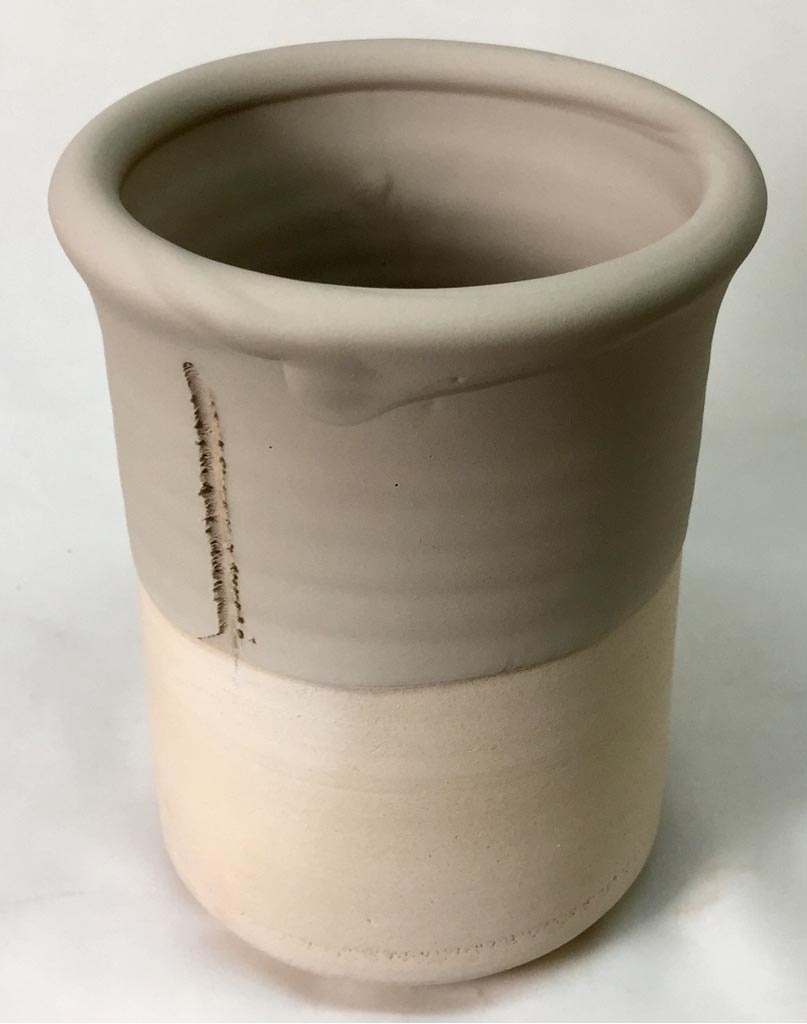
This picture has its own page with more detail, click here to see it.
In testing to determine the best specific gravity (SG) for this Darvan-deflocculated glaze slurry (G2926B), I arrived at what I thought would be great: 1.7. For 2.5kg of glaze powder only 1100g (1100ml) of water is needed, half the normal amount. And the slurry flows well. There appears to be enough water to form a good bond with the body. But a one-second dip of a bone dry piece produces twice the desired thickness, it dries too slowly and it is running. So, what should the SG be? I'll keep increasing the water until I can induce some thixotropy to hold it in place (using Epsom Salts), and it goes on thinner in a quick dip. If thixotropy is difficult, I’ll add 1% bentonite to increase particle surface area. And, I'll document the results at each step for future reference (in my Insight-Live account). Of course, these are going to need help drying, either by preheating the ware or putting the pieces in a drier.
From thrown to fired in 18 hours. How?

This picture has its own page with more detail, click here to see it.
Using a heat gun, it took 2-3 minutes to get this mug to soft leather-hard for trimming. It took 30 seconds to stiffen the handle for attachment afterward. I am now taking it to stiff leather-hard to prepare for glazing (left). Then I pour-glaze the inside and immediately push it lip-down into it to glaze the upper outside. I immediately gun it for a couple of minutes and then re-dip the outside bottom (up to the previous glaze boundary). Last, I gun it another 3 minutes and put it in the kiln for an hour at 250F for final water smoking. Finally, I fire 400F/hr to cone 6. The clay: Plainsman M370. The glaze: G3806C. The lesson: It is not the speed of drying; it is the evenness.
A once-fire mug vs. a bisque-fired mug

This picture has its own page with more detail, click here to see it.
The mug on the right was bisque-fired and then glazed, the one on the left was glazed in the green (dry) state using our standard meet-two-colors-at-the-rim glazing method. This method lends itself well to single fire glazing. Notice the glaze did not go on as thick on the once-fired piece (I should have used a slurry of higher specific gravity) and preheated the piece. In addition, there are a few pinholes, whereas the bisqued piece is flawless. Single-firing ware requires extra attention to firing, doing a bisque schedule first (to enable hydrates and carbon to escape) and then proceeding right into the glaze firing schedule.
Bisque-glazing vs. once-fire:
In medium temperature porcelain

This picture has its own page with more detail, click here to see it.
The mug on the left was bisque-fired and then glazed, the one on the right was glazed in the green (dry) state. The glazes are the same inside and out, but the porcelain one on the right is based on New Zealand kaolin (vs. American kaolin on the left). Three secrets for success for the one on the right were: It was glazed inside and out in two operations with a drying phase between; it was heated to about 150F before each application, and it was fired with a soaking period (at about 1900F) on the way up to top temperature (cone 6) to clear any gases generated by the body or glazes.
Single fire glazing done wrong

This picture has its own page with more detail, click here to see it.
The cone 6 porcelain mug on the left was successfully single-fire glazed by first pouring the inside (using a dipping glaze) and allowing that to dry thoroughly. The lip was then waxed, and the excess glaze that went over it was trimmed off. Finally, the outside was glazed by dipping the rim and then turning it over immediately and dipping down to the rim. The mug on the right was glazed on the inside and outside at the same time (by pouring, then dipping). As a result, it was over-whetted, and the body laminated within and bubbled during drying.
An alternative method: Mix it as a brushing glaze, apply one thinner coat at a time, drying each thoroughly before the next.
Links
| Articles |
Creating a Non-Glaze Ceramic Slip or Engobe
It can be difficult to find an engobe that is drying and firing compatible with your body. It is better to understand, formulate and tune your own slip to your own body, glaze and process. |
| Glossary |
Rheology
In ceramics, this term refers to the flow and gel properties of a glaze or body suspension (made from water and mineral powders, with possible additives, deflocculants, modifiers). |
| Glossary |
Spray Glazing
In ceramic industry glazes are often sprayed, especially in sanitary ware. The technique is important. |
| Glossary |
Ceramic Glaze
Ceramic glazes are glasses that have been adjusted to work on and with the clay body they are applied to. |
| URLs |
https://www.luepottery.hwy.com.au/PDF/glaze%20spray.pdf
Glaze Spraying booklet by Roger Graham - Excellent reference |
| URLs |
https://digitalfire.com/4sight/datasheets/GlazeSprayingForCraftPotter.pdf
Glaze Spraying booklet by Rober Gramham #2 |
| URLs |
https://www.instagram.com/reel/DVPM4MQCH-Y
Factory workers underglazijg and glazing bone dry plates The special dipping frame, application of colour as an underglaze, slurry rheology and very fast dip are a key to making this possible. |
| URLs |
https://www.instagram.com/reel/DZUv9ZikQ-7
Factory worker finishing bone dry mug with spinning sponge, glazing lip using modified sieve |
| URLs |
https://www.instagram.com/reel/Db6gU0fCuMZ
Factory worker glazing bone-dry plates by spinning, sponging and dipping The plates appear to be heated and the glaze is likely high-specific gravity because it dries incredibly fast. |
| URLs |
https://www.facebook.com/reel/1555758769633769
Factory worker dip-glazes bone china plates She does one every two seconds. Notice how watery the glaze is, she is applying a very thin layer of transparent. |
 PayPal | No tracking, No ads, No paywall, No transient content! Just organized, concise information constantly updated and improved. Was this helpful? Consider supporting me. |
| By Tony Hansen Follow me on        |  |
Got a Question?
Buy me a coffee and we can talk 

https://digitalfire.com, All Rights Reserved
Privacy Policy