Ceramic Tile
Tile manufacture is the largest sector of ceramic industry. Engineers overcome the very difficult technical challenges of drying and firing defect-free, flat and durable tile. Potters can do it too.
Key phrases linking here: ceramic tile - Learn more
Details
If you wish to make tile on a small scale, be aware that it is easy to underestimate the difficulty. After all, you may just be rolling a piece of clay flat, drying and firing it. How hard can that be? Let's compare how it is done in industry and the challenges they face to increase your likelihood of success on a small scale.
The tile industry is the largest sector of the ceramic industry. Few people realize its enormous scale. For example, in Morbi, India, alone, there are 1200 factories! Tile production is done at a wide range of temperatures using all manner of body and glaze types and process methods. While some countries use little ceramic tile, others cover every surface of their buildings with it. Even sidewalks. The quality of tile a company produces is a real testament to the expertise of its technical staff (the engineering challenges in tile production are daunting). By far the most common industrial fabrication method is dust pressing. Giant hydraulic machines are used to press moist powder (at 500kg/cm2 or more) into flats that can be larger than a square meter! Since shrinkage is almost zero, little warpage occurs during drying. Glaze and engobes can be applied to the dry or newly pressed tiles. Wall and floor tile make up the largest portion of production. Floor tile must be durable, non-slip, dense, strong, easily cleaned, and very flat. These properties are less important for wall tile.
In small-scale production, tile can be formed using many techniques. Hand rolling of plastic clay is surprisingly common in traditional techniques. Tiles as thin at 3/16" x 12" or more can be dried between flats of plaster wallboard panels (although it takes days). Tile can also be extruded and wet pressed (e.g. RAM pressing). Engobe (having the same firing shrinkage), in plastic form, can be laminated in a thin layer on a dark-burning body to produce tiles that glaze as if they were porcelain. Pretty well any hand-fabrication method suffers from a critical issue: Floor and rack space. Drying is slow, so the higher the production the greater the floor space needed. And dehumidifying capacity. Greater capacity can be added by using a tunnel drier (where draft, heat and humidity can be controlled).
Small-scale operations often use hobby electric kilns, they can produce a surprising amount of product.
Applying glaze can be more challenging than you might think, especially getting it on evenly and at the right thickness. Small-scale tile makers almost always bisque fire to make glazing easier. They have come up with many novel methods, many companies and artisans share video footage on Instagram, following them can be a real source of ideas on technique. Surprisingly, many are applying glaze, decoration and effects by brush (or spreading it with one). Brushing can be one of the factors that enables glazing in the dry rather than bisque state. Of course, they have to give attention to how they prepare the brushing glaze. Dipping and spraying are also common.
Huge quantities of unglazed porcelain tile are produced. Planarity is a big problem (because porcelain shrinks a lot on firing), so much so that tiles have to be ground flat after firing (that alone is an entire industry also). To achieve the lowest possible firing temperature tile bodies can contain up to 60% feldspar with no silica.
Much tile is covered with a white engobe before glazing. This makes it possible to employ a local clay that fires buff, brown or even red yet have a porcelain-like surface on which to apply glaze. Technicians expend much effort to match the engobe fired shrinkage/COE and glaze COE to the body. These can be applied as powder layers during the dust-pressing stage of the tile (or as slurries after pressing).
Another big issue is dry strength of the pressed tile (since the clay is low in plasticity and therefore has low dry strength). Companies add binders and glues as hardeners and even incorporate fiber (e.g. fiberglass) to make the pressed tiles stronger and less likely to be broken during handling.
As noted, some types of tile do not need to be vitreous to be strong and resistant to liquid penetration and crazing. Well-fitted engobes and glazes can make it possible to use non-vitrifying bodies of surprisingly high porosity to produce wall tile of very good quality. Such bodies are easier to fire flat because they shrink less. Regarding flatness (planarity): When tiles exit the production line and they are not flat this is a big problem for technicians. It is very difficult for them to replicate production conditions in the lab. Often, planarity issues trace to misfit of thermal expansions of engobe, glaze and body (if the former are not under compression to the correct degree they can affect flatness). Lab personnel cannot test things on production lines (it’s too expensive) and in the lab they cannot easily replicate what is done there. So they have to make sense of everything in theory before trying it in production and hope for the best. The longer their experience the more likely it will be a success.
The tile industry is at the leading edge of decoration technology. Of course, there are many traditional methods of decoration, but today there are just three important words: "Ink jet printing". Manufacturers can make a tile look like marble by simply printing a picture of marble on it! Photo realism is possible. Print heads are as wide as the fast-moving stream of tiles passing under them and there are separate heads for each color. Entire industries have formed around every aspect of printing (design, ink chemistry, ink rheology, nanoparticle pigments, machine design). Printers can cost $500,000 and ink thousands of dollars a kilogram.
Technicians fight a constant battle against pinholes. Just one pinhole can ruin a tile. Companies must go to incredible lengths in material processing, recipe development and production parameter control to create a pinhole-free tile. As already noted, they struggle to keep the tiles flat through drying and firing. Matching glaze and engobe thermal expansion to the body is very important in keeping tiles flat.
Huge supply industries have grown to provide tile manufacturers with everything they need. Cutting-edge technology characterizes the equipment industry especially. And, as noted, decorating. Suppliers are constantly developing new lines of glazes and novel surface treatments. There are even companies that do nothing but build tile factories, complete and ready to move in and switch on. And, of course, material suppliers (e.g. frits, feldspar, silica, talc, clays, pigments). Suppliers provide enough tech support and expertise that tile manufacturers can even outsource much of their engineering needs. The reason many countries do not have tile manufacturing industries, even though they do have clay and energy, is because they do not have these suppliers.
Related Information
Making complex ceramic tile shapes by 3D printing your own cookie cutters

This picture has its own page with more detail, click here to see it.
This was done on an affordable RepRap printer. The red plastic templates were drawn in Fusion 360 and sliced and printed using Simplify3D. A wooden block was used to press these cookie cutters into the clay. The plastic wrap made sticking a non-issue (and rounded the corners nicely). Commercial bottled glazes were applied to this low fire talc body by brushing (in three coats) after bisque - the rounded corners make brushing easier. The tiles were fired at cone 03. This is an old classic design that I discovered when researching Damascus tile. The toughest obstacle was learning how to use Fusion 360. It turns out that cookie cutters are a starter project for many 3D software packages, there are lots of videos on making them.
It possible to make a thin flat porcelain tile from a plastic pottery body

This picture has its own page with more detail, click here to see it.
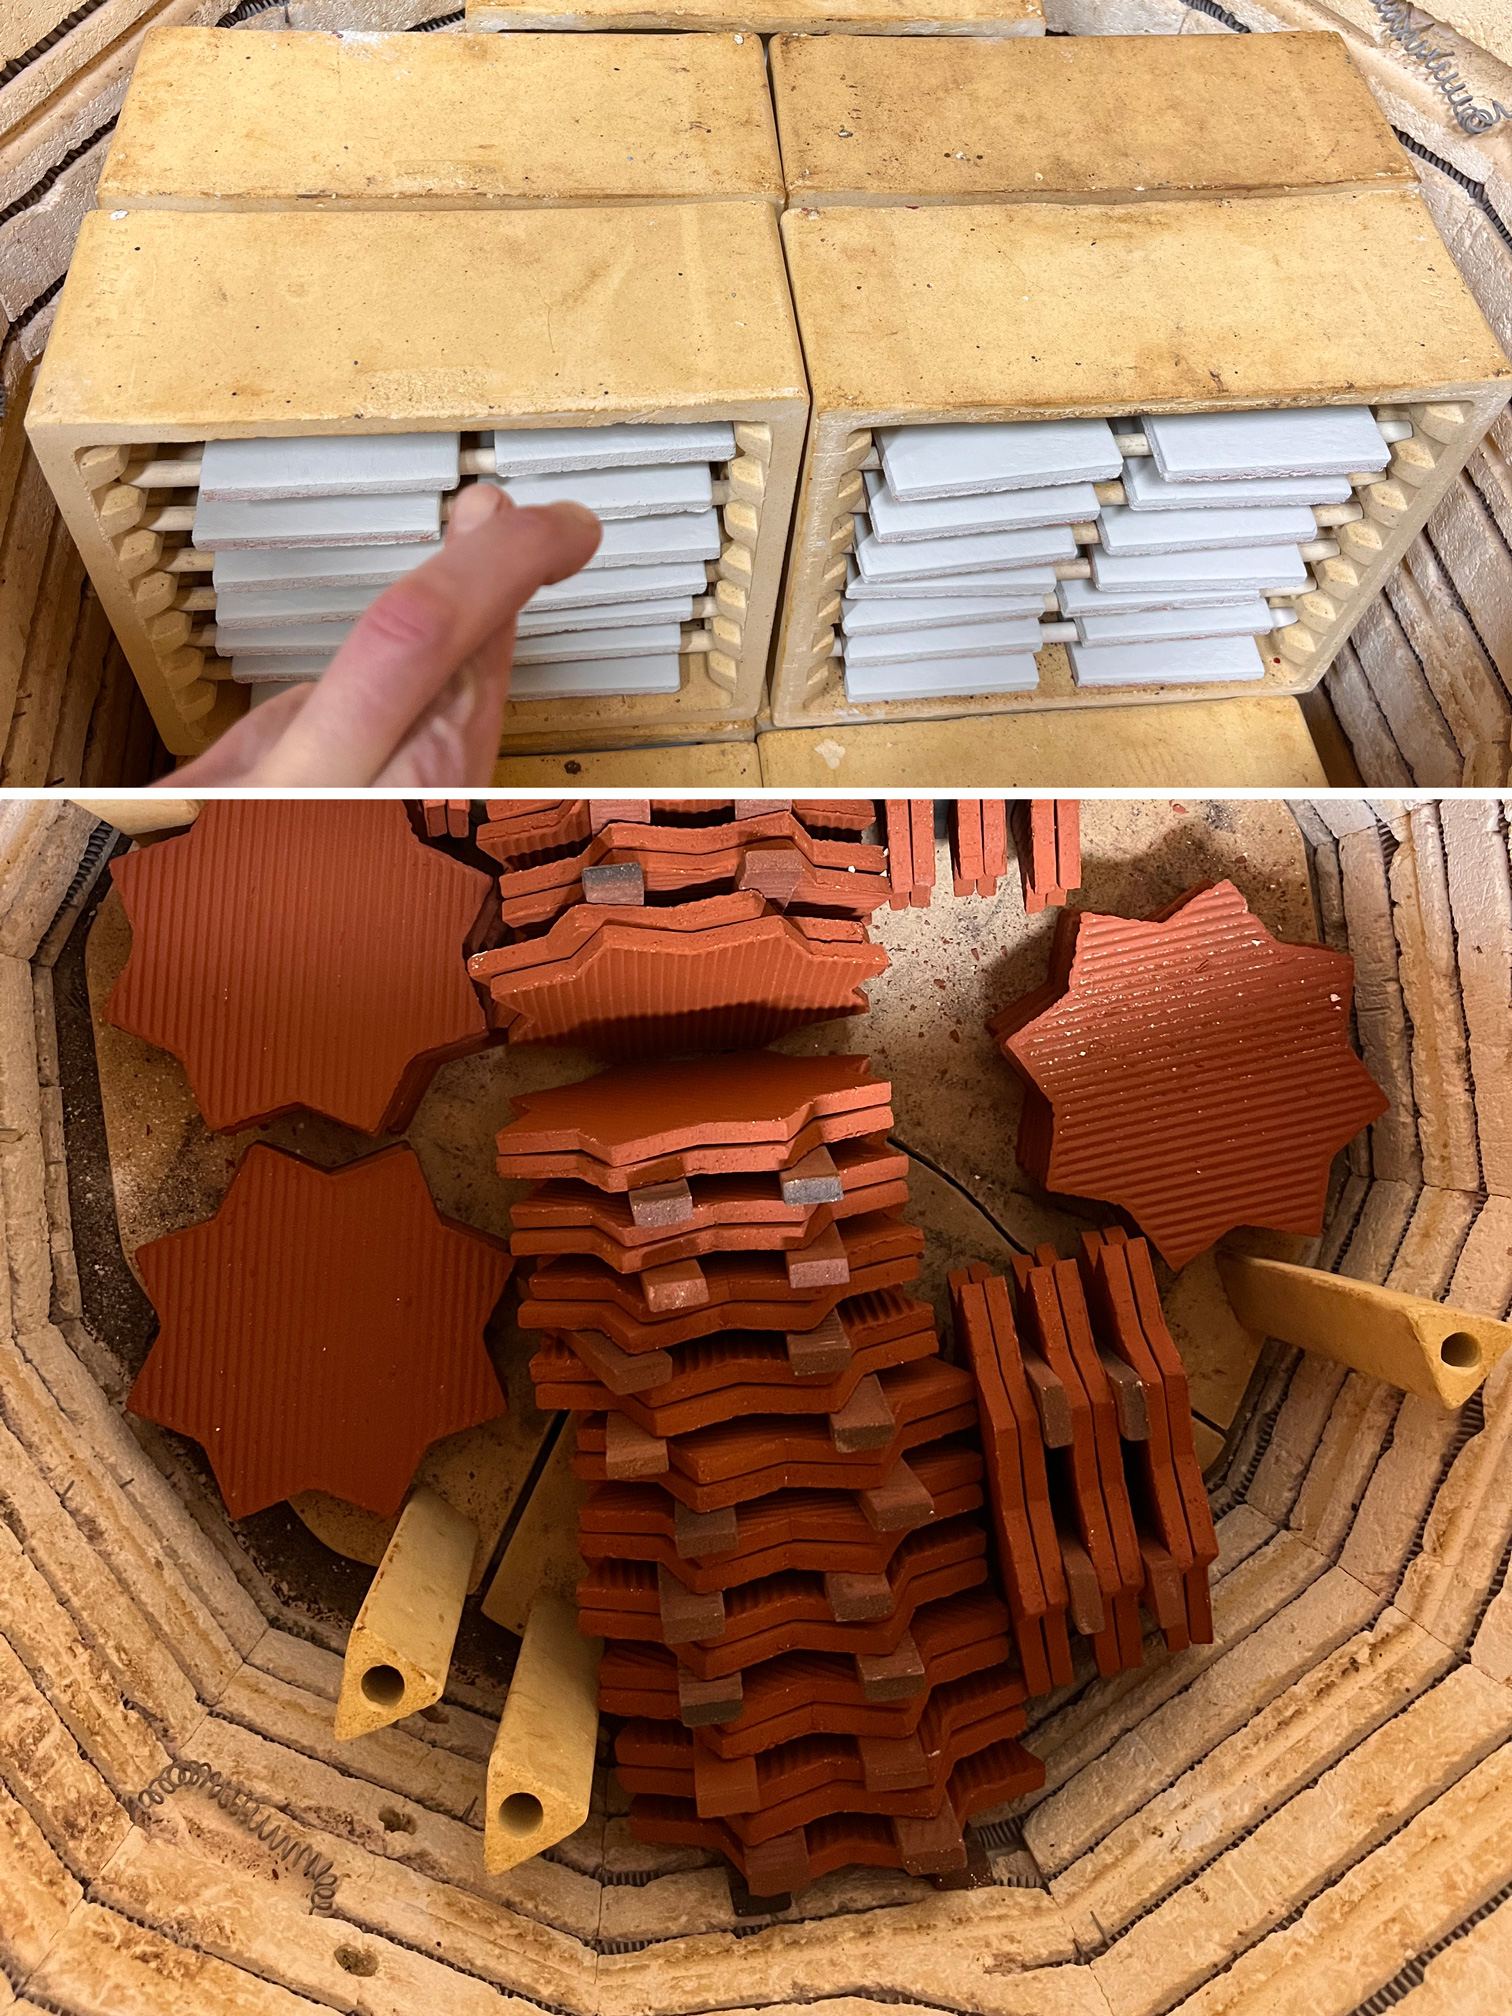
Yes. The body is Plainsman M370 (~ 25 silica, 25 feldspar, 30 kaolin, 20 ball clay + talc to tune maturity), a plastic throwing clay with far too much drying shrinkage to be suitable for tile. It is 3.8 mm thick fired (vs. commercial tiles are 5-7mm) and 33cm (13 in) square. It dried absolutely flat between sheets of plasterboard. We have even achieved total flat drying at this size using Polar Ice. Bisque and glaze firing were on an alumina shelf in an electric pottery kiln (at 300F/hr up through quartz inversion on the glaze firing), a completely unsuitable method for firing tile evenly top and bottom. Cooling on both firings was free-fall in a fairly empty kiln. Yet, it is flat! And flexible enough that I could lay it on the cement floor and stand on it without it breaking! Of course, to produce these consistently, special furniture that sinks minimal heat and a kiln that can evenly apply it front and back are needed. This is doable for custom applications. Of course, to compete in the commercial market, they need to be dust-pressed and there are lots of specifications to meet.
A plastic pottery clay for rolling ceramic tile:
Not a crazy idea when it can do what this can!

This picture has its own page with more detail, click here to see it.
This is the dolomite body recipe L4410P (a development version of Plainsman Snow). It is monoporosa tile on steroids; this body has zero percent firing shrinkage at cone 04! Predicting the final size and keeping that size consistent is much easier with such bodies. I have measured its drying shrinkage as 6% (doing our standard SHAB test). The final size needed is 20.5 cm square. Thus, I calculate the cut size to be 20.5 / (100 - 0.06) = 21.8 cm (or 20.5 / 0.94 = 21.8 cm). To keep these flat, we put them between sheets of drywall; the process takes 2-3 days. Since no change in size occurs during firing, this body has another big advantage: Tiles stay flatter during firing (a major problem with tile production). While making wall tile using a plastic pottery body is not something for industry (especially because of the space requirements for drying), for artisans working on a small scale, a body made by mixing super plastic ball clay with dolomite produces amazing working and tactile properties. The bonus is that they work so well at low temperatures, where there are so many glazing options.
Potters can learn from how glazes are fit on ceramic tile

This picture has its own page with more detail, click here to see it.
These are thermal expansion curves for body, engobe and glaze (from a dilatometer, a device that measures it against increasing temperature). The upper line is the body. The center line is the engobe. The lower line is the glaze. The ceramic tile industry is very conscious, not only of glaze-fit but also engobe-fit. Engobes (slips) are employed to cover brown or red burning bodies so they glaze like a porcelain. Typically technicians tune the formulation of the engobe to have an expansion between the body and glaze. The body is highest so that during cooling, as it contracts, it puts a squeeze on the engobe (the engobe thus never finds itself under tension). The glaze has the lowest expansion, it is under a state of compression by the engobe (and slightly more by the body). This equilibrium enables the tile to wear for many years without crazing or shivering. Chart courtesy of Mohamed Abdelmagid.
Raw Material Preparation and Forming of Ceramic Tiles - book

This picture has its own page with more detail, click here to see it.
This book is in Italian (unfortunately none of the world's tile producing countries speak alot of English). Yet the tile industry is the largest single market segment in ceramics and the largest user of materials and energy. The tile industry is at the cutting edge of inkjet, engobe, specialty glaze and firing technology. They are also experts at dust pressing. This book can be found at http://www.tiledizioni.it.
Color variation in wall tile:
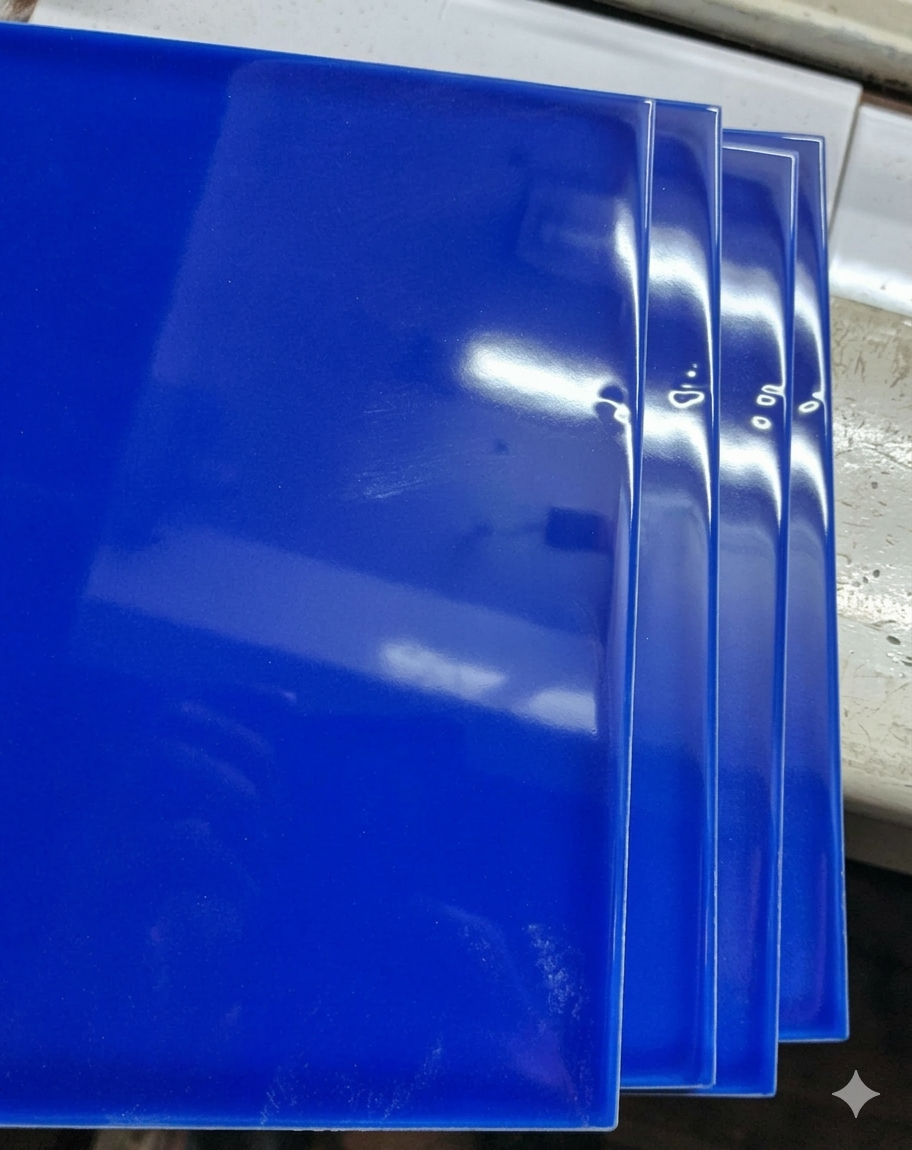
Why are these edges darker?
This picture has its own page with more detail, click here to see it.
Look carefully along the edges of these wall tiles. A band of darker blue appears around the perimeter. At first, it might seem that the cause is pooling at the edges during glaze application. But tile factories know all about even application (by bell, waterfall, disc, or spray). Instead, this is probably happening during firing - this is a fluid melt and likely flows slightly, with surface tension causing it to accumulate a little thicker at the edges. While this is a cobalt blue glaze is somewhat transparent, the thicker layer absorbs more light and appears darker. While potters often value color variation like this, ceramic tile manufacturers work hard to control “edge darkening” by adjusting glaze viscosity, application thickness, and firing conditions to achieve a more uniform surface. If they fail, here is what can happen: When thousands of tiles are laid side-by-side, those darker edges line up and visually create a grid pattern across the entire installation. And they can also make the grout lines appear stronger and the surface less uniform.
Could some glaze chemistry help? Maybe. Al2O3 is a classic melt stiffener; in many glazes, higher levels of it can be tolerated without losing any gloss. However, tile glazes must heal during very fast-firing and high Al2O3 can introduce defects (they prioritize perfect surfaces over small color variations). It can also make color less intense and reduce thermal expansion (a possible issue with fit and engobe compatibility). In tile plants, engineers usually prefer process adjustments over chemistry changes because they disturb the system less.
Extruded tile are all warping the same way
This picture has its own page with more detail, click here to see it.
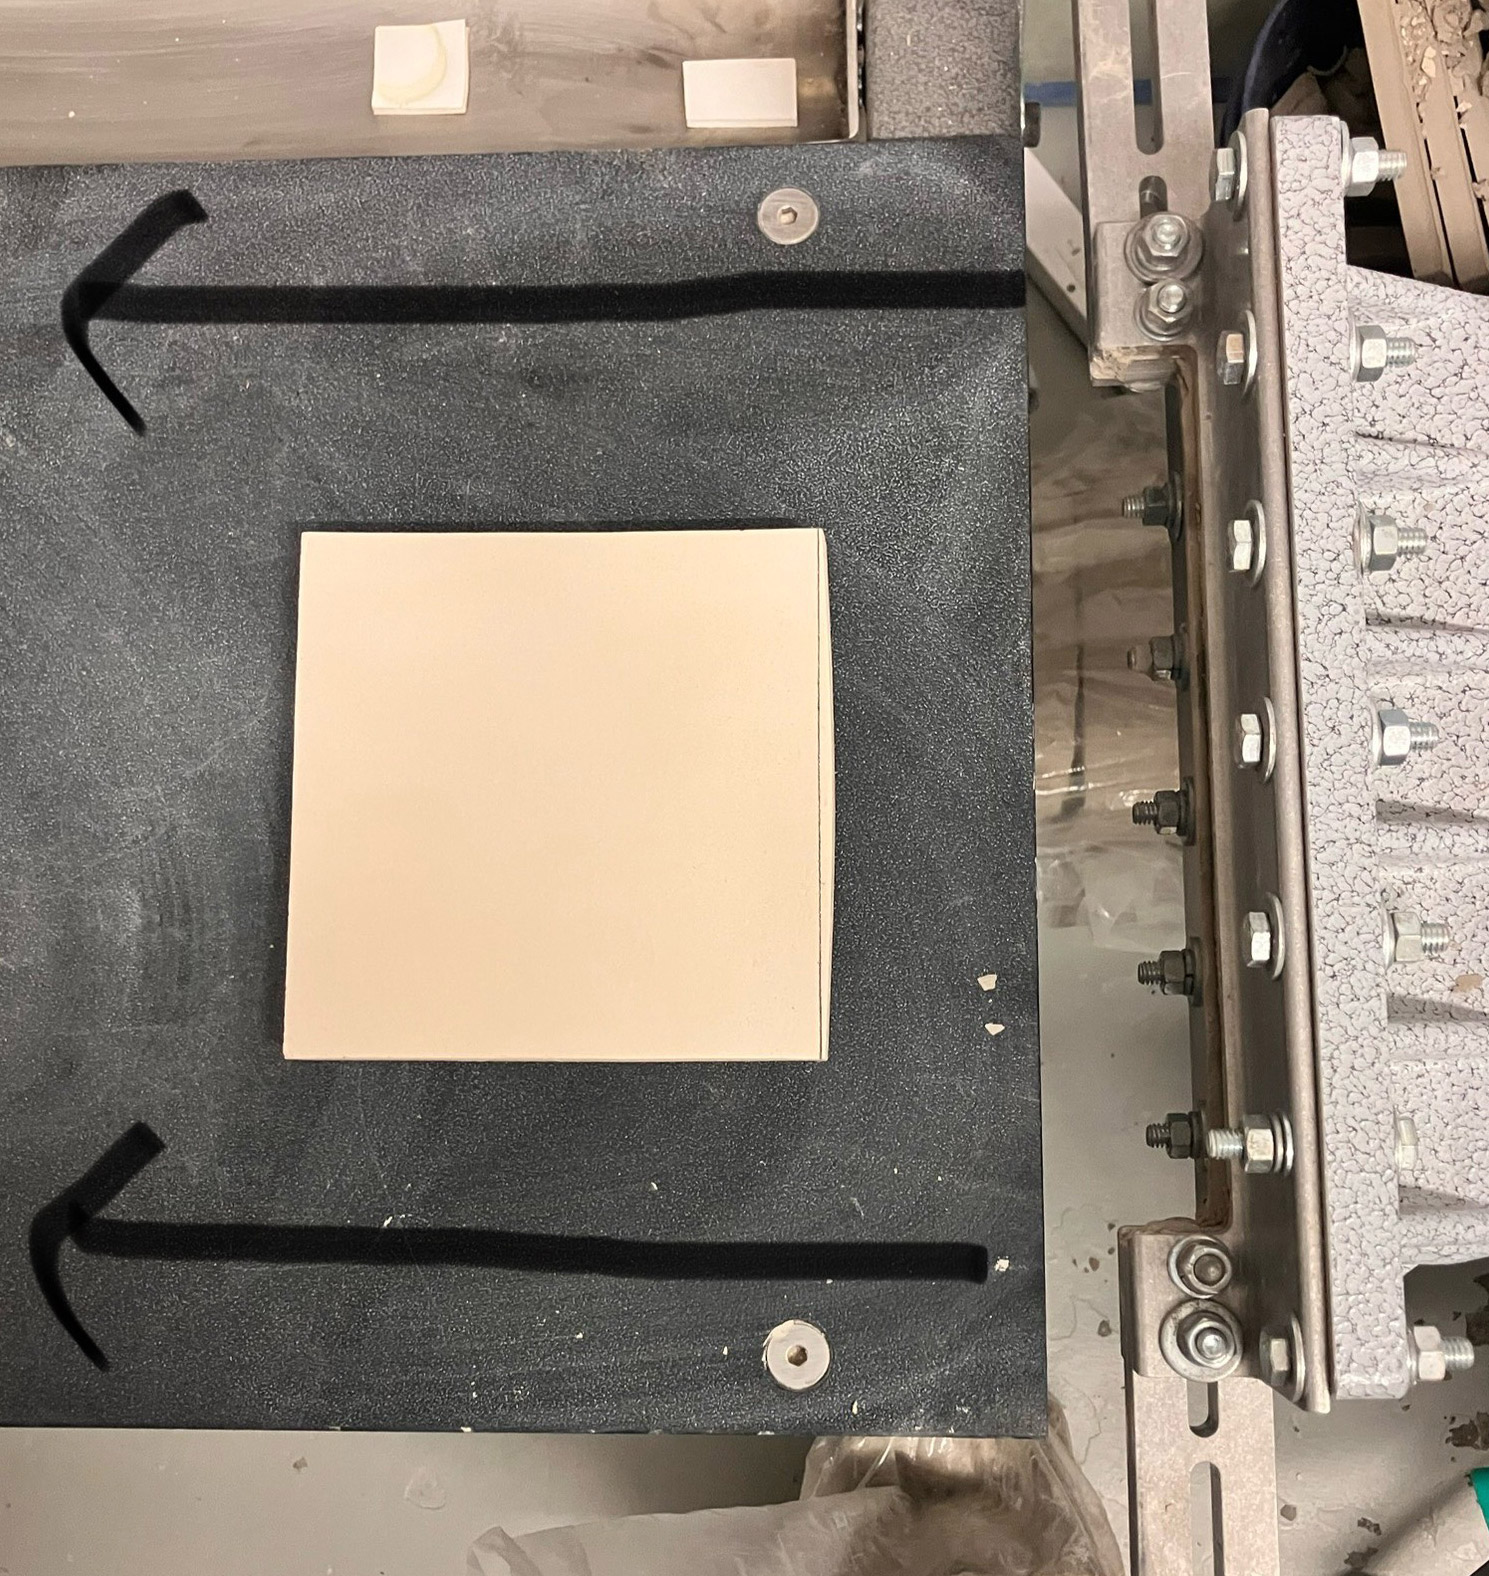
-The trailing edge of the tiles is bowing outward just the trailing edge bows outward (regardless of orientation in drier).
-The leading edge is not bowing inward.
-The tiles are cut using a cookie cutter after extrusion.
-They stay flat during drying.
-The pugmill and die are new. The die was purpose-designed for this.
-The moisture is equal front and back.
-The extrusion is stiff.
Some suggestions:
-Instead of the die walls being perpendicular (90°) to the extrusion direction, taper them inward 2-5°. This reduces the friction in the corners, enabling them to match the center's speed.
-Don't let the clay exit immediately after the shape is formed. Add a short, parallel section (a "land") after the shaping area. This allows the fast-moving center clay to rub against the slower-moving edge clay, equalizing the pressure before exit. Even a 1/4" (6mm) land can make a difference.
-Bevel the exit edge of the die, particularly on the inner face. This reduces the "drag" at the very last moment helping the trailing edge release more cleanly.
-Stiffer clay is less fluid and will hold the shape imposed by the die more faithfully.
-Shorter clay can reduce the elastic recovery.
-Add lignosulfonate to the clay (common in the tile industry).
Inbound Photo Links
 22 inch slabs successfully fired after a change. What? |
Links
| URLs |
www.tilecenter.com
Tile Center Inc website |
| URLs |
https://www.hubbardhall.com/
Hubbard-Hall Website |
| URLs |
https://www.ferro.com/products/product-category
Product Ferro Corporation |
| URLs |
http://www.qualicer.org/recopilatorio/ponencias/pdfs/2010234.pdf
Inkjet Printing for Ceramic Tiles |
| URLs |
https://en.wikipedia.org/wiki/Saltillo_tile
Saltillo tile is a popular type of rough unglazed handmade terracotta tile originally manufactured in Saltillo, Coahuila, Mexico. They are suitable in warm climates and require constant vigilance to avoid exposed porosity (by sealing). |
| URLs |
https://coolsandiegosights.com/2018/03/31/a-short-architectural-tour-of-the-santa-fe-depot/
Kaospar Tiles These were manufactured by "California China Products" in National city, CA. In the early 1900s there was a thriving tile industry in California. These were made from kaolin and feldspar deposits from quarries near Dan Diego. These tiles fetch high prices on eBay today. |
| URLs |
http://www.tiledizioni.it/ita/riviste/15922/Preparazione-materie-prime-e-formatura-di-piastrelle-ceramiche.aspx
Raw Material Preparation and Forming of Ceramic Tiles |
| URLs |
https://www.eieinstruments.com/tiles_&_ceramics_testing_instruments/abrasion_test/abrasion-testing-machine-for-glazed-tiles-bis-13630-11-en-iso-10545-7
Abrasion Testing Machine For Glazed Ceramic Tiles Compliance Standards: As per IS:13630 (Part 11), EN ISO:10545 (Part 7). |
| URLs |
https://www.eieinstruments.com/tiles_&_ceramics_testing_instruments/frost_test/determination-of-frost-resistance-bis-13630-10-en-iso-10545-12
Determination Of Frost Resistance for Ceramic Tile Compliance to standards EN ISO 10545-12, ASTM C1026, IS 13630 (Part-10). |
| Typecodes |
Ceramic Tile Manufacturing
|
| Articles |
Ceramic Tile Clay Body Formulation
An overview of the technical challenges a technician in the tile industry faces in making good tiles from the least expensive materials and process possible. |
| Articles |
Glaze and Body Pigments and Stains in the Ceramic Tile Industry
A complete discussion of how ceramic pigments and stains are manufactured and used in the tile industry. It includes theory, types, colors, opacification, processing, particles size, testing information. |
| Articles |
Glaze Types, Formulation and Application in the Tile Industry
An technical overview of various glaze type used in the tile industry along with consideration of the materials, processes and firing. |
| Articles |
Inkjet Decoration of Ceramic Tiles
Theory and description of various ceramic ink and inkjet printing technologies for ceramic tile, the issues technicians and factories face, inket printer product overview. |
 PayPal | No tracking, No ads, No paywall, No transient content! Just organized, concise information constantly updated and improved. Was this helpful? Consider supporting me. |
| By Tony Hansen Follow me on        |  |
Got a Question?
Buy me a coffee and we can talk 

https://digitalfire.com, All Rights Reserved
Privacy Policy