A Low Cost Tester of Glaze Melt Fluidity
A One-speed Lab or Studio Slurry Mixer
A Textbook Cone 6 Matte Glaze With Problems
Adjusting Glaze Expansion by Calculation to Solve Shivering
Alberta Slip, 20 Years of Substitution for Albany Slip
An Overview of Ceramic Stains
Are You in Control of Your Production Process?
Are Your Glazes Food Safe or are They Leachable?
Attack on Glass: Corrosion Attack Mechanisms
Ball Milling Glazes, Bodies, Engobes
Binders for Ceramic Bodies
Bringing Out the Big Guns in Craze Control: MgO (G1215U)
Can We Help You Fix a Specific Problem?
Ceramic Glazes Today
Ceramic Material Nomenclature
Ceramic Tile Clay Body Formulation
Changing Our View of Glazes
Chemistry vs. Matrix Blending to Create Glazes from Native Materials
Concentrate on One Good Glaze
Copper Red Glazes
Crazing and Bacteria: Is There a Hazard?
Crazing in Stoneware Glazes: Treating the Causes, Not the Symptoms
Creating a Non-Glaze Ceramic Slip or Engobe
Creating Your Own Budget Glaze
Crystal Glazes: Understanding the Process and Materials
Deflocculants: A Detailed Overview
Demonstrating Glaze Fit Issues to Students
Diagnosing a Casting Problem at a Sanitaryware Plant
Duplicating Albany Slip
Duplicating AP Green Fireclay
Electric Hobby Kilns: What You Need to Know
Fighting the Glaze Dragon
Firing Clay Test Bars
Firing: What Happens to Ceramic Ware in a Firing Kiln
First You See It Then You Don't: Raku Glaze Stability
Fixing a glaze that does not stay in suspension
Formulating a body using clays native to your area
Formulating a Clear Glaze Compatible with Chrome-Tin Stains
Formulating a Porcelain
Formulating Ash and Native-Material Glazes
G1214M Cone 5-7 20x5 glossy transparent glaze
G1214W Cone 6 transparent glaze
G1214Z Cone 6 matte glaze
G1916M Cone 06-04 transparent glaze
Getting the Glaze Color You Want: Working With Stains
Glaze and Body Pigments and Stains in the Ceramic Tile Industry
Glaze Chemistry Basics - Formula, Analysis, Mole%, Unity
Glaze chemistry using a frit of approximate analysis
Glaze Recipes: Formulate and Make Your Own Instead
Glaze Types, Formulation and Application in the Tile Industry
Having Your Glaze Tested for Toxic Metal Release
High Gloss Glazes
Hire Us for a 3D Printing Project
How a Material Chemical Analysis is Done
How desktop INSIGHT Deals With Unity, LOI and Formula Weight
How to Find and Test Your Own Native Clays
I have always done it this way!
Inkjet Decoration of Ceramic Tiles
Is Your Fired Ware Safe?
Leaching Cone 6 Glaze Case Study
Limit Formulas and Target Formulas
Low Budget Testing of Ceramic Glazes
Make Your Own Ball Mill Stand
Making Glaze Testing Cones
Monoporosa or Single Fired Wall Tiles
Organic Matter in Clays: Detailed Overview
Outdoor Weather Resistant Ceramics
Painting Glazes Rather Than Dipping or Spraying
Particle Size Distribution of Ceramic Powders
Porcelain Tile, Vitrified Tile
Rationalizing Conflicting Opinions About Plasticity
Ravenscrag Slip is Born
Recylcing Scrap Clay
Reducing the Firing Temperature of a Glaze From Cone 10 to 6
Setting up a Clay Testing Program in Your Company or Studio
Simple Physical Testing of Clays
Single Fire Glazing
Soluble Salts in Minerals: Detailed Overview
Some Keys to Dealing With Firing Cracks
Stoneware Casting Body Recipes
Substituting Cornwall Stone
Super-Refined Terra Sigillata
The Chemistry, Physics and Manufacturing of Glaze Frits
The Effect of Glaze Fit on Fired Ware Strength
The Four Levels on Which to View Ceramic Glazes
The Majolica Earthenware Process
The Potter's Prayer
The Right Chemistry for a Cone 6 Magnesia Matte
The Trials of Being the Only Technical Person in the Club
The Whining Stops Here: A Realistic Look at Clay Bodies
Those Unlabelled Bags and Buckets
Tiles and Mosaics for Potters
Toxicity of Firebricks Used in Ovens
Trafficking in Glaze Recipes
Understanding Ceramic Materials
Understanding Ceramic Oxides
Understanding Glaze Slurry Properties
Understanding the Deflocculation Process in Slip Casting
Understanding the Terra Cotta Slip Casting Recipes In North America
Understanding Thermal Expansion in Ceramic Glazes
Unwanted Crystallization in a Cone 6 Glaze
Using Dextrin, Glycerine and CMC Gum together
Volcanic Ash
What Determines a Glaze's Firing Temperature?
What is a Mole, Checking Out the Mole
What is the Glaze Dragon?
Where do I start in understanding glazes?
Why Textbook Glazes Are So Difficult
Working with children
Drying Ceramics Without Cracks
Description
Anything ceramic ware can be dried if it is done slowly and evenly enough. To dry faster optimize the body recipe, ware cross section, drying process and develop a good test to rate drying performance.
Article
Many potters and production operations have an uncanny capacity to break the rules and get away with it, then act surprised when problems strike! With drying, that's not a good strategy! Maybe you have watched Youtube videos of potters in India drying things in the sun. Don't try that. Their clay is non-plastic, very sandy and fiberous, they have learned for generations how to work with it. Your plastic body certainly cannot do this. Following are points to think about if you want to dry ware successfully.
Ware shrinks when it dries
In most cases, cracks happen when the shrinkage occurs unevenly enough within a piece to overcome its inherent strength to resist. So, it is not the speed of drying, but the unevenness of drying that results in ware either cracking or harbouring residual stresses. The influence of evenness of drying is well demonstrated by considering that one studio or plant may dry ware in a uniform manner without failure in half the time another is doing it unevenly with high losses.
Ware wants to dry unevenly
Exposed sections (like lips of ware) will dry first, and they will pull far ahead of other sections in the race-to-dry. Do what you need to to keep keep drying as even as possible throughout the process. For complicated shapes, certain sections will dry before others no matter how you orient it.
Isolate the stage in the process where variations in water content within a piece (drying gradients) are first introduced
This could happen with an early unshielded draft or ware left out too long after forming. Clay in the plastic state easily absorbs stresses created by a 3% spread in water content between the driest and wettest sections of a piece. Once introduced, however, this spread tends to remain throughout the rest of the drying process, and, in later stages weaker and thinner sections can find relief only by cracking.
The "nirvana" of continous-drying is a humidity-controlled tunnel
The tunnel is accessible at both ends, the carts push in one end and come out the other. The full heat of the furnace blows near the exit of the tunnel where outside dry air is also introduced. The flow of air proceeds toward the entrance where the lowest heat and maximum humidity are present. Vents along the tunnel are used to introduce outside fresh air or expel humid air, as needed (to fine-tune the process). Ideally, water smoking can be done in the drier.
The "nirvana" of batch-drying is a humidity-controlled chamber
Surface water is removed from ware by a high-velocity current of damp air in an atmosphere of slowly-declining humidity. The brisk humid draft visits all surfaces removing the same amount of water. The humidity control can be as simple as controlling how much outside dry air is allowed in and damp re-circulating air is allowed out. As a compromise, a special plastic-enclosed area of the studio or plant can create a humidity chamber (the humidity is a natural consequence of enclosing the wet ware). Ware dries much slower, but also more evenly; at the point at which all shrinkage has occurred it can be extracted for final air-drying. Potters and hobbyists can extend this principle by placing ware, on batts, under cloth and plastic. This will slow, and therefore even out, the drying process.
Give consideration to each type of piece being dried
Think of its special drying needs. In complex or unusual shapes, slow drying sections can be accelerated by a different orientation (e.g. turning bowls over as soon as possible), placement (e.g. putting mugs in circles with handles at the center), or air-flow adjustment or shielding. You can even slow fast-drying sections by application of wax resist or latex at leather-hard stage.
Ware needs adequate air-flow, temperature, and time to give up remaining pore water that is not released at room temperature.
In the absence of a +100°C drying chamber, your kiln is the final stage batch drier. Electric kilns lack air flow to carry away surface water, consider a kiln-venting system as not only an investment in safety, but in proper drying. Vent or no vent, it is vital to provide a slow heat above boiling point to give opportunity for all pore water to escape before firing proceeds. If necessary, program manually to hold at 240F for many hours (or even days) before continued the firing. Although it might seem that temperatures higher than 212°F boiling-point would create steam that could fracture ware, this is not the case (that is why we hold at 240°F).
Highly-grogged clays of low plasticity have superior drying properties
This is not only because of the obvious lower drying shrinkage, but because water-permeability is better and the grog creates extra pathways for water expulsion. In addition, the grog particles act to terminate cracks in their early microscopic stage.
Drying difficulty increases exponentially with ware size and weight
Do not underestimate the escalation of problems in drying ware that is larger than what has been made in the past. While 10-inch plates may have presented few problems for years, going to the production a 12-inch size could multiply drying loses tenfold. Some shapes of widely-varying thicknesses and angular contours are particularly difficult. Large plates, especially porcelain ones, can be a real challenge. Be mindful of the influence of shape and contour on the incidence of drying cracks.
Don't underestimate the effects of climate and weather changes on drying patterns
Watch out for long, cold, damp periods that culminate in a dry spell, especially if the conditions have encouraged you or your workers to get sloppy. Cold winter months can mean low humidity. Adjust your methods or make the drying environment as independent of these changes as possible.
Clay is composed of microscopic flat crystals
When they are randomly oriented in the plastic state, shrinkage is the same in all directions and no stress occurs during uniform drying. However, when they align, shrinkage is less along their length than width. So cracking can occur even if drying is even. Particle orientation across the bottoms of wide thrown pieces, for example, tends to be more random than up the walls. So if you are hand throwing such ware, compress the bottom to try to line them up parallel to the surface to reduce stress during drying. Consider also how your forming equipment might be aligning particles in an uneven way.
Materials in the body
It is possible that the cause of cracking can be traced to a body that is too sensitive to material changes, or a material change has affected a normally stable body. You may need to respond to such changes with a recipe adjustment. On the other hand, don't be too quick to blame the body either, if a sanitary ware manufacturer can dry a 50 pound porcelain toilet and you are having trouble with a 2 pound stoneware plate, there is a good chance your process could be adjusted to solve the problem! If your body contains bentonite, for example, you could safely reduce it by 1 or 2 percent without having any impact on fired properties. This will increase permeability (so water can escape faster) and it will reduce shrinkage. Another approach is to exchange some of the ball clay for a less plastic type of ball clay (or kaolin for a less plastic kaolin). The lower plasticity means it won't form quite as well, however it might be easier to adapt to a plasticity loss than deal with drying cracks. When doing the above adjustments, watch for changes in body maturity and adjust with a slight drop or increase in feldspar. One more point: don't trust other peoples' opinions about which kaolins and ball clays are more and less plastic, do drying shrinkage tests yourself to confirm.
Be Realistic when using porcelain
Do not expect a porcelain to dry as well as a stoneware or earthenware. Do not expect to be able to make any kind of shape and size using a porcelaneous body. If ware has differing thicknesses along its cross section and has angular contours then a porcelain may not be practical. That-being-said, while industry cannot afford to have time or labor-consuming drying scenarios, individual potters can nurse finicky clay bodies through drying. For example, porcelains can lose water very quickly (and therefore shrink a lot) during early minutes and hours of drying, it might be possible to successfully dry otherwise troublesome pieces by covering them quickly after forming, leaving them for days if needed, to slowly descend through initial drying.
An effective way to test and rate drying performance is valuable
Some labs have complex instruments and generate tons of numbers and reports but if you ask them to talk about a clay material's drying performance they can be at a loss for words! Knowing particle surface area, particle size, shrinkage, etc. are all fine, but drying performance is a complex dynamic that also involves particle shape, interactions, identity and the nature of particle-particle and particle-water interactions. The DFAC test (Drying Factor) is easy-to-do and produces real values that represent this property.
Conclusion
Take cracked ware seriously, even a few pieces can betray your flawed process, it could be just luck that has spared the rest. Pretest new or new batches of clay. The drying process is not really a black art. Just work toward the goal of being able to pick up a piece of ware at any stage of drying with confidence that water content tests taken anywhere on the piece will yield similar results.
Related Information
How to interpret the crack in a DFAC drying disk

This picture has its own page with more detail, click here to see it.
Drying disks used for the DFAC test are 12cm in diameter and 5mm thick (wet). A crack pattern develops in almost all common pottery clays as they shrink during drying. This happens because the center portion is covered and stays soft while the perimeter dries hard. This sets up a tug-of-war with the later-drying inner section pulling at the outer rigid perimeter and forcing a crack (starting from the center). If the clay has high plasticity and dry strength it can pull so hard from the center that cracks appear at the outer dried edge to relieve the tension. Or, it can create cracks that run parallel to the outer edge but at the boundary between the inner and outer sections. The nature, number and width of the cracks are interpreted to produce a drying factor that can be recorded.
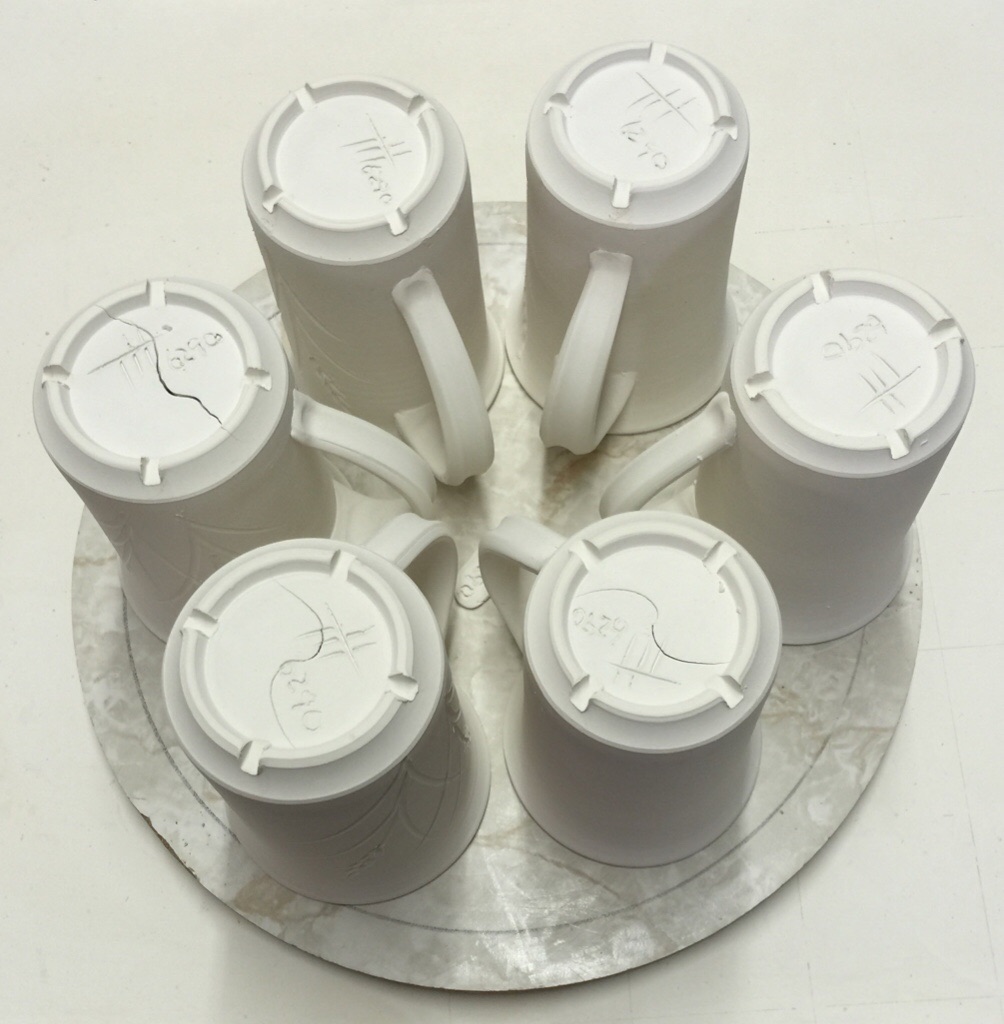
Place mugs with handles at the center and cover for drying

This picture has its own page with more detail, click here to see it.
Handles expose all sides to the air and dry (and therefore shrink) much more quickly than the walls of the mugs (especially in our dry climate). To achieve more even drying we put the handles on as soon as possible and place them like this. We also cover them by wrapping a heavy cloth over and tucking it in all around.
At first I was wondering why those two mugs cracked so badly

This picture has its own page with more detail, click here to see it.
But actually, I should be wondering why that one did not crack! This clay has 8% drying shrinkage and is very plastic, it should crack when it dries. But still, the uncracked one demonstrates with the extra care I could probably have dried all three successfully. Suppose you use a plastic porcelain and throw large, flat pieces. They should actually crack. If they do not, expect them to do so if you do not take great care in drying them. What is great care? At no time in the drying process should any part of the piece be stiffer than another. Sometimes throwing on a plaster bat is the only way to make this happen.
Do grog additions always produce better drying performance?

This picture has its own page with more detail, click here to see it.
This DFAC test for drying performance compares a typical white stoneware body (left) and the same body with 10% added 50-80 mesh molochite grog. The character of the crack changes somewhat, but otherwise, there is no improvement. While the grog addition reduces drying shrinkage here by 0.5-0.75% it also cuts dry strength (as a result, the crack is jagged, not a clean line). The grog vents water to the surface better, notice the soluble salts do not concentrate as much. Notice another issue: The jagged edges of the disk, it is more difficult to cut a clean line in the plastic clay.
Clay cracking often happens because of uneven drying, not lack of grog

This picture has its own page with more detail, click here to see it.
Using a grogged body for making functional pottery is misguided. Unless very large pieces are being made it makes little sense to add the inconveniences of having a gritty material in your clay. Any normal smooth commercial pottery clay will dry without cracking if ware is dried evenly.
Cross section is an important factor in avoiding cracks
This picture has its own page with more detail, click here to see it.
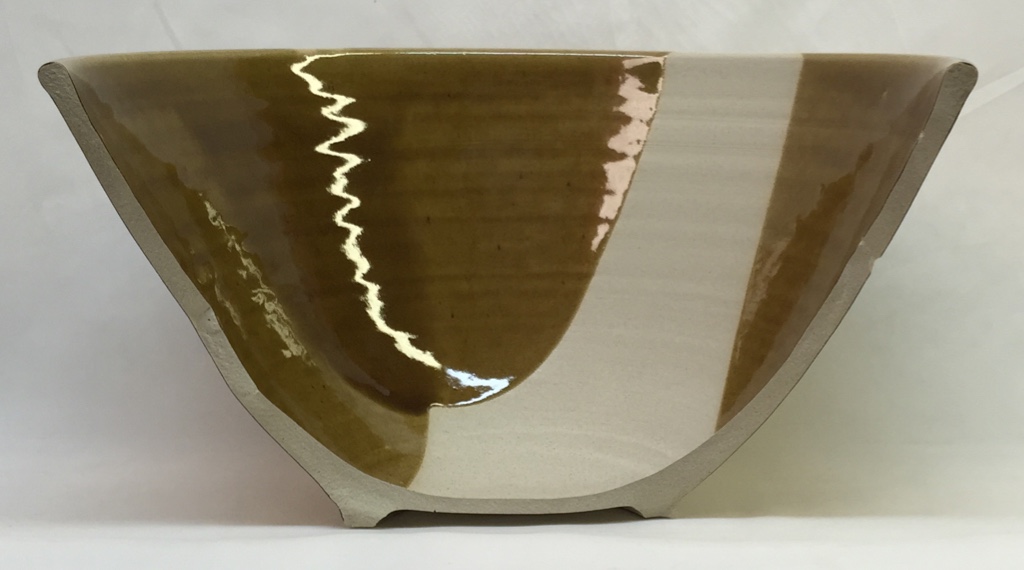
The cross section of a bowl. For the best success in drying and firing, it is advantageous to have as even of a thickness as possible. But it is also important not to have sharp concave angles. It would have been possible to make the section outside the foot ring thinner by creating a more abrupt concave contour, but that contour, if too sharp, could offer a point of weakness where a crack could start.
Can you dry a mug with handle in two hours? Yes.

This picture has its own page with more detail, click here to see it.
The lid of my firing kiln seems to be just the right environment for even drying, even of freshly thrown pieces. By the time this mug really got under way here the kiln was at 1000F and the lid was getting pretty hot. The bottom was the warmest and the top coolest, the exact opposite of how drying normally becomes uneven (the top drying first). This principle could be employed to make a heated drying chamber. The interior space could be kept at high humidity and a draft of air through it could remove humid air and the needed rate.
17 hours from slurry to thrown to trimmed to fired with glaze

This picture has its own page with more detail, click here to see it.
In industry fast drying and firing are standard, but potters still dry for days and firing cycles are often 24 hours. But it is surprising how much even very plastic clay can be pushed. This porcelain slurry dewatered to plastic in 30 minutes. I threw the mugs and attached handles after 15 minutes fan-drying, then put them into a 240F test kiln immediately (with exhaust fan going). This created a high humidity hot zone that dried them quickly and evenly (trimmable in 15 minutes, ready to green-glaze inside in 30, glaze outside 15 more). Then I fired them to 1-hour-soak at 240F and go full speed to cone 6, soak 10 minutes and shut off. I ice-watered them when they hit 300F on cool-down (IWCT test). I did get a bubble on the outside of one and a weird surface crack traveling about 5 mm below the rim on the other, so a few minutes extra glaze drying time was needed before firing.
Three squares of toilet paper the secret to drying a mug in an hour

This picture has its own page with more detail, click here to see it.
After rotating in front of a fan these porcelain mugs were ready for trimming and handle attachment in 15 minutes. Then they were turned over, the handles wrapped and in another 45 minutes were dry and ready to fire. It is not how fast you dry something, it is how even. The handles would normally dry faster so this retards them enough to stay in sync with the rest of the cup.
It is not the speed of drying, but how even it is
This picture has its own page with more detail, click here to see it.
Half of these Plainsman Polar Ice mugs cracked. But I know exactly why it happened! After throwing them I put them on a slowly rotating wheelhead in front of a fan to stiffen them enough so I could attach the handles quickly. Of course, I forgot them and they got quite stiff on the lip (while the bottom was still wet). I quickly attached the handles and then covered them with cloth and plastic and let them sit for two days to let them even out. Notwithstanding that, that early gradient sealed their destiny. The lesson: At no time in the drying process should any part of a piece be significantly ahead of another part.
How to dry these mugs evenly to avoid cracks

This picture has its own page with more detail, click here to see it.
It is important that during all stages of drying gradients (sections of different stiffnesses) do not develop in pieces. Thus I like to attach handles as soon after throwing as possible. An unavoidable gradient develops anyway because the rims need to be stiff enough to attach the handles without going out of shape too much. Now how can I stiffen these mugs for trimming and even them out at the same time? The first key is to put them on a plaster bat (as I have done here). Then I cover them with a fabric (arnel fabric works well because it flows). Then I put the whole thing into a large garbage plastic bag folded underneath to seal it. The plaster stiffens the bases and absorbs moisture in the air to stiffen the walls also. The next day every part of the piece is an even leather hard.
From thrown to fired in 18 hours. How?

This picture has its own page with more detail, click here to see it.
Using a heat gun, it took 2-3 minutes to get this mug to soft leather-hard for trimming. It took 30 seconds to stiffen the handle for attachment afterward. I am now taking it to stiff leather-hard to prepare for glazing (left). Then I pour-glaze the inside and immediately push it lip-down into it to glaze the upper outside. I immediately gun it for a couple of minutes and then re-dip the outside bottom (up to the previous glaze boundary). Last, I gun it another 3 minutes and put it in the kiln for an hour at 250F for final water smoking. Finally, I fire 400F/hr to cone 6. The clay: Plainsman M370. The glaze: G3806C. The lesson: It is not the speed of drying; it is the evenness.
Why do cracks across the base of ware form an S shape?

This picture has its own page with more detail, click here to see it.
This cup is being force dried with a heat gun. The speed of the drying is not the problem. I can dry this mug in minutes as long as I apply the heat evenly to all surfaces. But in this case I have dried the side walls first and the base is far behind. The first surprise is where the crack starts: It is actually the meeting of two, they each start at the outside edge (that is where the stress encounters clay stiff enough to crack). Another surprise is when: Near the end of the process the cracks suddenly grow (these photos span only about a minute). The way it which the two cracks find each other at the center produces the characteristic S-crack.
Sixteen kinds of clay. No mugs have cracked in drying. Why?

This picture has its own page with more detail, click here to see it.
The key is avoidance of methods that result in one part of the piece being stiffer at any stage of drying (not vinegar in the water, compressing the bottoms, etc.). Throw mugs with walls of even thickness. Put them on a plaster bat (it dewaters the base). Make the handles a while after you have made the mugs (they stiffen quicker). Apply them as soon as the rims are stiff enough to maintain shape (in my climate, two hours). Use a join method that enables application of lots of pressure (better than scoring). Use only enough slip (of thick cream consistency) to make the join (no excessive squirting out at the perimeter). Pack all the mugs closely on bats, rims up, cover with flowing cloth (e.g. arnel). Put them inside big bags or wrap plastic around and tuck it under. Trim the bases the next day (to the same thickness as the walls). Place rims down (with handles at the center) on smooth batts (not plaster) and cover them with large fabrics that can wrap under leaving no holes exposed to the outside air (in our dry climate two days dries them).
Compression of the base is the key to avoiding S-cracks? Wrong.

This picture has its own page with more detail, click here to see it.
This is an exchange I had on Facebook on this topic. Many people believe cracks are caused by high water content, high shrinkage clay, not compressing the base when throwing, throwing off the hump or stretching the clay excessively when throwing. But I break some or all of these rules every time I make mugs and have almost no cracks. Why? Because the reason pieces crack is unevenness in wall thickness and drying. And I make sure both are even.
Same clay disk dried fast (heat gun) and slower (fan) for the DFAC test

This picture has its own page with more detail, click here to see it.
The center portion was protected while the perimeter dried and shrank first (reshaping the central section). No cracks. But as the central area hardened it reached a point where it was stiff enough to impose forces that forced two cracks to start from the outer edge (opposite each other), these grew inward and found each other. Then the gap widened to dissipate more of the stresses (the width of this gap relates to the drying shrinkage of the clay). But the accelerated pace in the top disk left more stresses, they were relieved by the other hairline cracks from the outer edge, these happened at the very end.The lesson: The stage was set for cracking on both samples very early in the drying process. But the actual cracks occurred very late. Accelerating the process only created small extra edge cracks (on top disk).
Why were these handles pulled an hour after the mugs were thrown?

This picture has its own page with more detail, click here to see it.
Because they dry and stiffen much faster. When the handles are glued on with slip about an hour later they are about the same stiffness as the mugs. The handled mugs, which are sitting on plaster batts, will then be covered with cloth and plastic over night. The next morning, the bases will have stiffened and all sections of the mugs will be about the same stiffness, ready for trimming. After that they will be decorated, then placed on smooth wooden batts and wrapped with a cloth for drying.
Drying mugs in front of a fan in 2 hours. No Cracks.
These are Plainsman Coffee clay. They, and the handles, were made on the wheel about half an hour ago, then stiffened enough in front of the fan to enable handle attachment. Coffee clay is plastic and will crack if pieces are not dried evenly. But if they are dried evenly, there is no problem. The handles were waxed after they were attached (leaving only a thin section on the inside where some water could escape). This slowed them down, otherwise they would have dried far ahead of the body. They went in the kiln and were ready for glazing the next morning.
Wanna throw porcelain plates with thick bottoms and thin rims?

This picture has its own page with more detail, click here to see it.
They need ten days to dry in our climate! This 14" plate has been thrown with a 1" thick base. The rim is a quarter of that. During the first few hours, the rim would dry quickly, leaving the base far behind. So as soon as it will support the weight of a cover-cloth I put it under that and plastic for several days. After that has to be cut off with a wire (there is a lot of clay here, it waterlogs the bat). The rim is stiff enough to support it for trimming but the base will still be quite soft. Thus, it is doubly important to trim it deep enough to create a cross-section of even thickness. Then, to try to even out the water content between base and rim I place it under layers of cloth and under plastic for several more days. Finally, out of the bag, it dries, with cloth still covering it. Even then, the base may bow upwards or crack. These are difficult, there is no getting around it!
It is impossible to dry this clay. Yet we did it. How?

This picture has its own page with more detail, click here to see it.
These are made from a 50:50 mix of bentonite and ball clay! The drying shrinkage is 14%, more than double that of normal pottery clay. These should have cracked into many small pieces. Yet notice that the handle joins with the walls are flawless, not even a hairline crack (admittedly the base has cracked a little). Remember that the better the mixing and wedging, the smaller the piece, the thinner the walls, the more even wall thickness, the better the joins, the fewer the sharp contour changes, the more even the water content is throughout the piece (during the entire drying cycle) and the damper the climate the more successful drying will be. What did it take to dry these in our arid climate? One month under cloth and plastic, changing the cloth every couple of days. Implementing these same principles on a normal clay body will assure drying success.
How can Craft Crank sculpture clay be so plastic and smooth with this much grog?

This picture has its own page with more detail, click here to see it.
The super-smooth clay on the left is "Industrial Crank" from Potclays in the UK, I have removed the grog (our test code number L3868). First I did our standard tests on that body, then I dried some, slaked it in water, screened the grog out and then dewatered the remaining clay to plastic form. The grog yielded weighed the same as the clay portion of the recipe yet this body is known for amazing workability and toughness! How is that possible with so much aggregate in the recipe? The base clay body is extremely smooth, sticky and highly plastic. Mixtures of just ball clay and feldspar (e.g. 75:25) will yield this type of material, some ball clays will produce as little as 6% drying shrinkage using this ratio. The grog they use is also special: The particles have angular shapes and a narrow range of sizes, from about 35 mesh to 70 mesh (most is of the coarsest size). This narrow range of sizes means dramatically less particle surface area. These factors produce much less disruption of the plastic properties of the base clay. How could you make a body like this? Slurry up about 75% ball clay and 25% feldspar and wedge the grog into that.
The incredible plasticity of bentonite.
It is the secret to win the ThrowDown!

This picture has its own page with more detail, click here to see it.
The 20cm vase on the left is thrown from what I thought was a very plastic body, M370. I achieved close to the same thickness top-to-bottom (5mm). The one on the right was the same original height, 20cm. But it has dried down to only 18cm high, it shrinks 14% (vs. 6% for the other). The thinnest part of the wall is near the bottom, only 2mm thick! How is it possible to throw that thin? The body is 50% ball clay and 50% bentonite. Bentonite, by itself, cannot be mixed with water, but dry-blended with fine-particled ball clay it can. That bentonite is what produces this magic plasticity. But it comes at a cost. It took about four days to dewater the slurry on our plaster table. And one month under cloth and plastic to dry it without cracks.
Drying a flat slab of clay between sheets of Gyproc

This picture has its own page with more detail, click here to see it.
I am making my own low-temperature kiln shelves by rolling 3/16-inch thick slabs from plastic clay (from a 50:50 mix of Pyrax and Kaolin with 20% grog added). How can I dry them flat? Between two sheets of plasterboard. You might think that the weight of the board above would impede the shrinkage of the slab and crack it, but that does not happen. Even if the clay is quite soft or less plastic these still slabs still dry within two days without splitting or cracking.
Drying and firing a 31-inch porcelain plate without cracks. How?

This picture has its own page with more detail, click here to see it.
It takes extreme care. Three months of it! Porcelains are fine-grained and, for heavy pieces, they will not tolerate uneven drying at any stage. These cone 10 plates are made by Peter Flanagan at Okanagan Pottery in Nelson, B.C. Firing is also a real challenge. Pottery porcelains are high in quartz, getting a piece like this down through quartz inversion (~1200-900F) without dunting is only possible if done very slowly. The fact that ancient Chinese potters made very large porcelain pieces means they knew about slow cooling also (and it was a natural consequence of the heavy kilns they used). But our modern kilns cool quickly so the drop must be slowed. Peter adds an extra level of "super humanness" by actually lustre-firing these pieces, which means 2 more trips through the hazardous quartz inversion territory! If you do this be prepared to fire super slow (e.g. 25 degrees per hour) through this range.
Why throw on a plaster bat when making larger pieces?

This picture has its own page with more detail, click here to see it.
To achieve more even drying. As soon as was practical after throwing (a few hours), I covered the piece with a cloth and then put a garbage bag over it. While that put the upper section a little ahead of the base in drying, over night the base caught up (the plaster sucks the water out of it, even the walls of the piece stiffen). In the morning I remove the plastic and within an hour or two it is ready to lift off the bat and turn over, shortly after that I can trim it. I secure each plaster bat to the wheel-head using a "Batmate", that works extremely well. To stick the clay to the plaster well I apply a thin layer of slip, round off the piece of clay and firmly slam it down onto the plaster (if it is not rounded it will not stick as well or may break the bat). This is quick and effective to achieve the even drying needed to avoid a drying crack. This method is especially important for large plates and bowls, which often suffer s-cracks.
Heavy and thick plates cracking? What to do?

This picture has its own page with more detail, click here to see it.
The difficulty of crying large plates increases dramatically by size and thickness. The better the mixing and wedging, the smaller the piece, the thinner the walls, the more even the wall thickness, the less porcelaneous the clay, the lower the drying shrinkage, the higher the dry strength and the more even the drying the fewer cracks there will be. The poorer the mixing and wedging, the larger the piece, the thicker the walls, the more uneven the cross-section, the more porcelaneous and smooth the clay, the higher its drying shrinkage, the lower its dry strength and the more uneven the drying the more cracks there will be. Do not dismiss the possibility that it could take a month or more to dry this type of piece.
A plaster table makes a good base as a drying box

This picture has its own page with more detail, click here to see it.
These mugs are on a plaster table, freshly thrown on the wheel. I made the box cover from a large sheet of cardboard and painted wax emulsion on the inside. When left overnight under the box the mugs dewater evenly, the plaster pulls water from the air in the box and directly from the thicker bases. If I am worried they will stiffen too much overnight I water down the plaster to keep the humidity. When things are right, in the morning they are stiff enough for handle attachment and to turn over to ready them for trimming. An advantage of this method is that I can throw ware minutes before closing time, come back in the morning, and they are ready. And pieces do not experience the unevenness in drying that happens typically when pieces are left to air dry (after throwing) until they are stiff enough to support a cloth and plastic to cover them.
Plaster bats are indispensable to the potter

This picture has its own page with more detail, click here to see it.
Although there are reasons to use various types of bats in ceramic production (e.g. wood, plastic, masonite), for throwing pieces that are too big or fragile to lift immediately, a plaster bat is the best solution. This is especially so for porcelaineous clays that are difficult to dry. The main reason for this is to minimize drying cracks. The plaster pulls water out of the base of the piece in the hours it sits after throwing. That solves a fundamental problem, for example, with making large platters and bowls. On a wooden bat the rims of these need to be dried until the walls are stable enough to support the weight upside down. By the time that happens the rim is well ahead of the base and a gradient has been set up that can cause a drying crack across the base later. These are fairly expensive, but it is easy to make your own.
Designing your own humidity controlled tunnel drier

This picture has its own page with more detail, click here to see it.
The ideal drying chamber is a tunnel. Typical tunnels pass wheeled-ware-carts single file. Hot dry air enters where the ware exits. The moving air touches all surfaces and picks up humidity as it moves toward the entrance. The tunnel must be calibrated so that air reaching the entrance, is still very warm and laden with water it got from ware down the tunnel. When an equal volume of ware is passing constantly, manual calibration of cart movement, air volume and temperature is possible. But if flow is not constant multi-location monitoring and intervention is needed. ESP8266/ESP32 controllers are revolutionizing industrial control. As cheap as $5, these tiny battery-powered WIFI servers can display a web page, email or text you and communicate with an online dashboard to relay measurements. And they can respond to commands and actuate relays to control blowers, heaters and vents. Hiring a technician on Upwork.com to design a system is only a matter of a few thousand (even hundreds) of dollars. Shown here is an Amazon listing for a development kit of an 8266, sensor and cables (the humidity/temperature sensors are the key element, search for them specifically on Amazon). Shown also is a listing for a ready-made one, dozens of these will be found for the search "esp32 humidity temperature sensor controller". Greenhouse automation uses this same technology.
Do you really need a grog body for sculpture?

This picture has its own page with more detail, click here to see it.
These were all made in our studio. All were dried evenly as possible and are awaiting firing. The tall white vase weighs 21kg, built in four pieces, using H550, by Toludare Toluwalope. The brown vase was made by Kat Valenzuela, it weighs 27kg and is made of H440. The torso was made by Grace Warren, it weighs 13kg and is made of H441G (it contains minimal grog of fine particle size). Another torso behind of similar weight is made of H440. Her other piece behind the front torso weighs 25kg and has varying thick and thin sections, it is made of Tapper clay (sold to the smelting industry). None of these pieces had any significant cracks during drying or firing.
Links
| Tests |
Drying Factor
The DFAC Drying Factor test visually displays a plastic clay's response to very uneven drying. It is beneficial to show the relative drying performance of different clays. |
| Projects | Troubles |
| Glossary |
Drying Performance
In ceramics, drying performance is very important to optimizing production. More plastic clays shrink more and crack more, but they are also better to work with. |
| Glossary |
Drying Crack
During drying clays and porcelains shrink as they become rigid. When this occurs unevenly, cracks are the result. |
| Glossary |
Water Smoking
In ceramics, this is the period in the kiln firing where the final mechanical water is being removed. The temperature at which this can be done is higher than you might think. |
| Glossary |
Brick Making
Brick-making is surprisingly demanding. Materials blending and processing, forming, drying and firing heavy and thick objects as fast as possible are like no other ceramic manufacturing challenge. |
| Troubles |
Cracking of Clays During Drying
The best way to avoid drying cracks when making ceramics or pottery is to avoid doing the things that cause it. Do not just blame the clay, anything can technically be dried. |
 PayPal | No tracking, No ads, No paywall, No transient content! Just organized, concise information constantly updated and improved. Was this helpful? Consider supporting me. |
| By Tony Hansen Follow me on        |  |
Got a Question?
Buy me a coffee and we can talk 

https://digitalfire.com, All Rights Reserved
Privacy Policy