Mold making using 3D printing
An ordinary consumer 3D printer has many exciting possibilities for making many types of molds, it is a place where people having both artistic and mechanical abilities can get a double the dopamine!
Related Information
Light-weight 3D printed plate-setters are coming

This picture has its own page with more detail, click here to see it.
The way potters and hobbyists traditionally pack electric kilns is the height of energy wastage. This 18x22 hexagonal kiln load of bowls is a good example. A traditional pack on the left does 24. The new method using 3D printed setters on the right does 36. The left firing contains only 5.3 kg of bowls with more than 60kg of furniture - each 220g bowl incurs 2700g (6 lb) of kiln furniture weight - seven times as much! This type of packing also leads to uneven firing and puts a heavy load on the electrical components. The bigger the kiln the greater the efficiency.
These light-weight stackable setters don't exist yet. But they soon will. I designed specifically for this bowl and printed samples using PLA. Sintered alumina, the ultimate material, has 3x density over PLA - so we can predict the weight at 160g. These setters allow free flow of air, even the foot of the bowl is exposed. They can be printed upside down with one pass of the nozzle for most of the geometry.
New uV hardened resins for dental applications are the inspiration for this idea. These resins and hardeners are commodity items online now, anyone with a clay 3D printer (or the ability to retrofit an existing PLA printer) can experiment with recipes (even of inexpensive refractory materials like kaolin, ball clay silica) and print these.
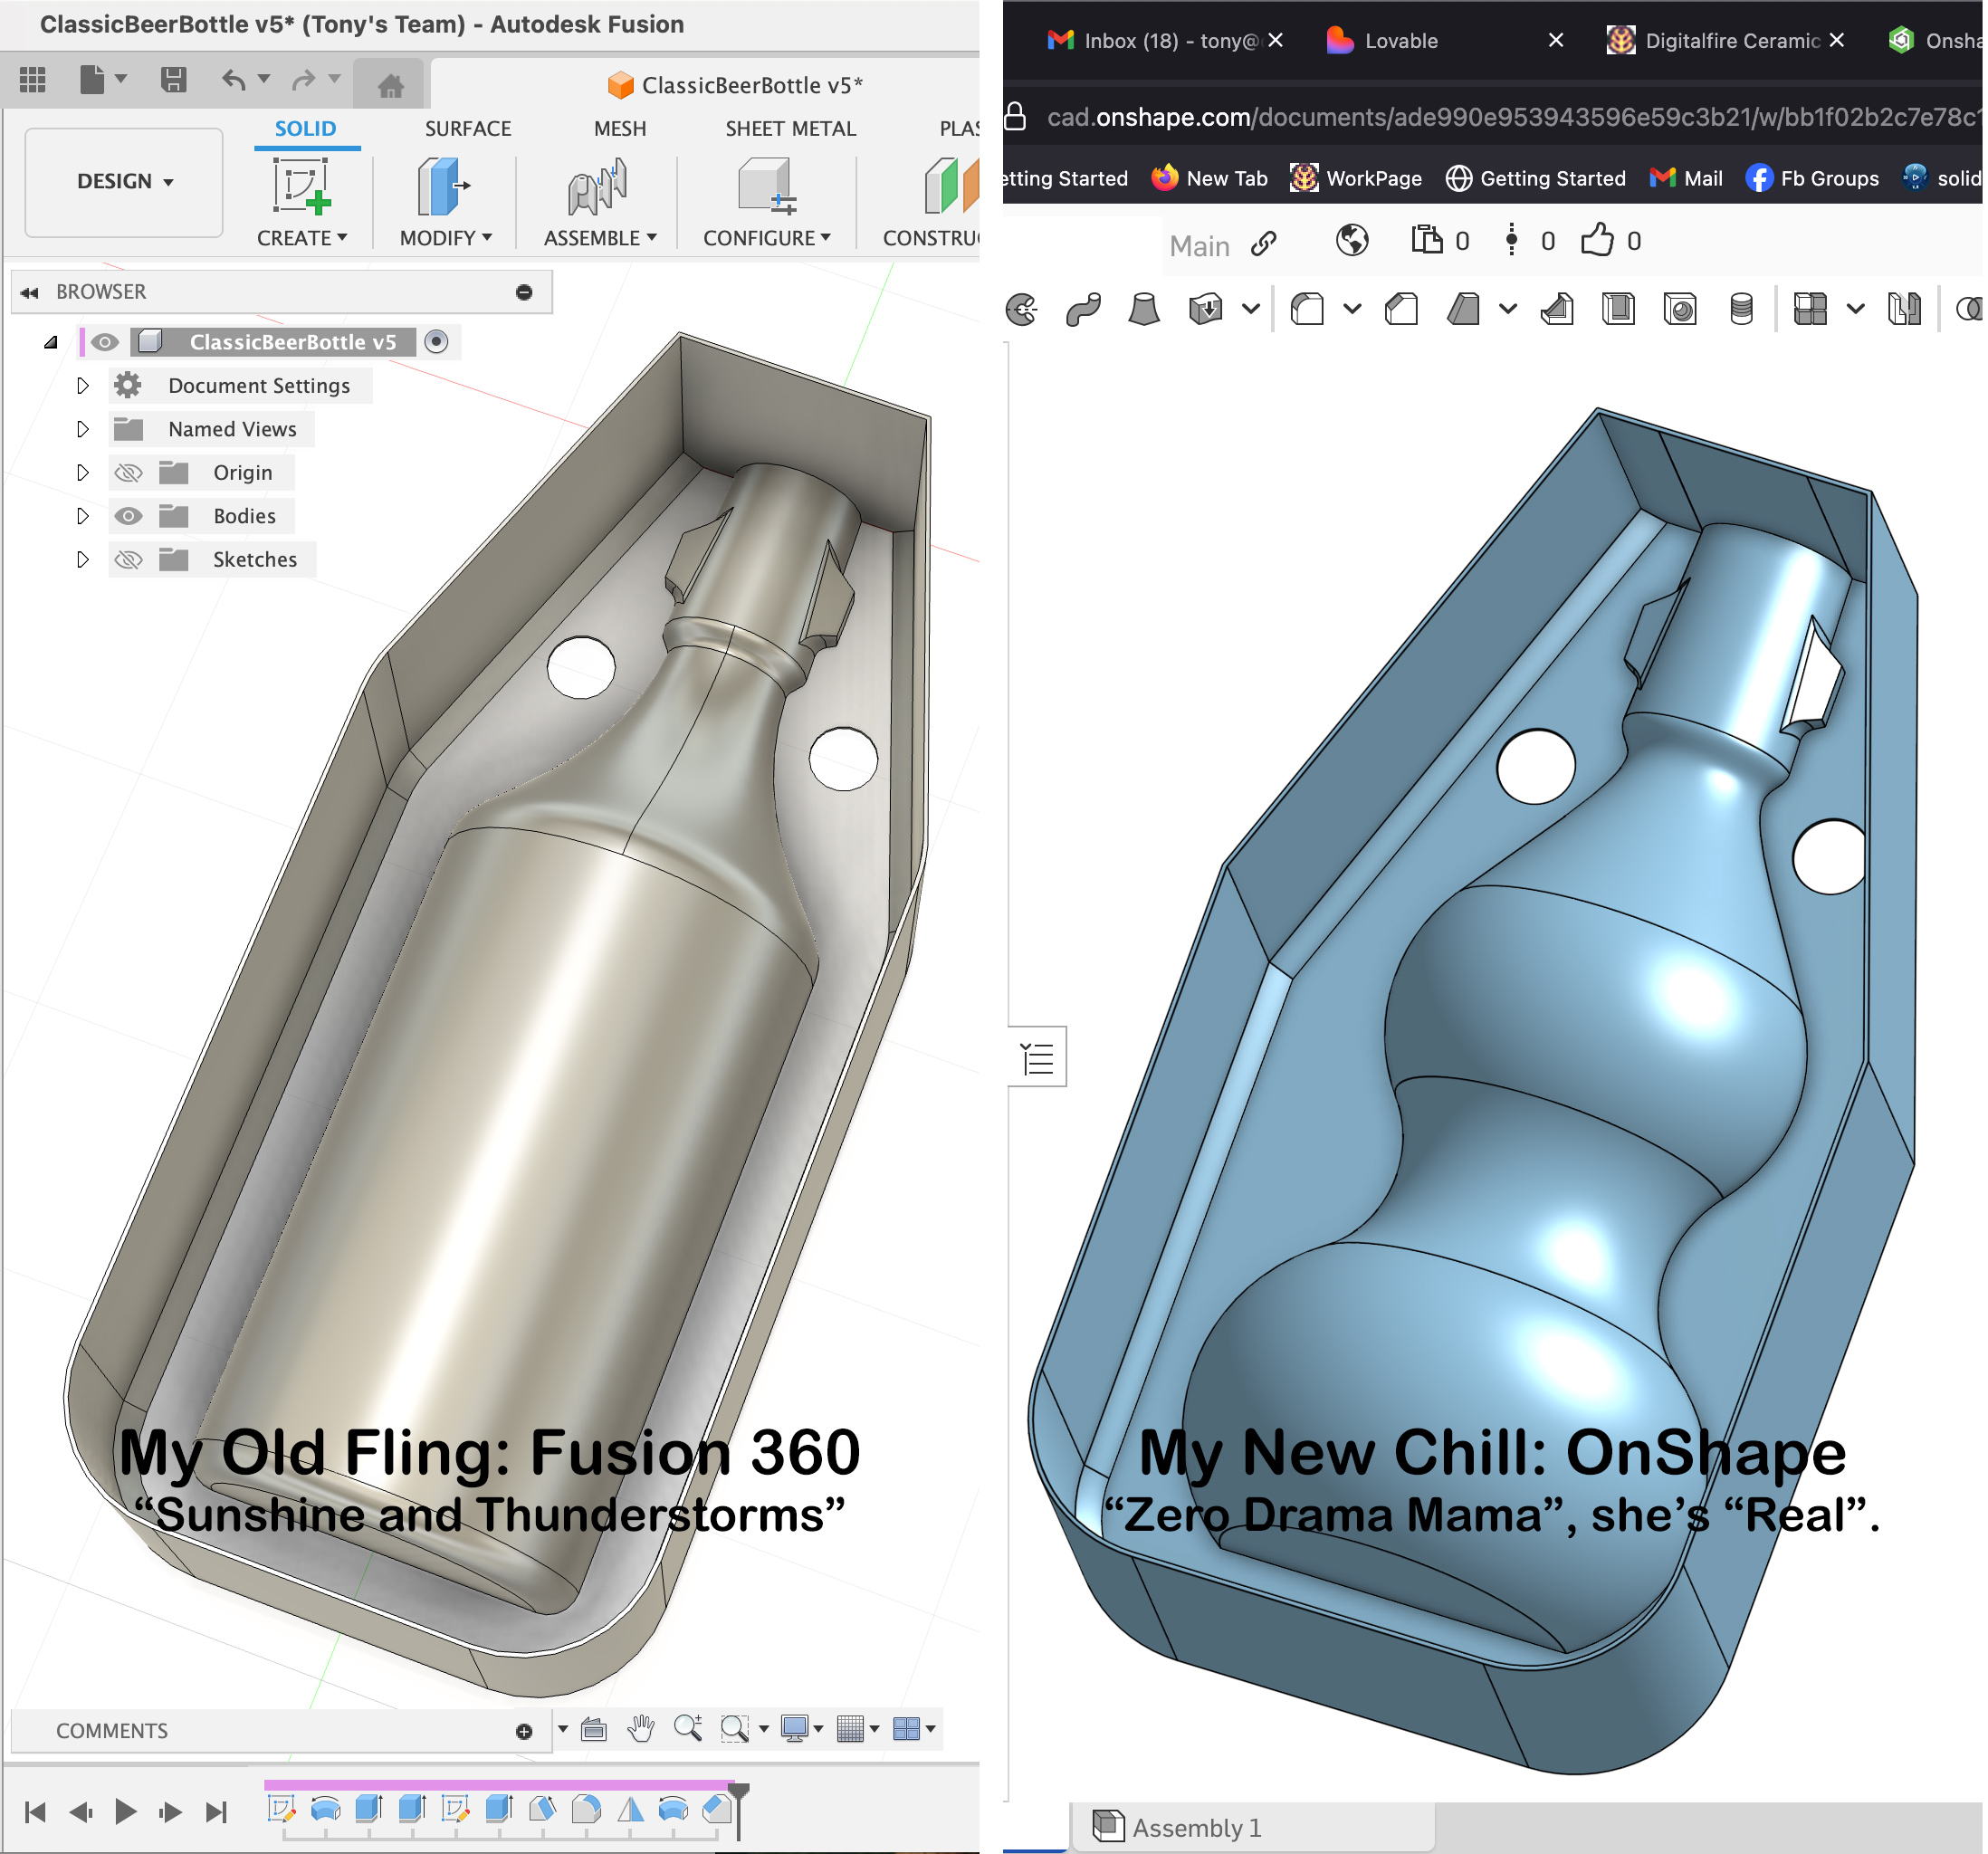
My Breakup with Fusion 360
I had a "Little Dictator", now I have a "Partner"
This picture has its own page with more detail, click here to see it.
I am just a simple guy, a hobby 3D printing "Maker", I focus on making molds for ceramic slip casting. I don't need a "high maintenance" CAD partner.
Fusion 360 and I were not a good match. It was her world, Windows and Mac only - I had to live in it. She was the “Queen of Complicated”, always on the drama channel of new features far beyond what I needed, rather than refining the simple ones I did need. And she was expensive to take out, costing way more than what I needed ($750/year).
OnShape is my new chill. She will go out, at full power, to Linux and iPad. She's a keeper. I don’t need a user manual for her. She's not a princess but a partner, social not a snob. I don't feel like I am on a roller coaster without a seatbelt, rather I am with someone that is easy to be around and way more powerful than she looks.
v3 Shelled AI Mug Using OnShape CAD
A great on-ramp to learning slip casting
Available on the Downloads page
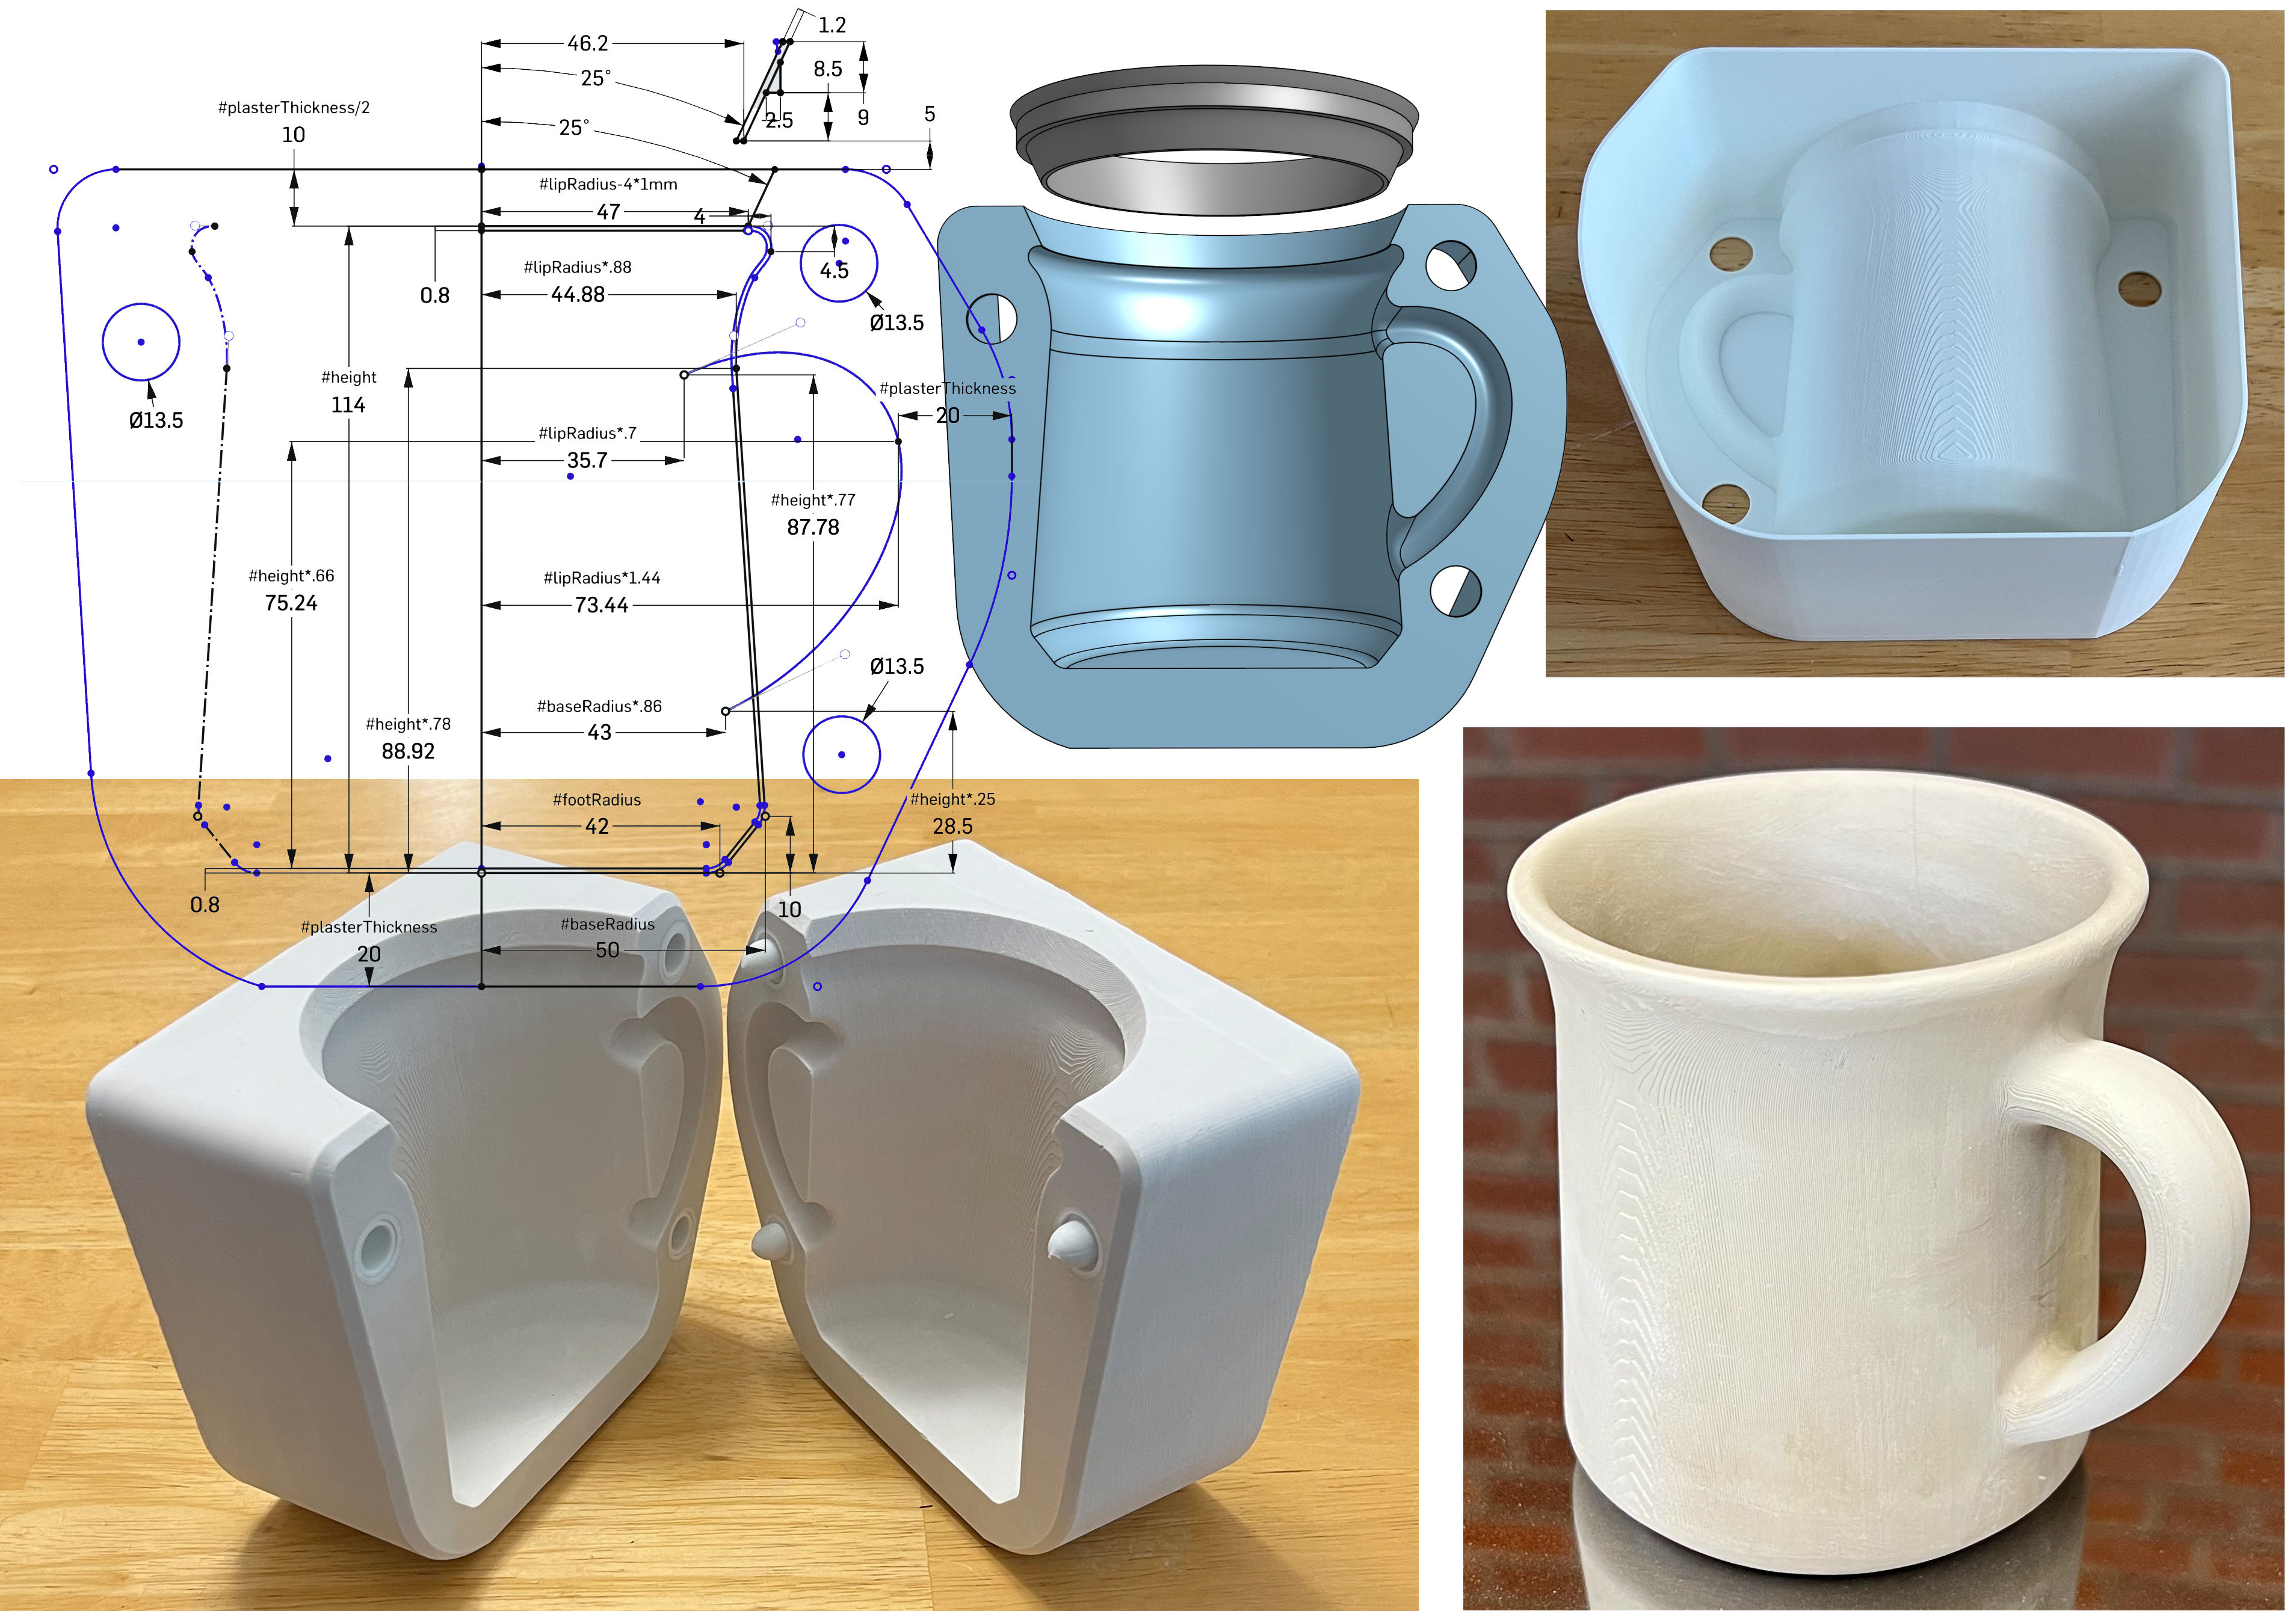
This picture has its own page with more detail, click here to see it.
Follow the video, step-by-step, to create this yourself. Don’t expect perfection the first pour, we did this dozens of times to get to this point. You’ll still make a few mistakes before getting it right, that is what DIY is about.
This design differs from the v2 drawing in that the plaster pouring cavity is formed by shelling (hollowing) the back side (top right). And this is designed for removal using a heat gun. This method has several advantages:
-No sketch offset or extrusion was needed to make the outer wall.
-Because the first 3D action is to extrude everything as one solid mass, corners of the outer 3D perimeter can be chamfered (but don’t do it so much that that there is insufficient thickness for the natches).
-The mug's geometry (offset inward by 0.8mm) is revolved, swept and bevelled by cutting into the block. Shelling to the same 0.8mm wall thickness, from the backside of the block, produces the cavity needed (top right).
-The last steps, after shelling, are chamfering the outside inner corner, cutting the holes for the natches and revolving the pouring spout (as a separate body).
-Our v3 natch system continues to work well with this (lower left).
-Printing artifacts are not a problem for prototype molds (visible op right). Production is asking me to enhance these (a freshly cast mug is shown lower right).
-The plaster mold is of stunning quality (the PLA 3D print was softened using a heat gun and carefully removed using needle-nose pliers).
-Slip cast mugs most often have poor-quality and oval lips. This one stays round because of the outward flare and the quality is better because the 3D printed pouring spout also acts as a cutting guide at the pre-removal stage.
-The PLA pouring spout is deep and absorbs no water. Thus, the slip level does not need to be topped up during casting, the slip surface stays flatter (not developing a bowl shape) so pour-out time can be accurately gauged by its slip level.
There are many casting body recipes that would work with this. DIY CAD skills will enable you to follow me into another exciting world: Low-cost 3D printing of the clay itself! Coming soon.
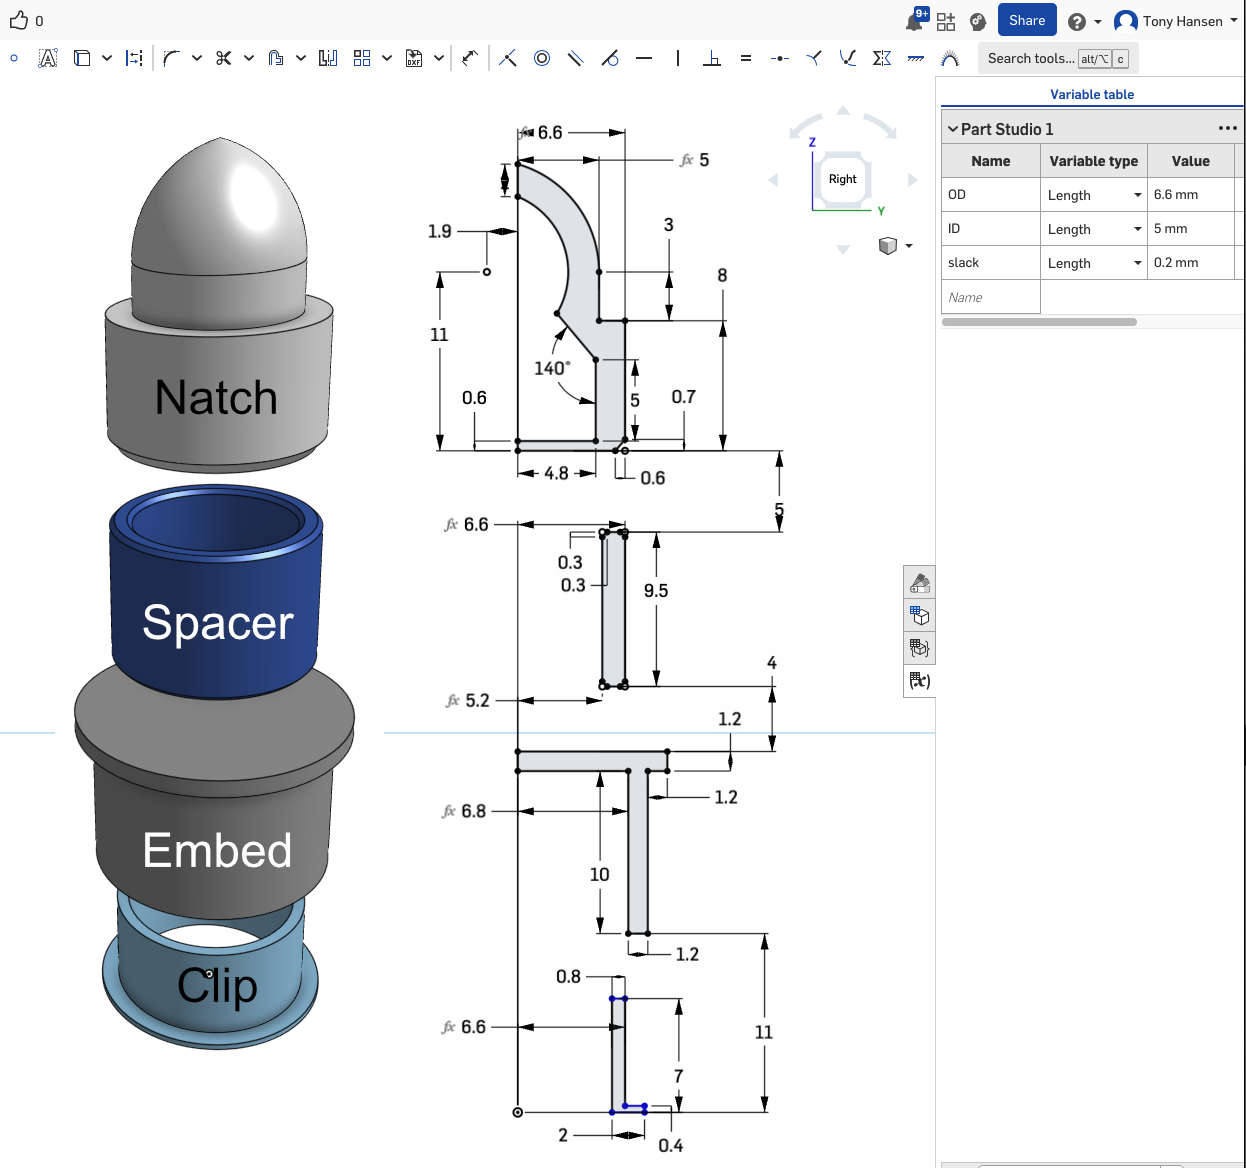
v2 Digitalfire Mold Natches in OnShape
These are even better than before
Available on the Downloads page
This picture has its own page with more detail, click here to see it.
Until now, I have done these in Fusion 360. But in OnShape and my new dimensioning method they are even better. If you are a hobby maker like me, then OnShape is free. This updated design only has three parameters: ID (inside diameter), OD (outside diameter), and slack (addition or subtraction for a good fit).
Print all four of these at the same time. Repeat cycles of adjusting the slack parameter and printing again until they fit into and over each other well (the better quality your printer to smaller the "slack" dimension can be). Print them in multiples of seven: Two natches, two embeds, two clips and one spacer (these are the proportions in which you will be consuming them).
An advantage of OnShape is that it enables sharing; the link is below. To 3D-print it select all four, right-click on one of them, export to 3MF format, open that file in your slicer software, position (and replicate/orient items), then print or export to a G-Code file.
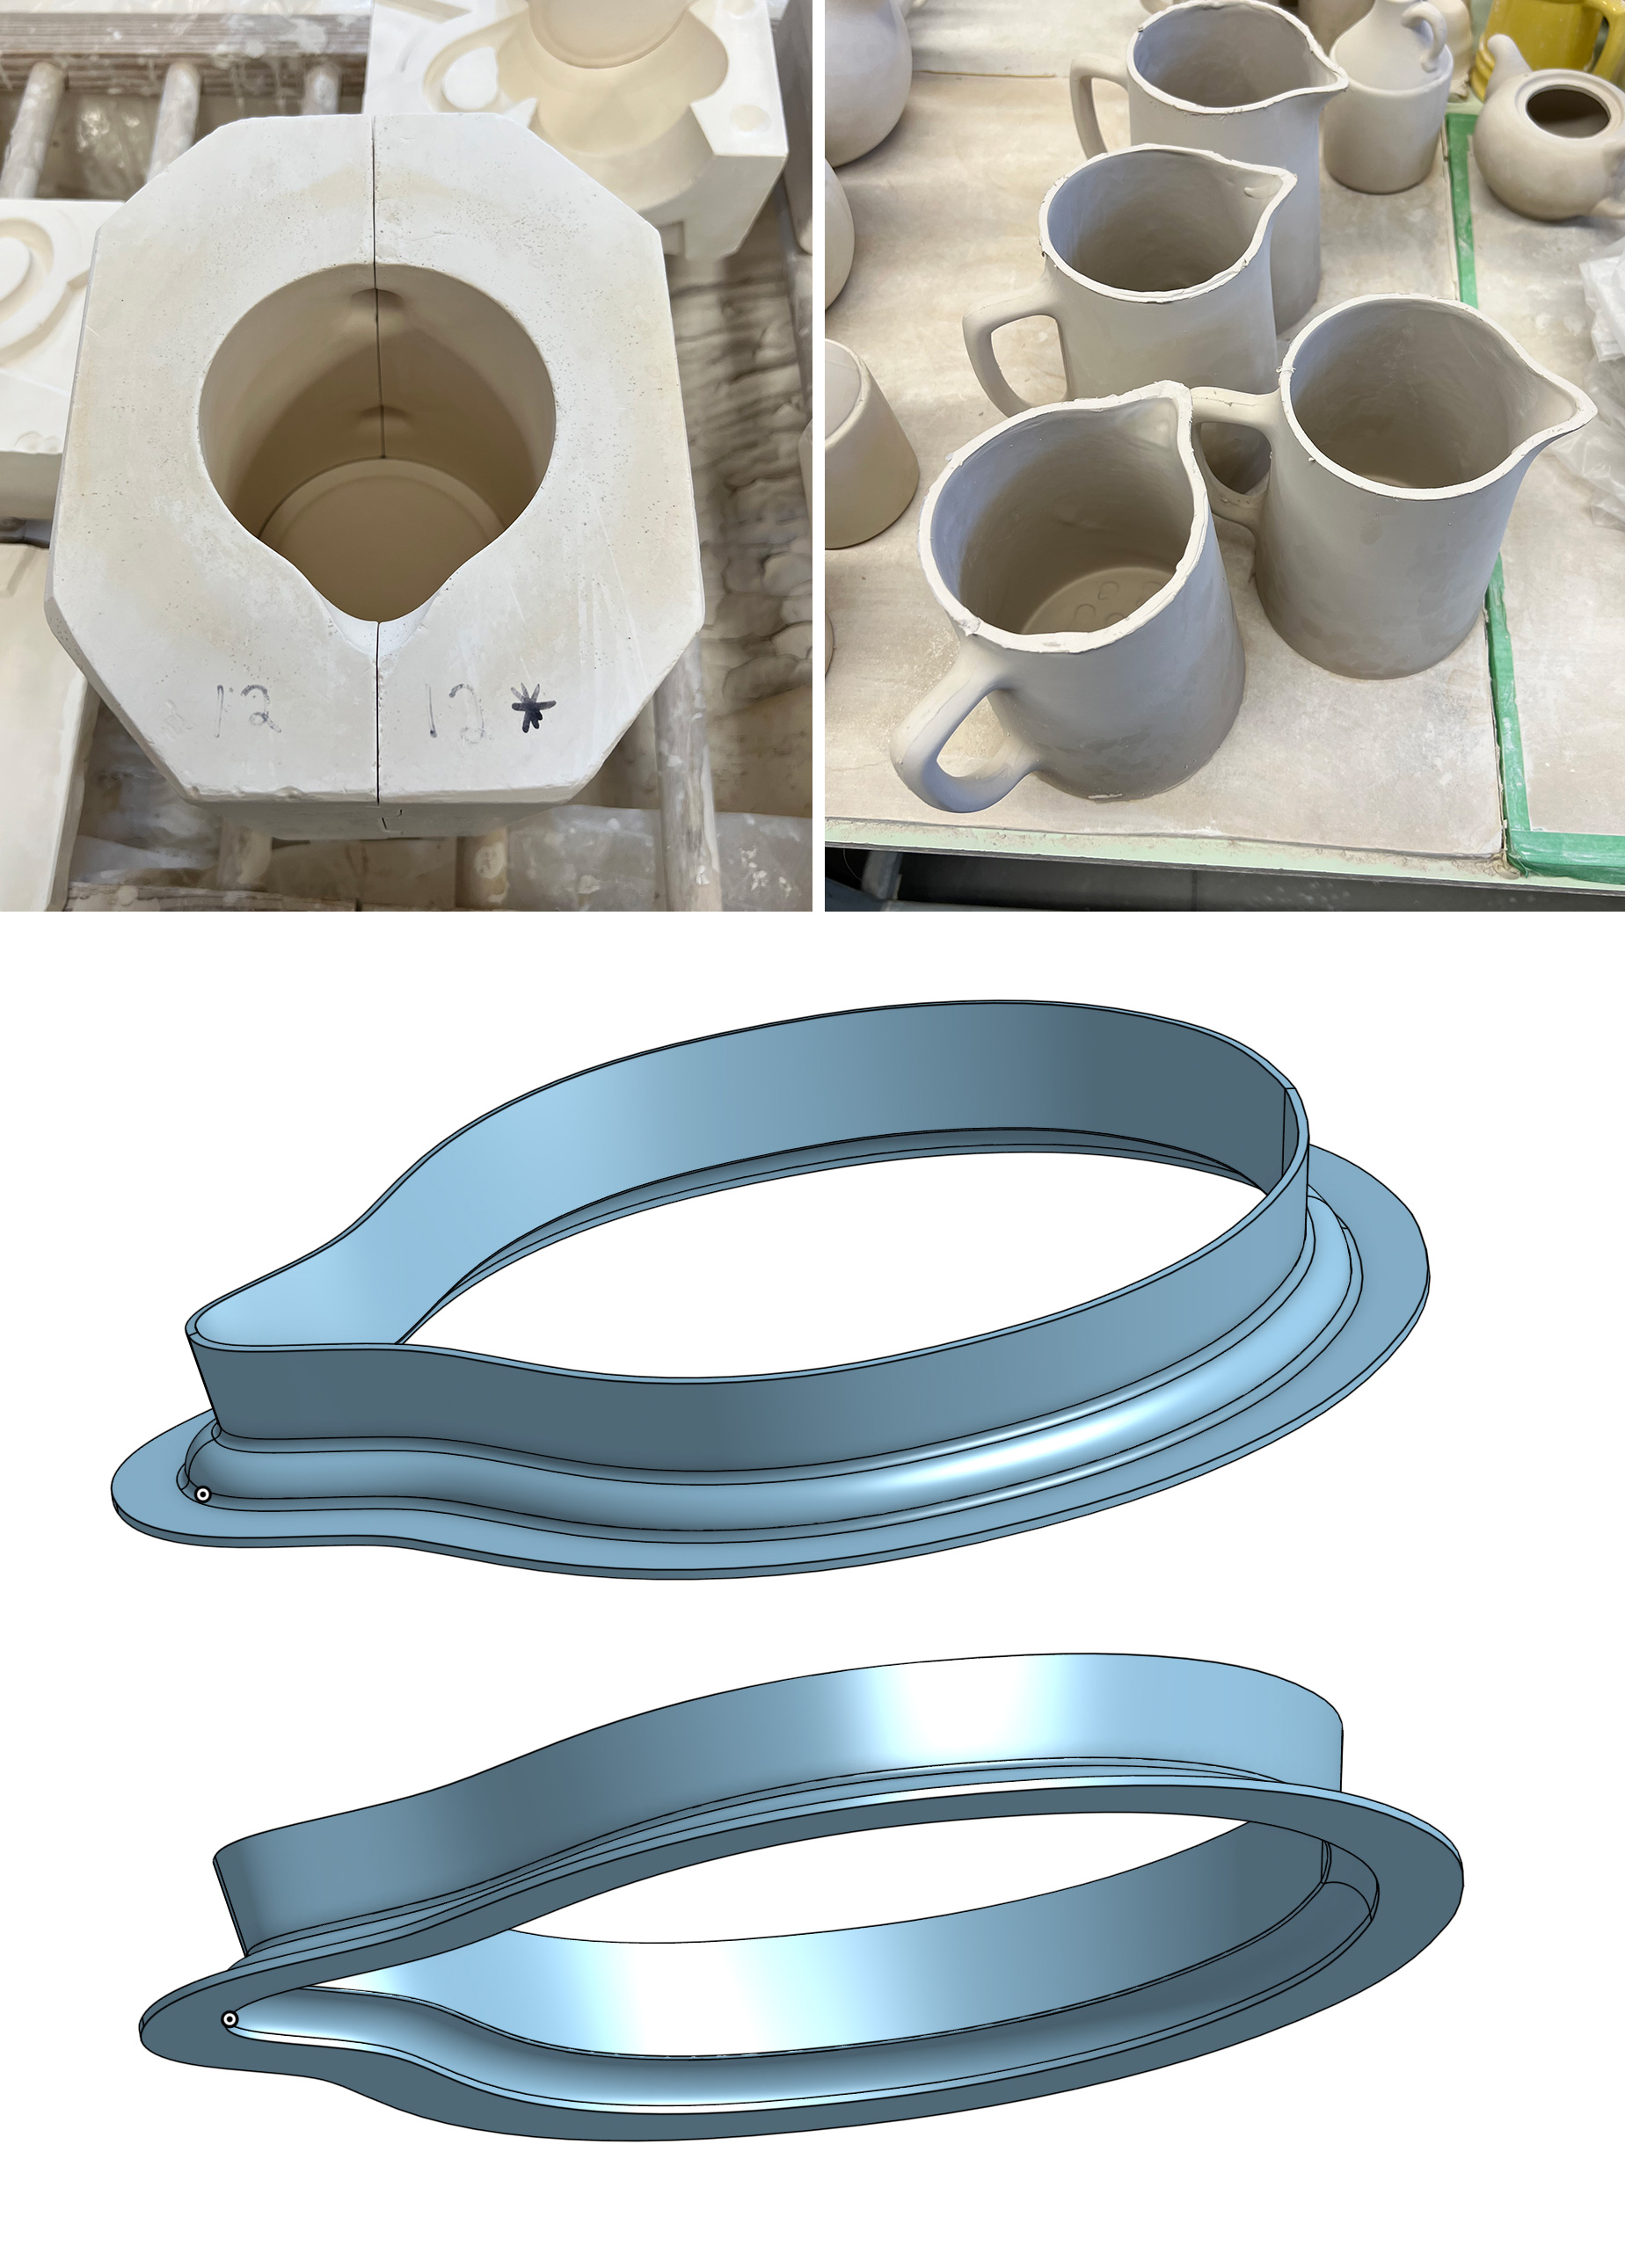
Quick fix to make these spareless molds more usable
This picture has its own page with more detail, click here to see it.
These legacy slip casting molds from Medalta Potteries (made from 80 year old masters). They are difficult and time-consuming to use and produce less than optimal results because they have no top section (this no spare) and require constant filling during cast time. Demolding requires cutting the lip flat (top right). But a lot of time trimming and sponging is needed to round it again, but making the lip even and symmetric is difficult to say the least.
I found a way to make these molds easier to use and better: A 3D printed spare/pouring spout that also defines a rounded rim. It can be glued to the top of the mold with slip. Of course, the PLA print is not absorbent, but this still works because the mold top edge is able to dewater the slip even inside the contoured top it forms. The print also acts as a cutting guide to cleanly cut anway any clay inside the spout section, leaving a clean line inside the lip. And the shrinkage of the clay pulls the pitcher lip away from the print.
Links
| Projects |
Beer Bottle Master Mold via 3D Printing
A project that took several years of failures and blind allies and is finally coming together - so much simpler than expected! |
| Projects |
A cereal bowl jigger mold made using 3D printing
A new way to 3D-print your way to making jigger molds and templates. The molds are encased in a 3D printed shell that makes them fit perfectly into the cuphead. And the template is precise and very effectivwe. |
| Projects |
Coffee Mug Slip Casting Mold via 3D Printing
A potter can now use AI, 3D CAD, 3D printing and custom clay bodies to slip-cast beautiful quality stoneware pottery mugs. It is efficient and practical. |
| Projects |
Cookie Cutting clay with 3D printed cutters
We are finding more and more applications for this simple process of cookie-cutting shapes in ceramics. You won't believe whats possible and how easy it is to get started. |
| Projects |
Medalta Ball Pitcher Slip Casting Mold via 3D Printing
A project to make a reproduction of a Medalta Potteries piece that was done during the 1940s. This is the smallest of the three sizes they made. |
| Projects | Nursery plant pot mold via 3D printing |
| Glossary |
3D-Printing
Standard 3D printing technology (not printing with clay itself) is very useful to potters and ceramic industry in making objects that assist and enable production. |
| Glossary |
3D Design
3D Design software is used to create dimensionally accurate objects by sketching 2D geometry and transforming it using tools to rotate, extrude, sweep, etc. The software generates the polygon surface. |
| Glossary |
3D Printer
Standard 3D printers (not clay 3D printers) are incredibly useful in ceramic production and design, bringing difficult processes within reach of potters and hobbyists. |
| Glossary |
3D Printing Clay
Clay for 3D printing. People are getting carried away with the technology and forgetting the common sense things relating to the clay. |
| Glossary |
3D Modeling
3D surface modelling tools enable the creation of objects by starting with a basic shape having polygon surfaces and then subdividing, pushing and pulling the quadrilateral or triangle polygon meshes to form shapes. |
| Glossary |
FDM, SLA, SLS, MEX 3D printing technologies
Knowing a little about the main types of 3D printing technologies can help you decide which road to take. |
| Media |
3D Printing a Clay Cookie Cutter-Stamper
Create a clay cookie cutter by exporting a vector image from Illustrator into Fusion 360, adding width to lines and extruding them to form the cutter, stamp and base |
| Media |
Make a precision plaster mold for slip casting using Fusion 360 and 3D Printing
In 11 minutes you will learn a new way to make complex plaster molds for slip casting - faster and more precise than ever before. Anyone can do this. |
| Media |
Design a Triangular Pottery Plate Block Mold in Fusion 360
Lilly will take you step-by-step through the process of parametrically drawing a triangular plate with curved sides and rounded corners, for 3D printing to pour a plaster working mold. |
| Media |
Drawing a Mug Handle Mold in Fusion 360
Lilly will take you step-by-step through the process of drawing a shell mold that can be 3D printed and used to cast a plaster mold for slip casting perfect-fitting handles. |
Video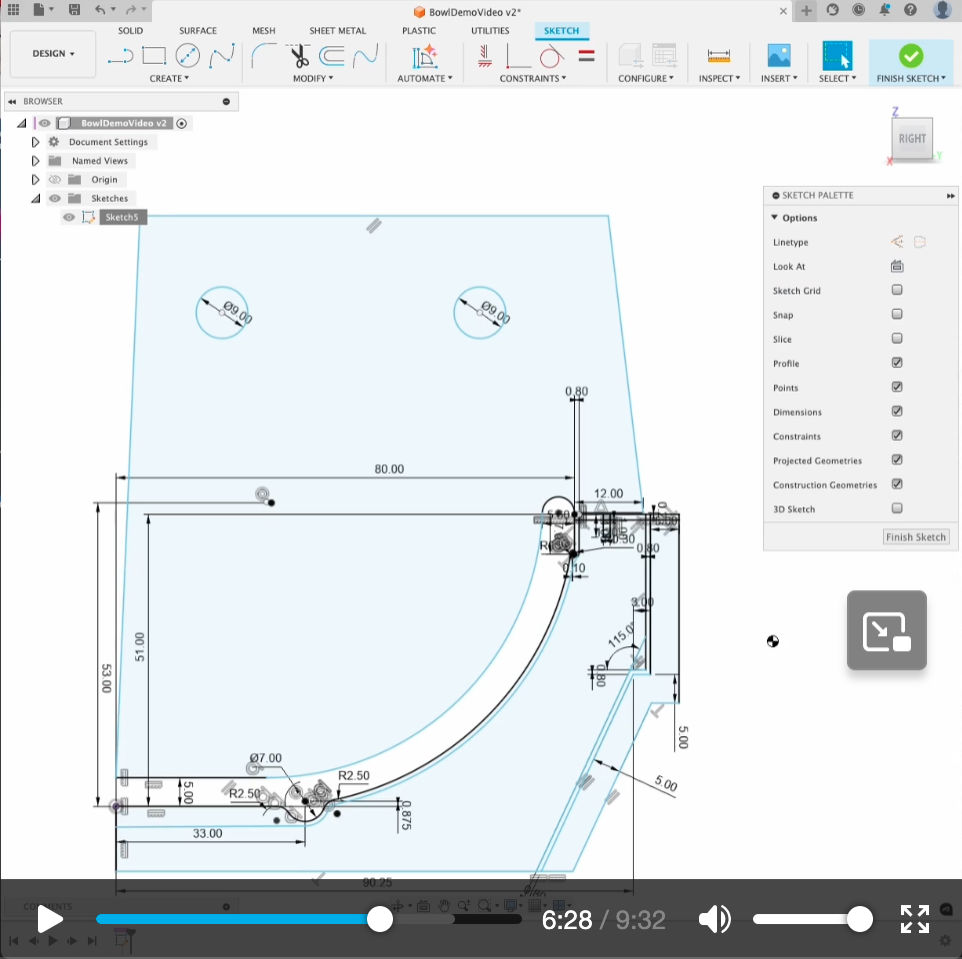 |
Designing a Jigger Mold for a Bowl Using Fusion 360 CAD
From scratch we will create a sketch, constraining as we go, of everything needed to be able to revolve 3D shapes to cast a model of the outside shape of the bowl, a mold to cast the plaster jigger mold around it, a spacer ring to line them up concentrically and the template to bolt to the jigger arm. Every single step is covered so that potters or even hobbyists can do this. A landing page at digitalfire.com is the gateway to everything you need to know to start jiggering on a small scale. |
Video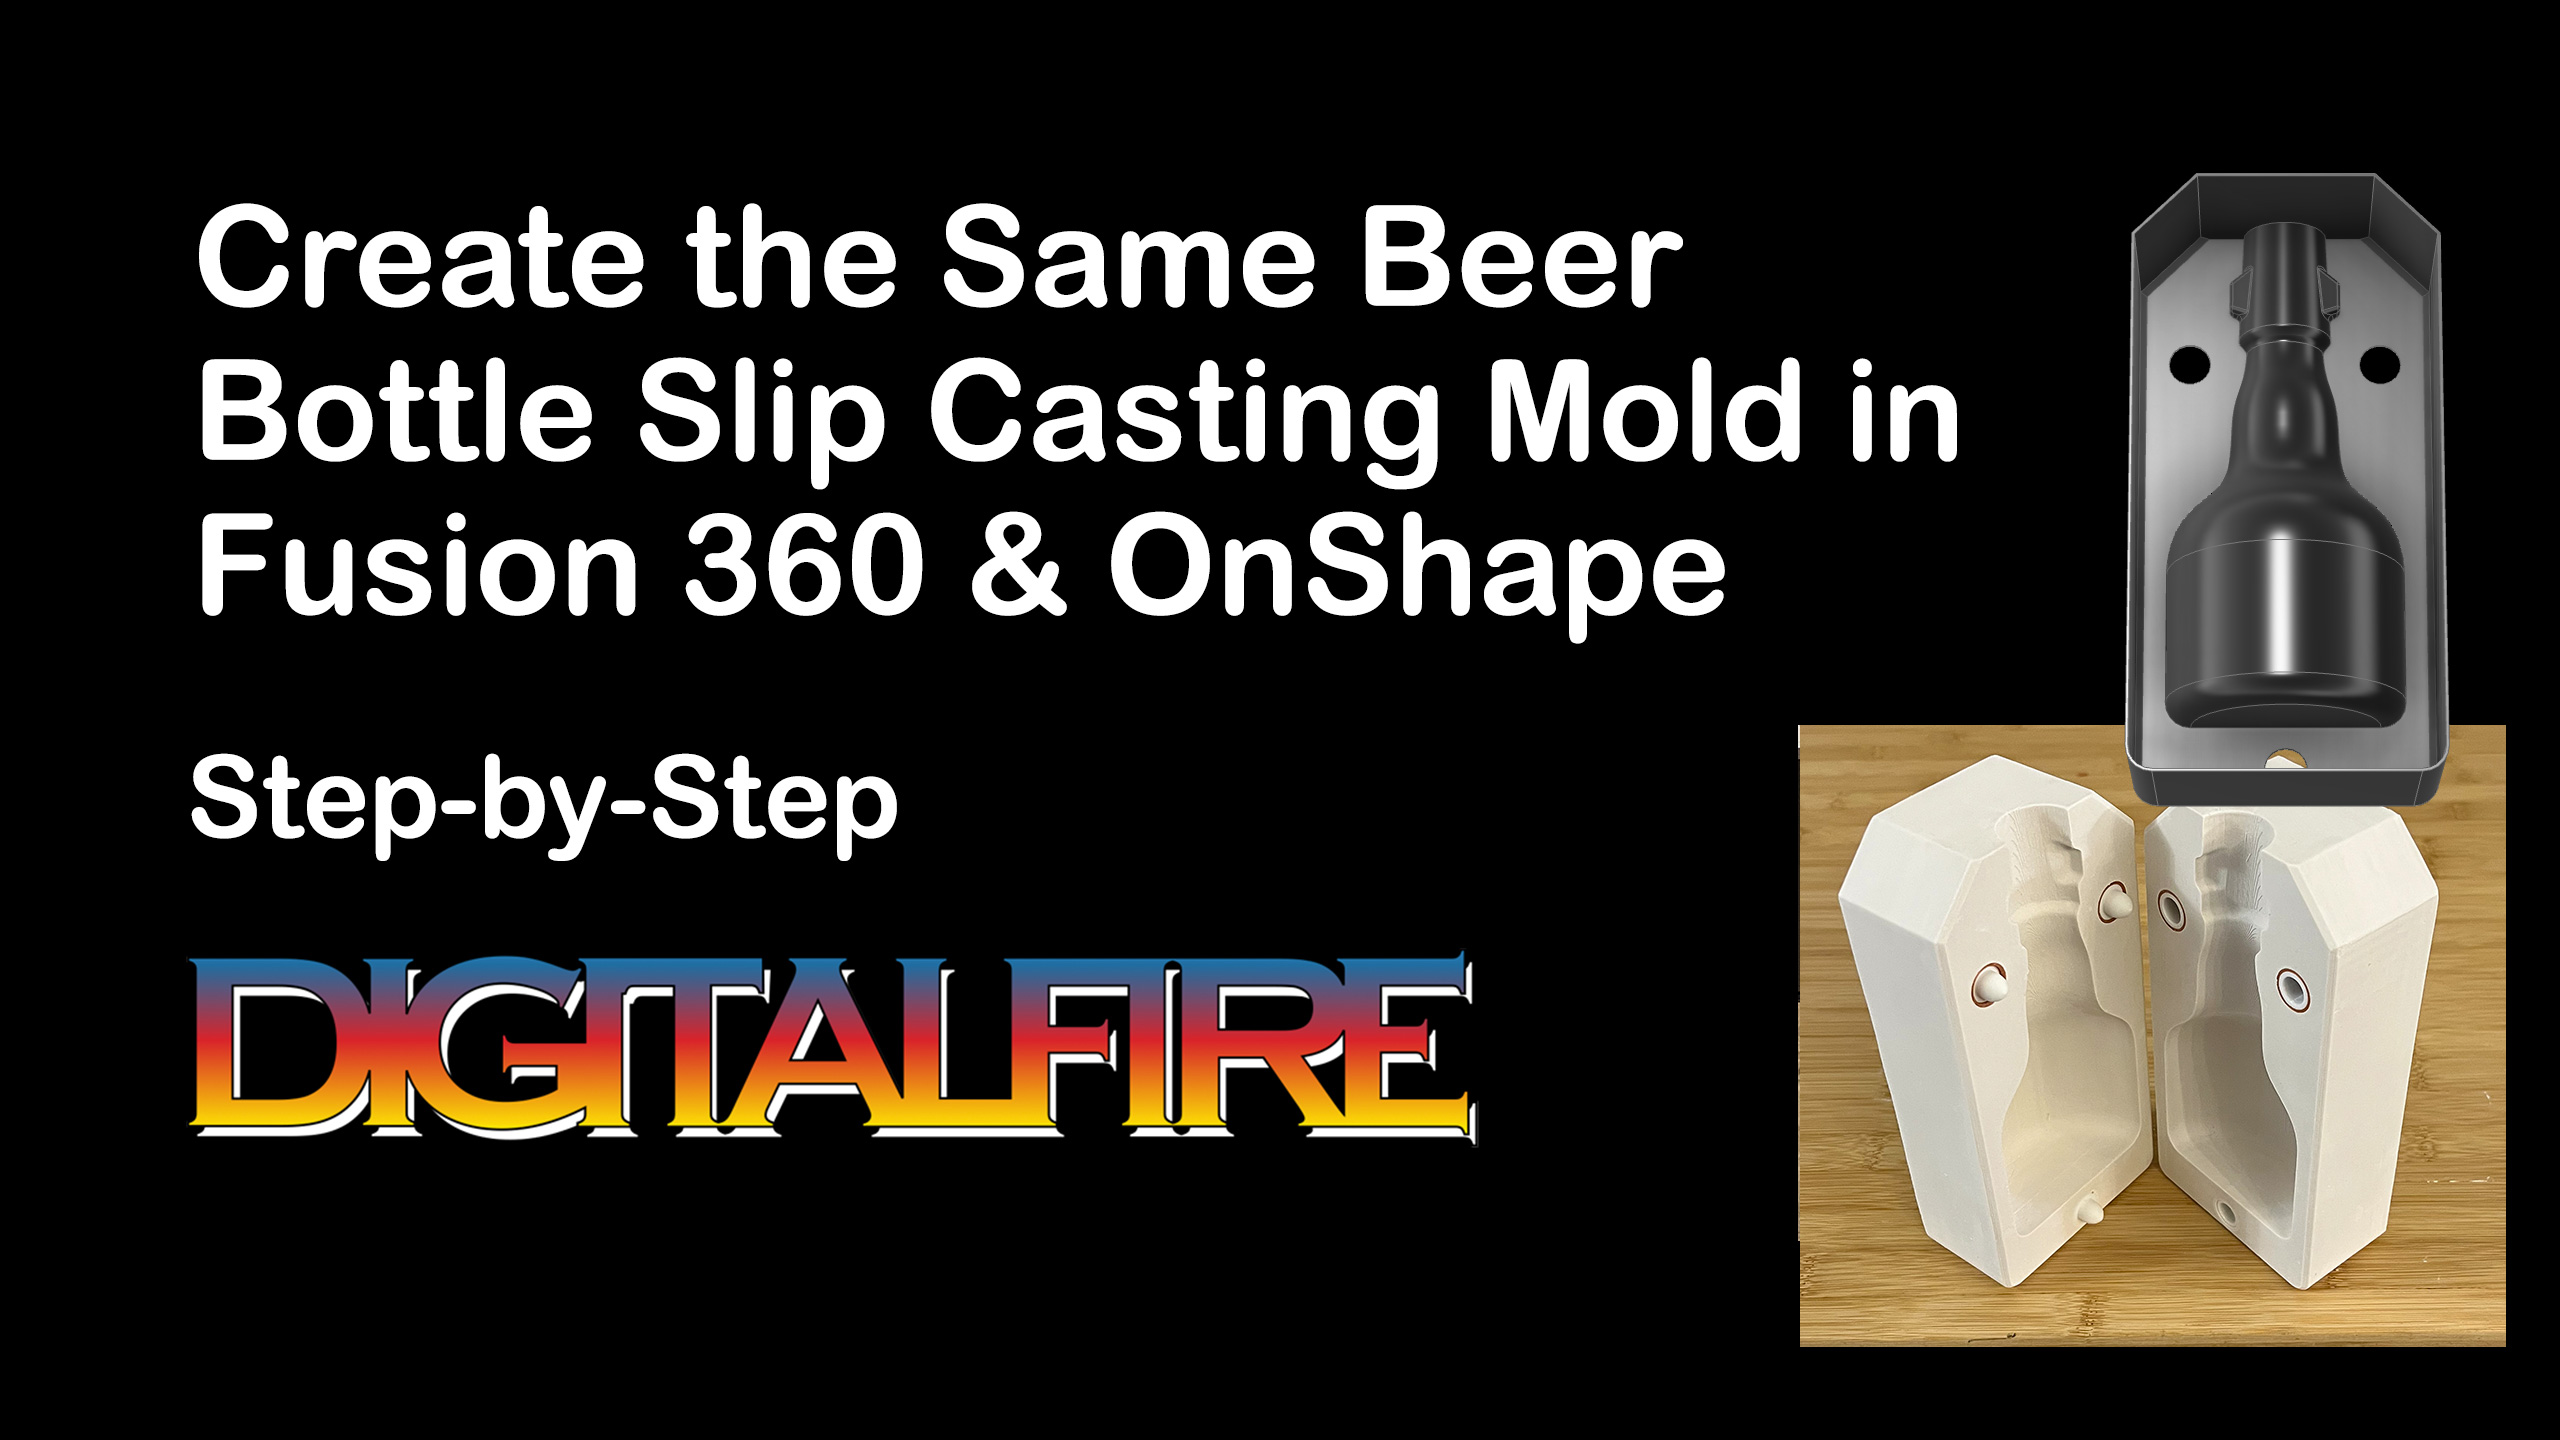 |
Same Beer Bottle Mold Using Fusion 360 and OnShape CAD
I will make a classic Medalta beer bottle case-mold for 3D printing using OnShape CAD (just pour in plaster and you have a mold to slip cast bottles). I will highlight the differences between OnShape and Fusion 360 as we go. |
Video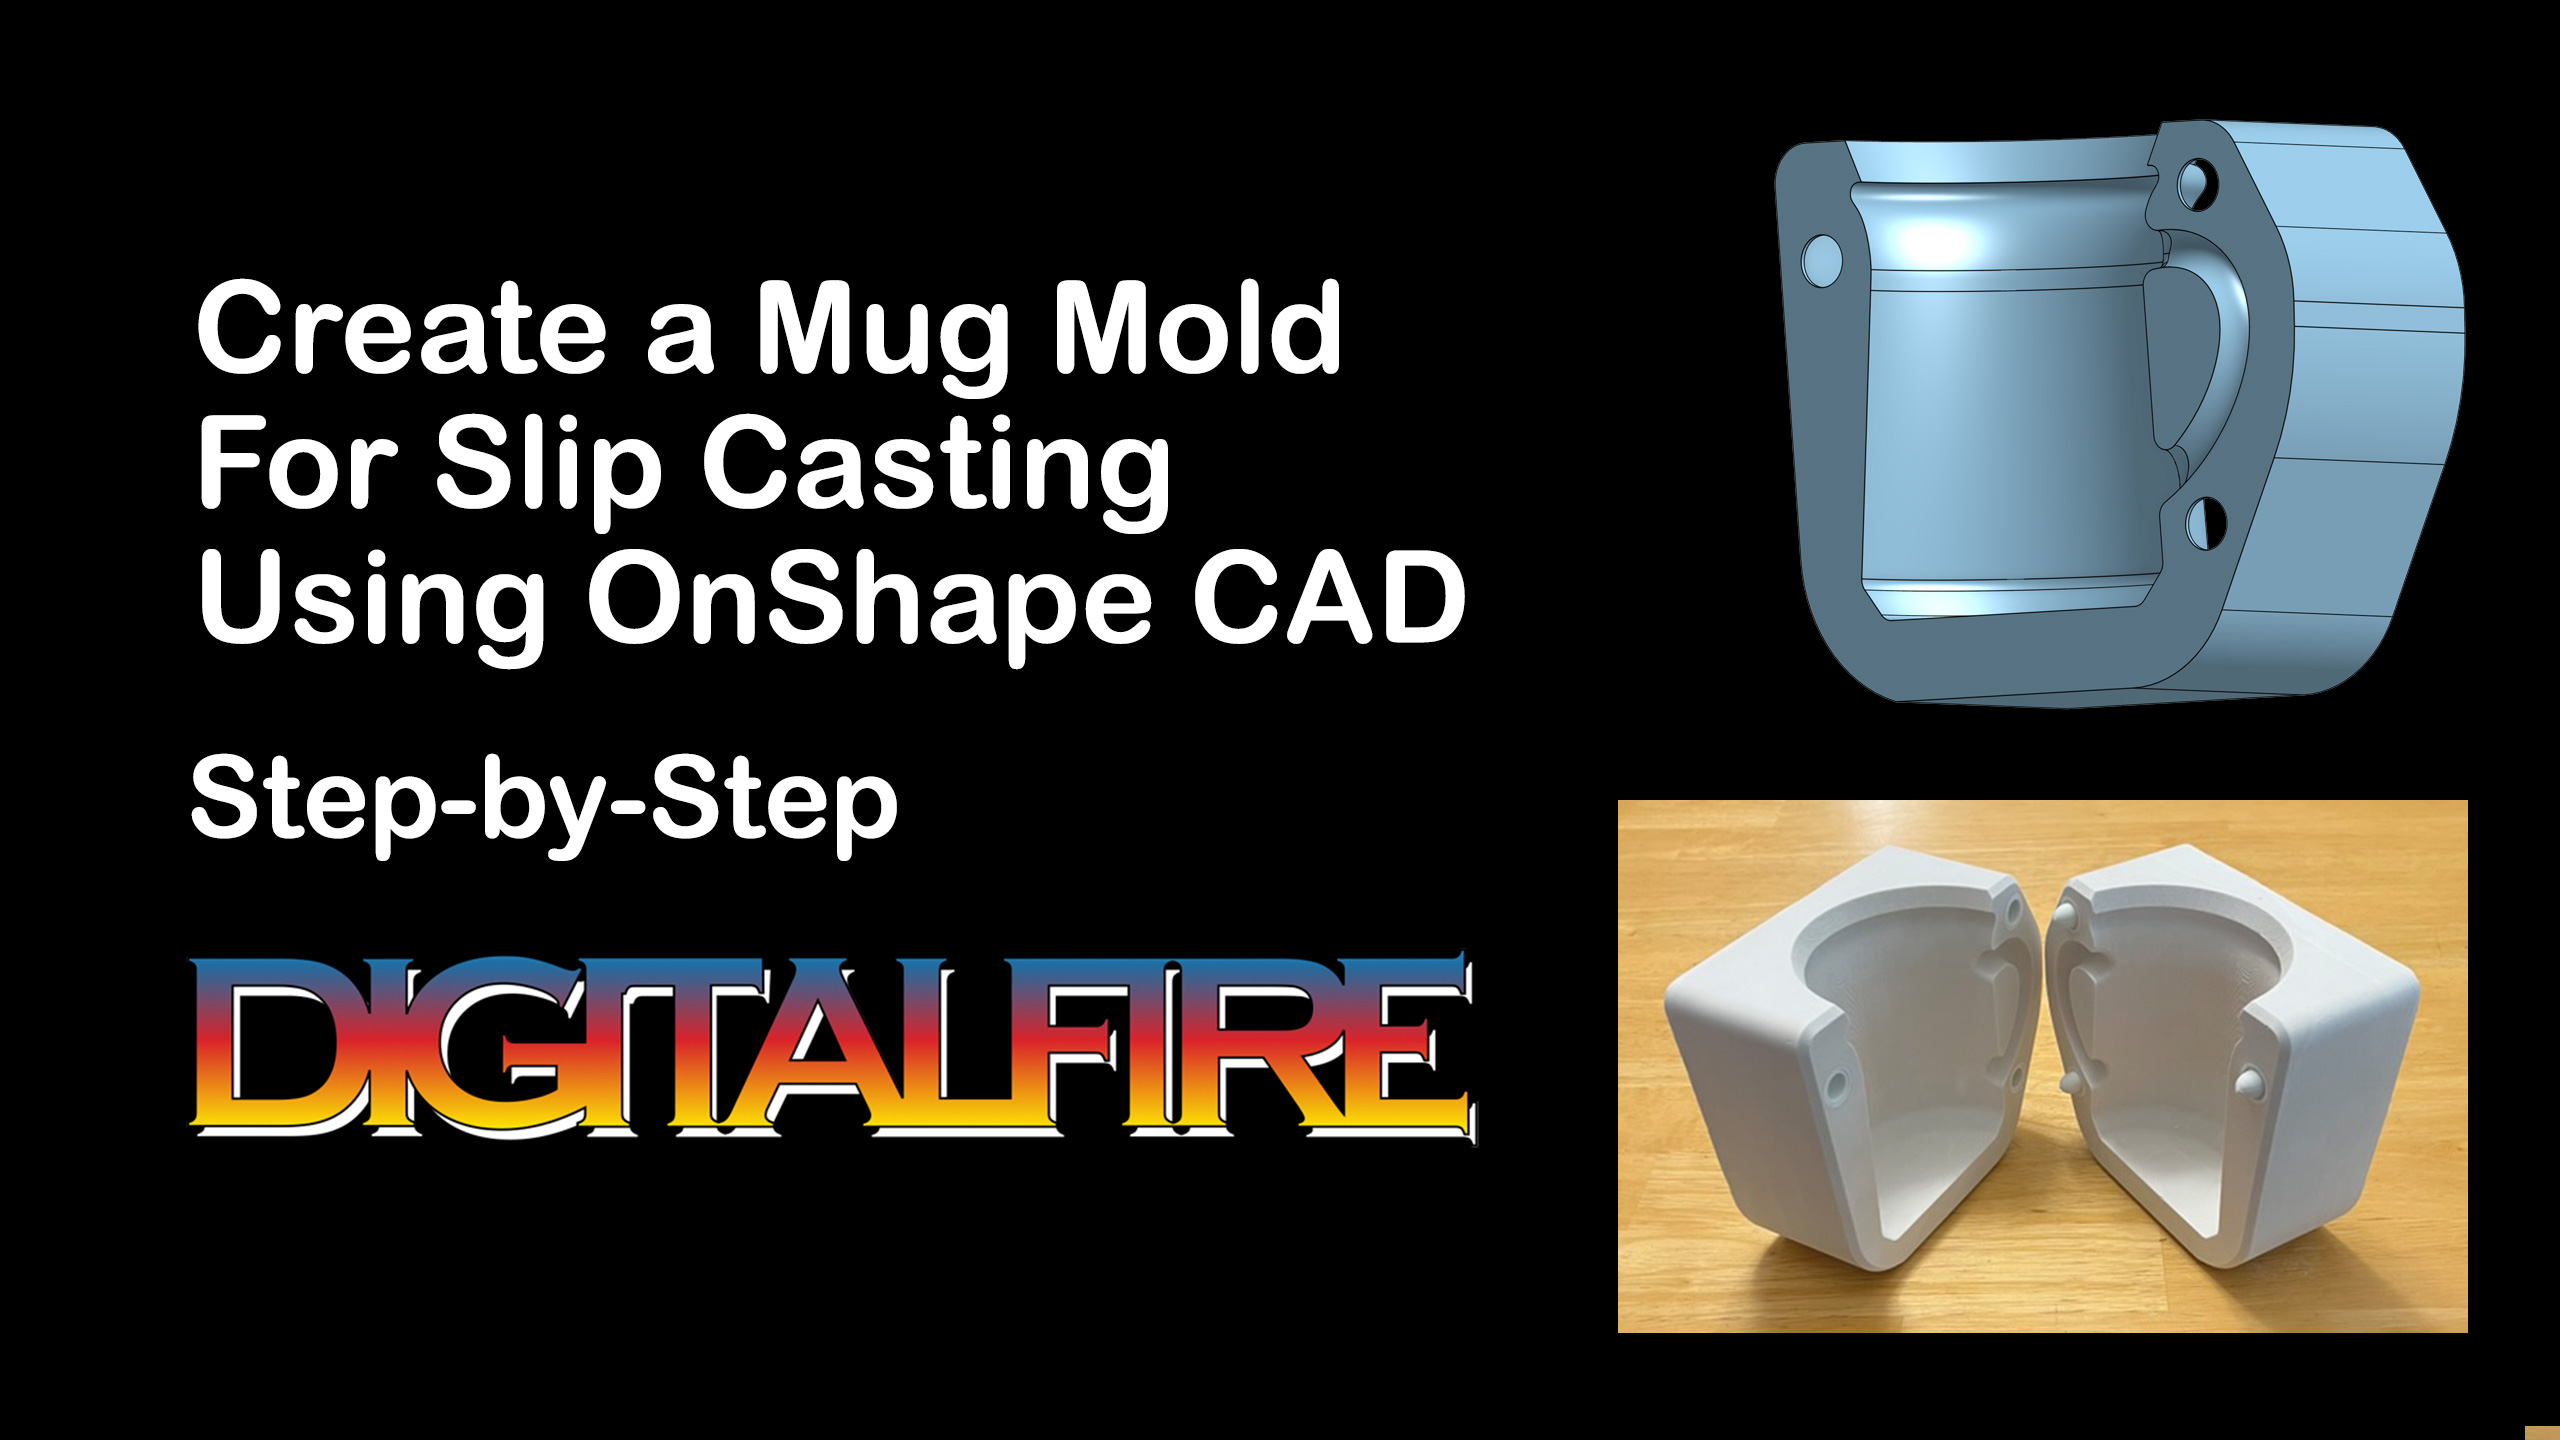 |
Drawing a Mug Mold Using OnShape CAD
Follow me, step-by-step, as I draw a coffee mug case mold, with handle. You'll be able to 3D print this using PLA filament in a standard consumer printer, pour in plaster to make a working mold. If you are coming from Fusion 360 the process will be familiar. |
 PayPal | No tracking, No ads, No paywall, No transient content! Just organized, concise information constantly updated and improved. Was this helpful? Consider supporting me. |
Got a Question?
Buy me a coffee and we can talk 

https://digitalfire.com, All Rights Reserved
Privacy Policy