A cereal bowl jigger mold made using 3D printing
Beer Bottle Master Mold via 3D Printing
Better porosity for Brown Sugar Savers
Build a kiln monitoring device
Celebration Project
Comparing the Melt Fluidity of 16 Frits
Cookie Cutting clay with 3D printed cutters
Evaluating a clay's suitability for use in pottery
Make a mold for 4-gallon stackable calciners
Make Your Own Pyrometric Cones
Make your own sieve shaker to process ceramic slurries
Making a high quality ceramic tile
Making a Plaster Table
Making Bricks
Making our own kiln posts using a hand extruder
Medalta Ball Pitcher Slip Casting Mold via 3D Printing
Medalta Jug Master Mold Development
Mold Natches
Mother Nature's Porcelain - Plainsman 3B
Mug Handle Casting
Nursery plant pot mold via 3D printing
Pie-Crust Mug-Making Method
Plainsman 3D, Mother Nature's Porcelain/Stoneware
Project to Document a Shimpo Jiggering Attachment
Roll, Cut, Pull, Attach Handle-making Method
Slurry Mixing and Dewatering Your Own Clay Body
Testing a New Load of EP Kaolin
Using milk as a glaze
Yixing Teapots
Coffee Mug Slip Casting Mold via 3D Printing
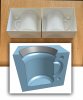
Potters who want to increase mug production have almost always looked to the jiggering process. But only the brave did it (because of the expense of equipment, the hassle of making and attaching handles, the special soft plastic clay needed, the burden of fixup work, and just the mess and difficulty of making the process work). Slip casting didn’t seem like an alternative (because of poorly formed lips, the hassle of casting and joining handles, the thin walls and, of course, the overwhelming difficulty of making the molds). But, traditional potters can now do their own 3D CAD work, and make their own custom molds. And the method I’ll show you here produces a quality formed lip, attached handles, thick walls and fast casting. This project was evolutionary and revolutionary for me.
Version 1: Pictures are shown below. That work was done in Fusion 360. Unfortunately, my previous traditional mold making experience led me down a path of a lot of extra work and a needlessly elaborate block mold. For both v1 and v2 I was also needlessly worried about printing artifacts.
Version 2: I 3D-printed the case mold directly, using separate side rails, expecting to reuse it to make multiple molds. I also printed it upright and each half in two pieces (which I had to glue together). And I made separate handle molds. Again, this proved to be far more elaborate than needed.
Version 3: I had learned OnShape and how to make and print a super-light weight case mold that can be removed using a heat gun. Printing it flat creates poured halves that fit, without the need for sanding. And this method better lends itself to the use of my natch system. It works so well that making a rubber case mold seems unnecessary. By this time I had also learned to create elegantly simple CAD designs (previous efforts had dozens of steps in the history list).
Long casting times usually make thicker walls impractical in slip casting. However, we now have casting bodies that make it possible to cast 5mm walls in 10-15 minutes, meaning we can make heavy stoneware mugs using the slip casing process. We also have black and dark red burning casting body recipes. These interact with glazes to produce beautiful stoneware-type surfaces. A real beauty of slip casting is that you can mix your own clay body recipes so you can fine-tune their degree of vitrification, color and glaze fit.
Related Information
v3 Shelled AI Mug Using OnShape CAD
A great on-ramp to learning slip casting
Available on the Downloads page
This picture has its own page with more detail, click here to see it.
Follow the video, step-by-step, to create this yourself. Don’t expect perfection the first pour, we did this dozens of times to get to this point. You’ll still make a few mistakes before getting it right, that is what DIY is about.
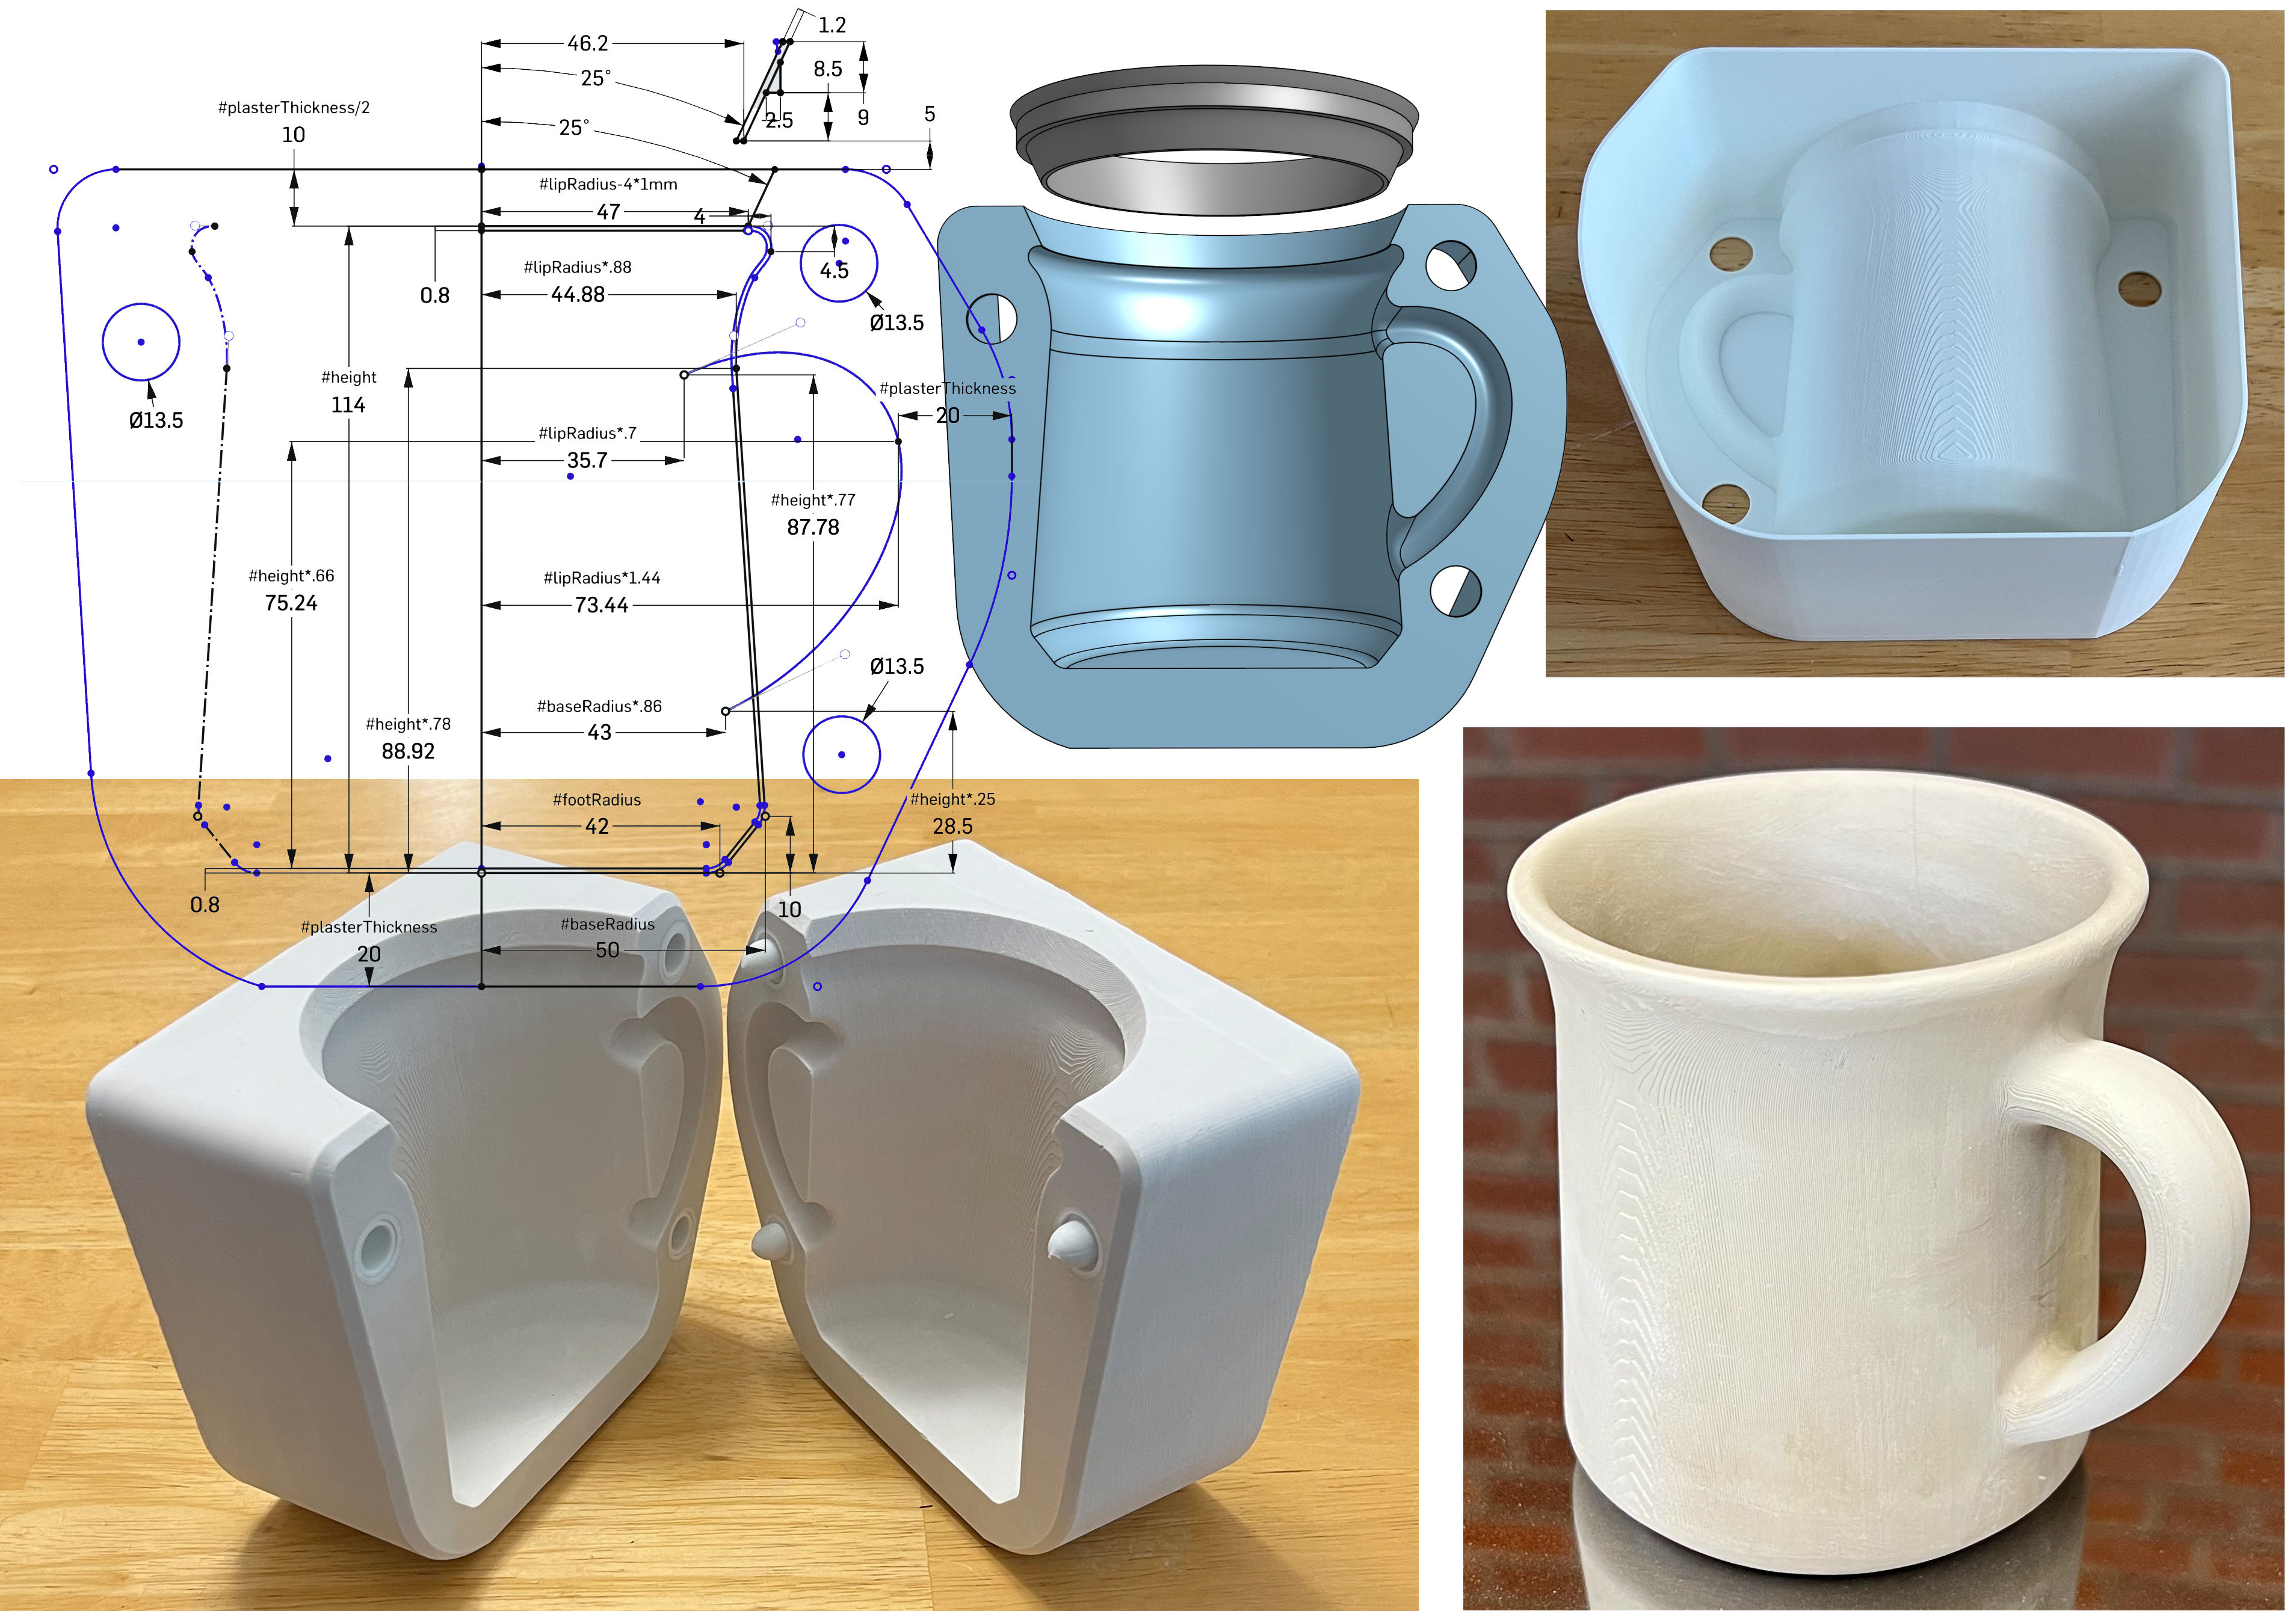
This design differs from the v2 drawing in that the plaster pouring cavity is formed by shelling (hollowing) the back side (top right). And this is designed for removal using a heat gun. This method has several advantages:
-No sketch offset or extrusion was needed to make the outer wall.
-Because the first 3D action is to extrude everything as one solid mass, corners of the outer 3D perimeter can be chamfered (but don’t do it so much that that there is insufficient thickness for the natches).
-The mug's geometry (offset inward by 0.8mm) is revolved, swept and bevelled by cutting into the block. Shelling to the same 0.8mm wall thickness, from the backside of the block, produces the cavity needed (top right).
-The last steps, after shelling, are chamfering the outside inner corner, cutting the holes for the natches and revolving the pouring spout (as a separate body).
-Our v3 natch system continues to work well with this (lower left).
-Printing artifacts are not a problem for prototype molds (visible op right). Production is asking me to enhance these (a freshly cast mug is shown lower right).
-The plaster mold is of stunning quality (the PLA 3D print was softened using a heat gun and carefully removed using needle-nose pliers).
-Slip cast mugs most often have poor-quality and oval lips. This one stays round because of the outward flare and the quality is better because the 3D printed pouring spout also acts as a cutting guide at the pre-removal stage.
-The PLA pouring spout is deep and absorbs no water. Thus, the slip level does not need to be topped up during casting, the slip surface stays flatter (not developing a bowl shape) so pour-out time can be accurately gauged by its slip level.
There are many casting body recipes that would work with this. DIY CAD skills will enable you to follow me into another exciting world: Low-cost 3D printing of the clay itself! Coming soon.
AI-Assisted Mug and Handle Design
A shape with multiple benefits for slip casting
 Midjourney prompt: Create a coffee mug with a shape having inherent strength to keep it from warping to oval during firing
This picture has its own page with more detail, click here to see it.
This shape is one of many suggestions I got from MidJourney.com when I described what I needed. Consider the advantages of this for slip-casting:
-The piece has thick walls, that will help prevent warping during firing (enabling using a clay body that is highly vitreous).
-The shape, wide at the bottom to narrower at the top - and then a flared rim will also resist warping.
-The flat sides will be practical for applying ceramic transfers (this decoration can be done exactly that way). Of course, the transfer will have to be cut in a semi-circle to lay properly.
-The heavy handle should make it possible to cast the mug with the handle attached.
-The smaller foot ring sets it up off the table and should enable stacking.
This surface character will be possible using an opacified light-colored glossy oatmeal glaze - the pigment in an iron-bearing body should bleed through wherever the glaze is thinner (e.g. on contour edges like the rim).
My Initial CAD Drawing of the Mug
This enabled printing a mock-up

This picture has its own page with more detail, click here to see it.
To make this I offset the profile sketch by 0.88 mm outward, this enables printing a thin shell of the shape. The total shrinkage from forming to the final firing product will be about 10%, thus the 0.88 will shrink down to 0.8 mm, that is exactly double the 0.4mm width of my printhead. I rotated the .88 mm profile to create this shell. In the slicer, I shrunk each of the models by 10% to emulate clay shrinkage.
Heavy Slip Cast Stoneware Mugs

This picture has its own page with more detail, click here to see it.
These are made using the L4558B red burning cone 6 stoneware from my v1 mold. The inside glaze is GA6-B. The outside glaze on the left is G3948A iron red. The one on the right is G3933EF. No rim warping occurred, despite the very heavy handle.
v1 First Half of the Case Mold Drawn

This picture has its own page with more detail, click here to see it.
Notice the rib stabilizers, these will keep it rigid. I will fill these cavities with plaster before casting the case mold from this. I am going to print a mount onto which the leather hard mug will fit. The flat bottom will thus be better for embossing the base. Foot rings can also be adhered to that if needed.
v1 3D Printed Plaster-Reinforced Case Mold
Ready for pouring block mold

This picture has its own page with more detail, click here to see it.
This is part of a project to make a slip-casting mold for a coffee mug. This is a prototype, without natches. In the slicer, I split the print into two pieces 22mm up from the base. This enabled doing the bottom section right side up and the top one upside down. That drastically cut the amount of printed support generated (and thus printing time). I scotch-taped the two halves together and filled it with plaster to produce a rigid block mold. The two halves fit so precisely it is difficult to tell where they join. The big benefit of printing it upright like this is that the all-important front face is flatter (there is some warpage on other parts but that does not matter).
First v1 Plaster Mug Case Mold
Extracted from 3D-printed block mold

This picture has its own page with more detail, click here to see it.
The actual mold (top left) vs 3D drawn one (lower). The case mold (top right) separated from the 3D print easily. The taped-together join between top and bottom sections of the 3D print is invisible. An advantage of making plaster case molds, vs flexible rubber, is the extra opportunity to smooth surfaces and fix defects (this case mold has some small surface defects at the top of the handle, these are easy to remove from the plaster case mold or the working molds. The rigidity of the plaster case mold enables the use of 3D printed rails having a flange that goes under the edge all the way around, this reduces issues with potential plaster leakage.
Flattening v1 Mating Mold Faces

This picture has its own page with more detail, click here to see it.
The 3D printed mug outlines align almost perfectly - but the mating faces of the two halves are not perfectly flat. After the halves are dry they can be sanded flat, greatly improving the fit. The absence of natches or a registration key makes this possible. The fact they are missing in this v1 prototype mold is not a problem, it is easy to match the halves perfectly when strapping them together in preparation for pouring.
Side Rails For v1 Working Mug Mold

This picture has its own page with more detail, click here to see it.
In this approach to making a prototype mold I have poured plaster into a 3D printed block mold (and done minimal surface treatment to smoothen it). This produced the plaster case case mold shown here. These side rails were made specifically to fit it. For rigidity I printed their wall thickness at 1.2mm. The flange at the bottom fits under the mold and helps assure that no plaster will leak under and displace it upward (provided, of course, that the plaster form is held tightly in place within the rails).
First Mug From v1 Prototype Mold

This picture has its own page with more detail, click here to see it.
This plaster test mold is thin-walled yet I can cast three thick-walled mugs in three hours. This clay is L2596G, a buff burning cone 10 stoneware - the mug on the lower right has been fired to cone 10 oxidation. Achieving 4-5mm thick walls is not a problem if the casting slip employs a large particle kaolin intended for this purpose (e.g. OptiKast). And it is deflocculated properly.
The flared lip works as expected, keeping the rim nice and round. No cracks have appeared at handle joins, even for pieces left in the mold overnight. The mold halves mate with each other very well and the seam is easy to remove. The seam on the base is an issue - I have to be careful to line up the halves well before clamping the mold strap - this is a warning for accuracy during the mold production stage. And the possible motive for a three-piece mold if I get more serious about this piece.
Closeup of the polygon surface of a cast mug

This picture has its own page with more detail, click here to see it.
This is L4023F (a test body like our H440 cone 10R body). The polygons on this surface are produced when the 3D CAD software converts from its native format to an STL file that slicer software can use. These are the product of the default settings (which can be changed but increase file size). The precision of the 3D printer is evident in that it can reproduce these. Since the polygons are not visible in the final glazed piece, neither the PLA surface on the 3D printed block mold, or the surface of the plaster case mold made from it, were sanded.
Inbound Photo Links
 The Prusa MK4 3D printer is worth the upgrade from MK3 |
 Simplified v2 AI-Inspired Mug Using OnShape As good or better than previous Fusion 360 efforts |
Links
| Glossary |
Slip Casting
A method of forming ceramics. A deflocculated (low water content) slurry is poured into absorbent plaster molds. As it sits in the mold, usually 10+ minutes, a layer builds against the mold walls. When thick enough the mold is drained. |
| Glossary |
3D Design
3D Design software is used to create dimensionally accurate objects by sketching 2D geometry and transforming it using tools to rotate, extrude, sweep, etc. The software generates the polygon surface. |
| Projects |
Medalta Ball Pitcher Slip Casting Mold via 3D Printing
A project to make a reproduction of a Medalta Potteries piece that was done during the 1940s. This is the smallest of the three sizes they made. |
| Projects | Nursery plant pot mold via 3D printing |
| Typecodes |
Mold making using 3D printing
An ordinary consumer 3D printer has many exciting possibilities for making many types of molds, it is a place where people having both artistic and mechanical abilities can get a double the dopamine! |
| URLs |
https://github.com/pdaoust/mug-generator
Mug Generator: An Inkscape extension that turns a 2D mug design into a set of print-ready 3D models! |
 PayPal | No tracking, No ads, No paywall, No transient content! Just organized, concise information constantly updated and improved. Was this helpful? Consider supporting me. |
| By Tony Hansen Follow me on        |  |
Got a Question?
Buy me a coffee and we can talk 

https://digitalfire.com, All Rights Reserved
Privacy Policy